Black Walnut Bedroom

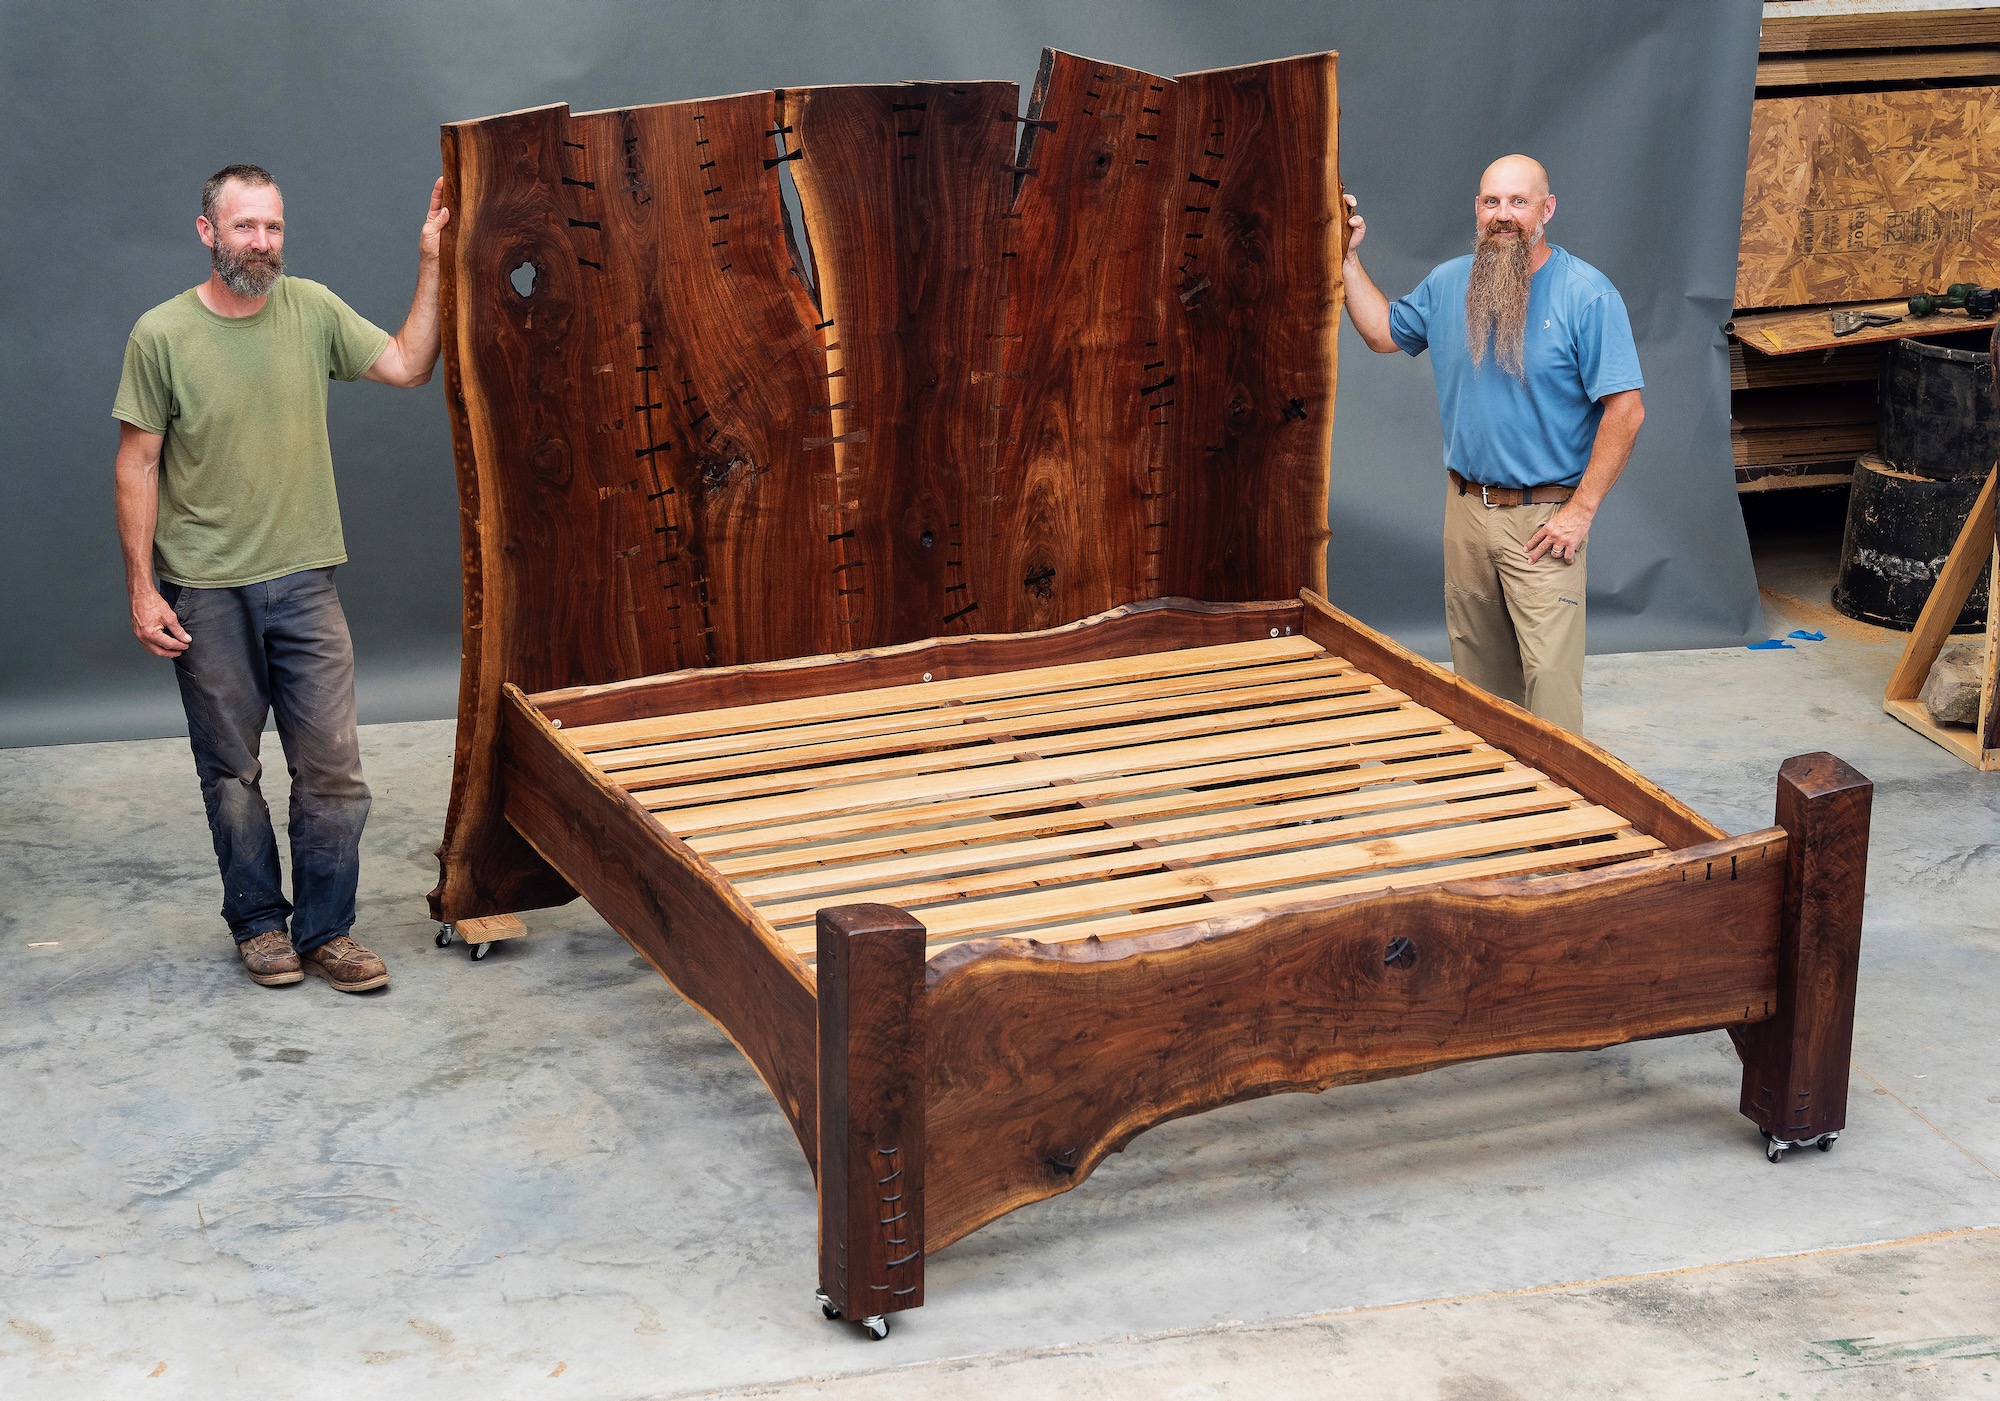
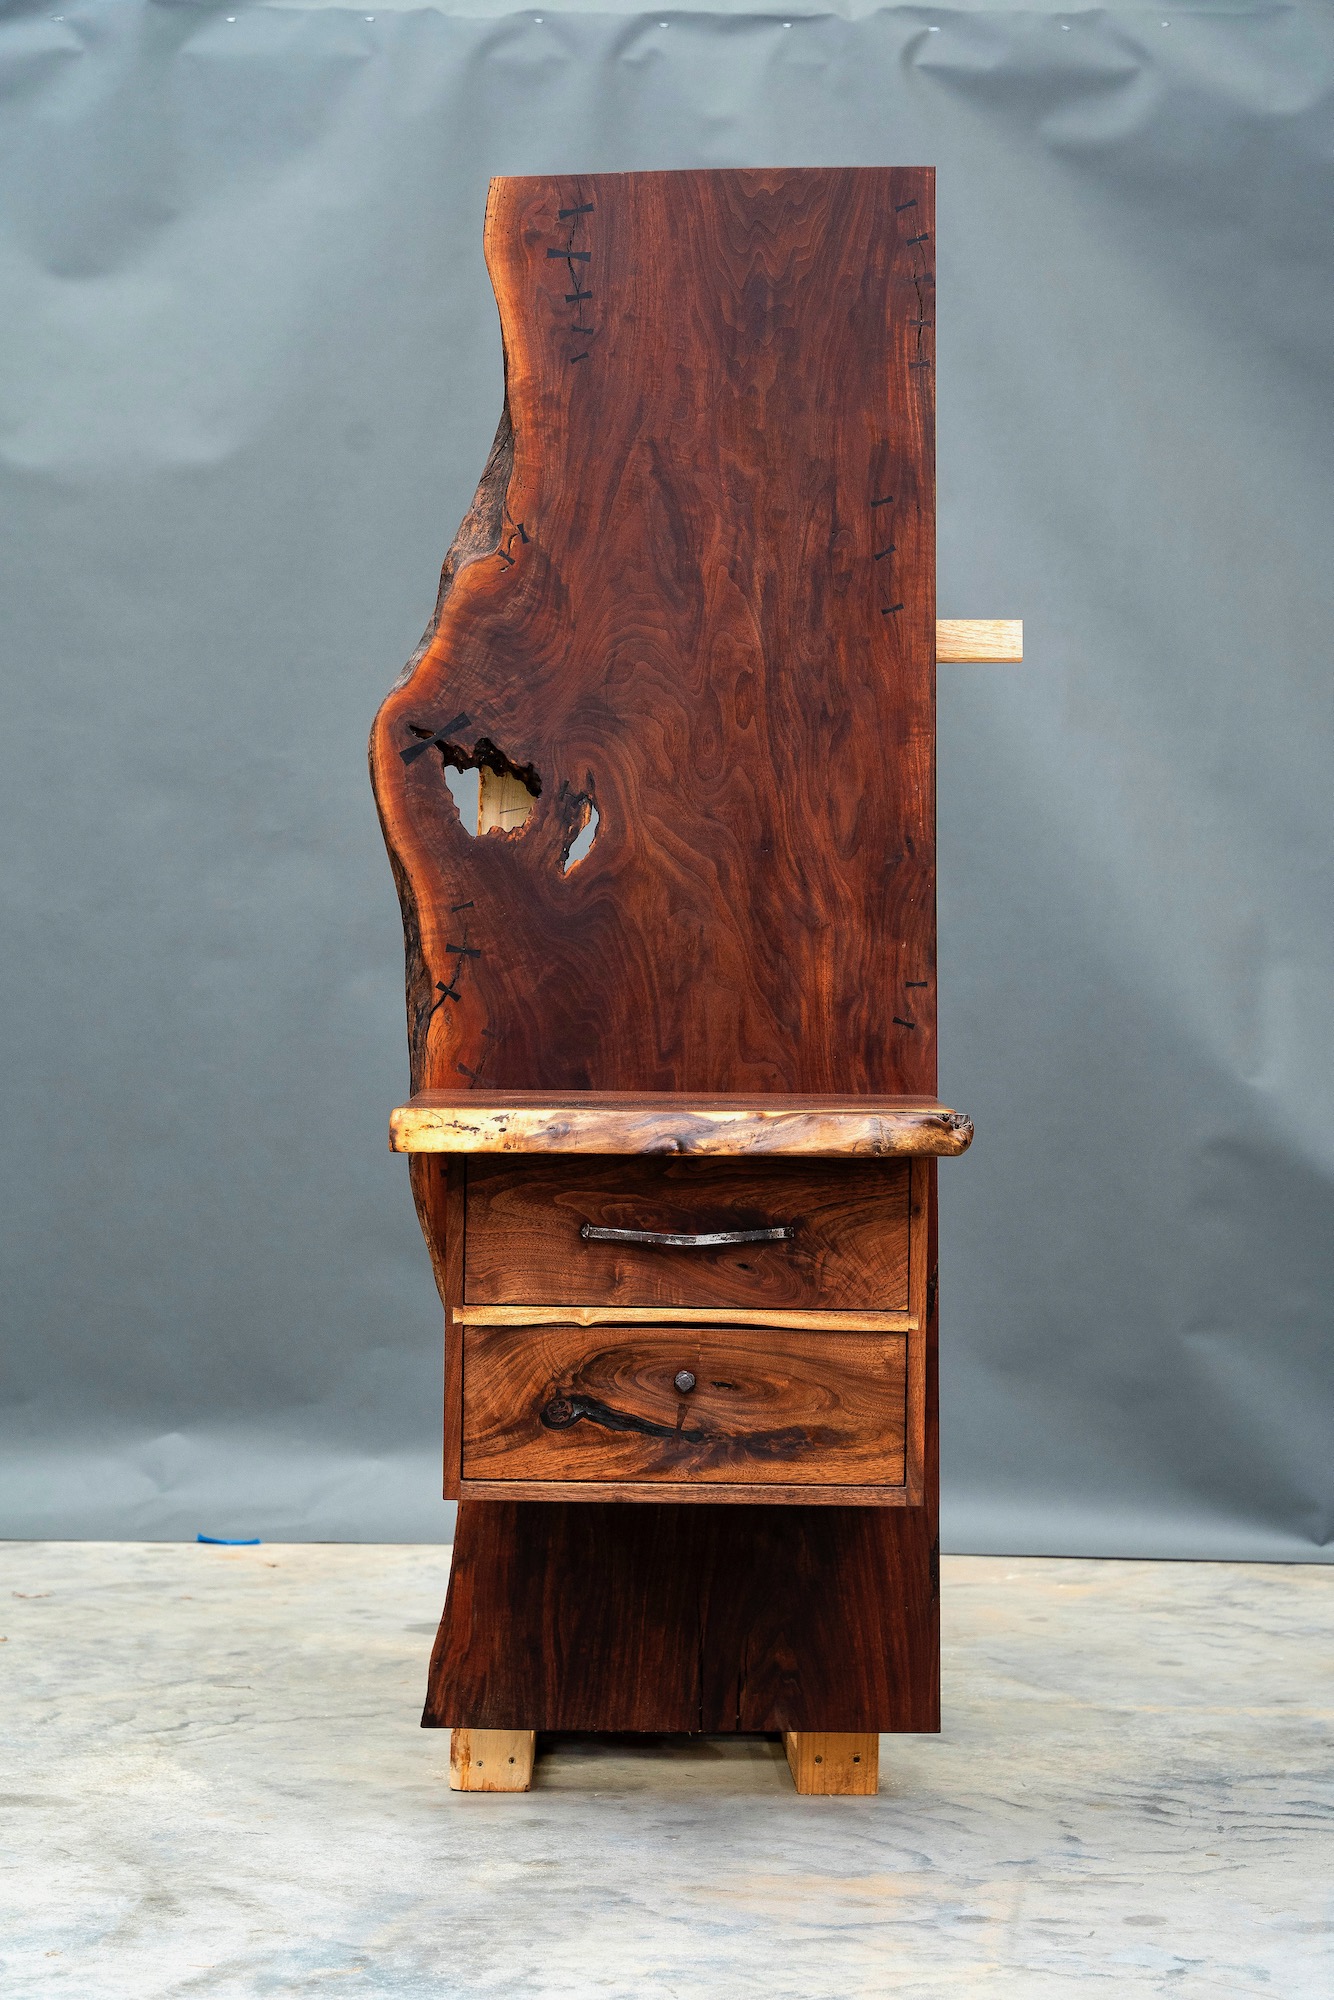
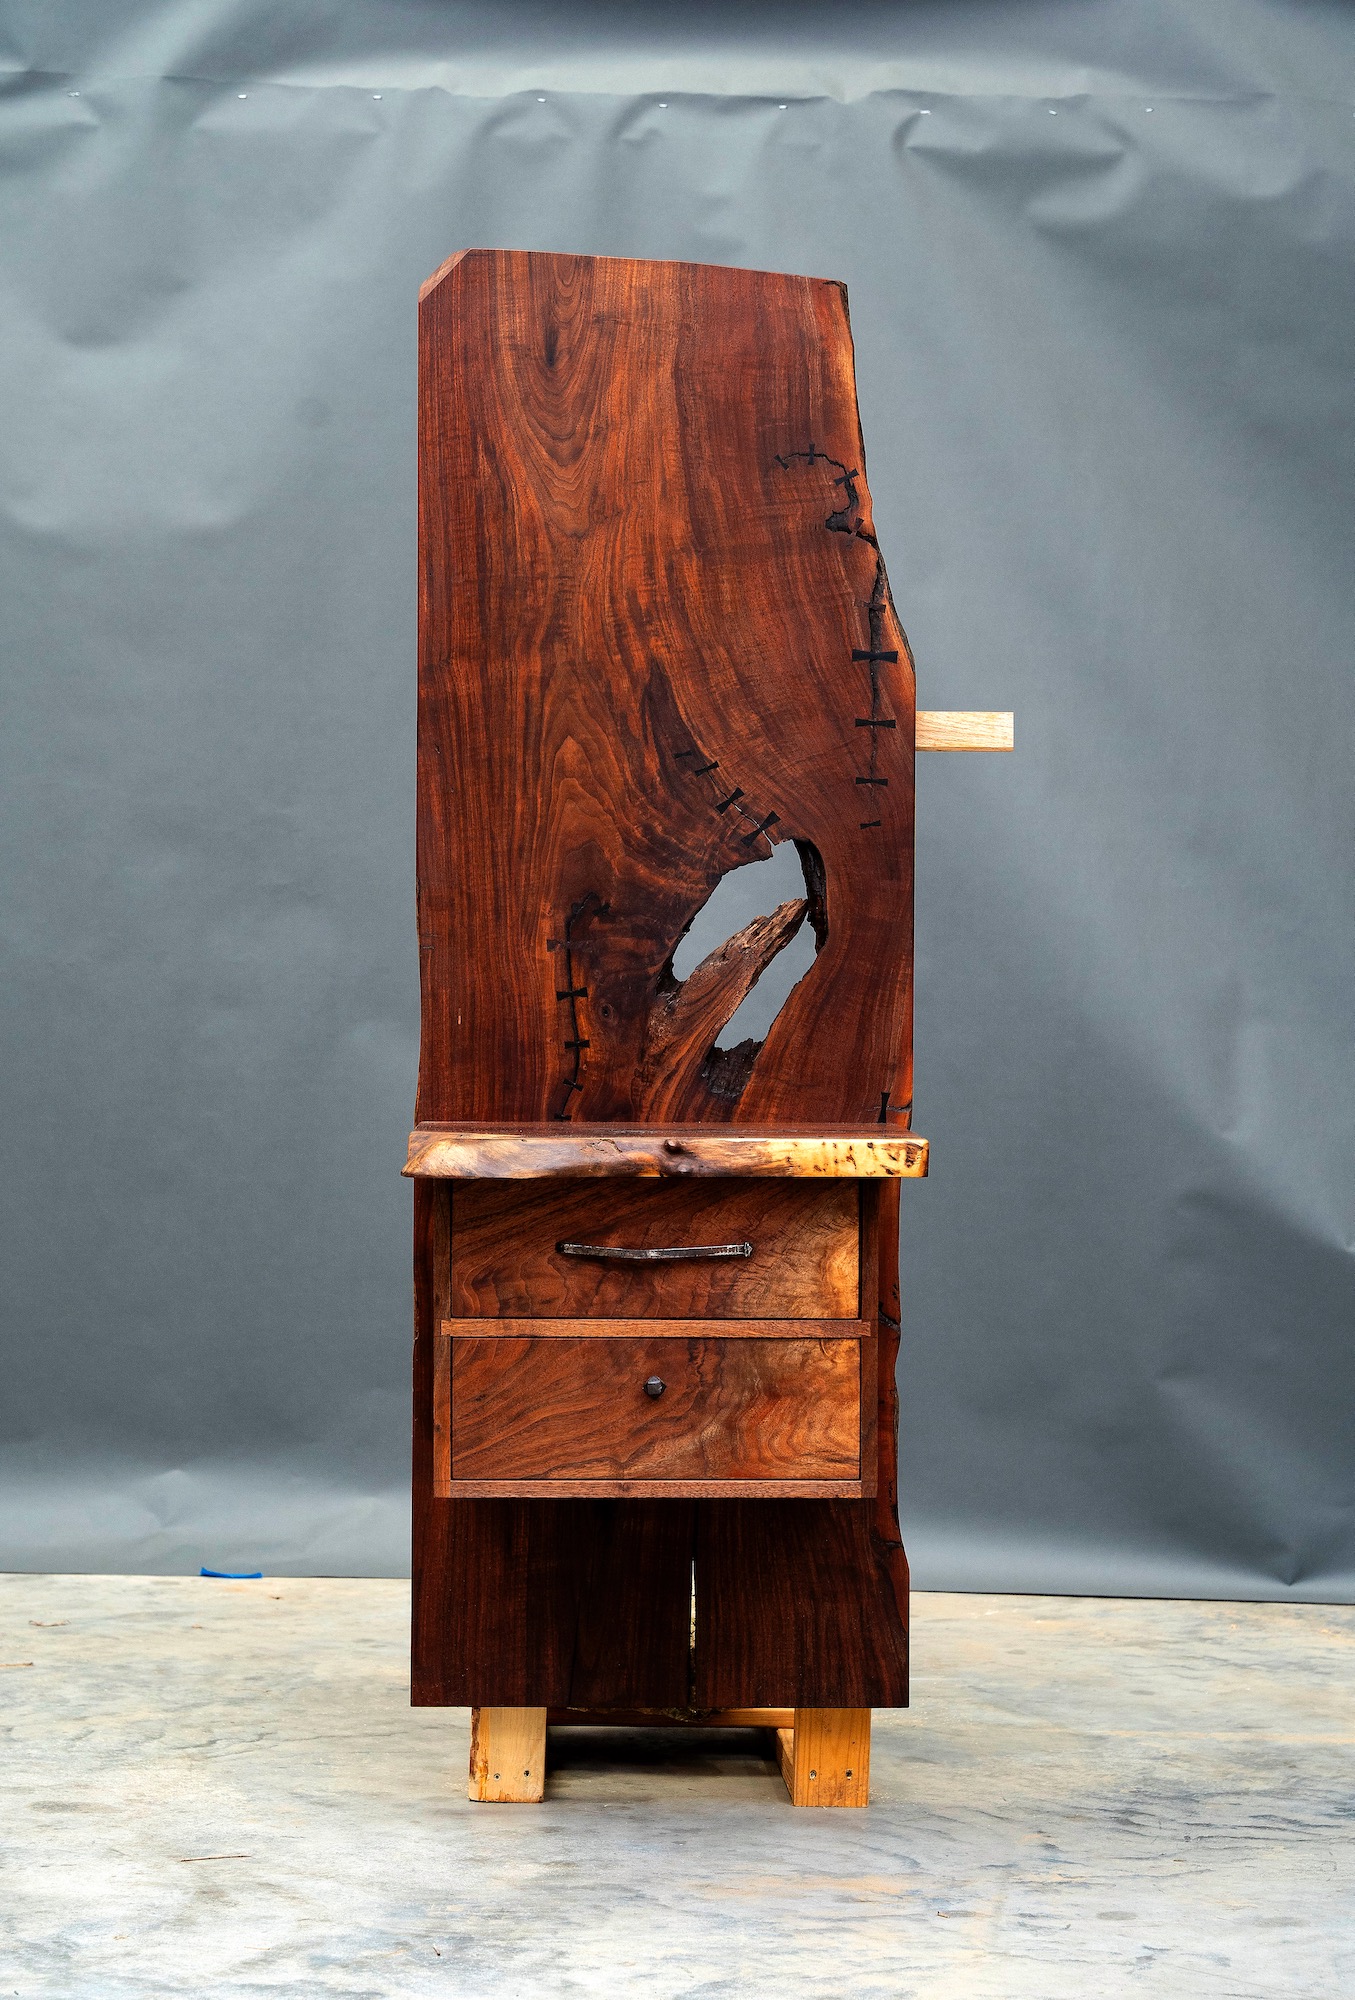
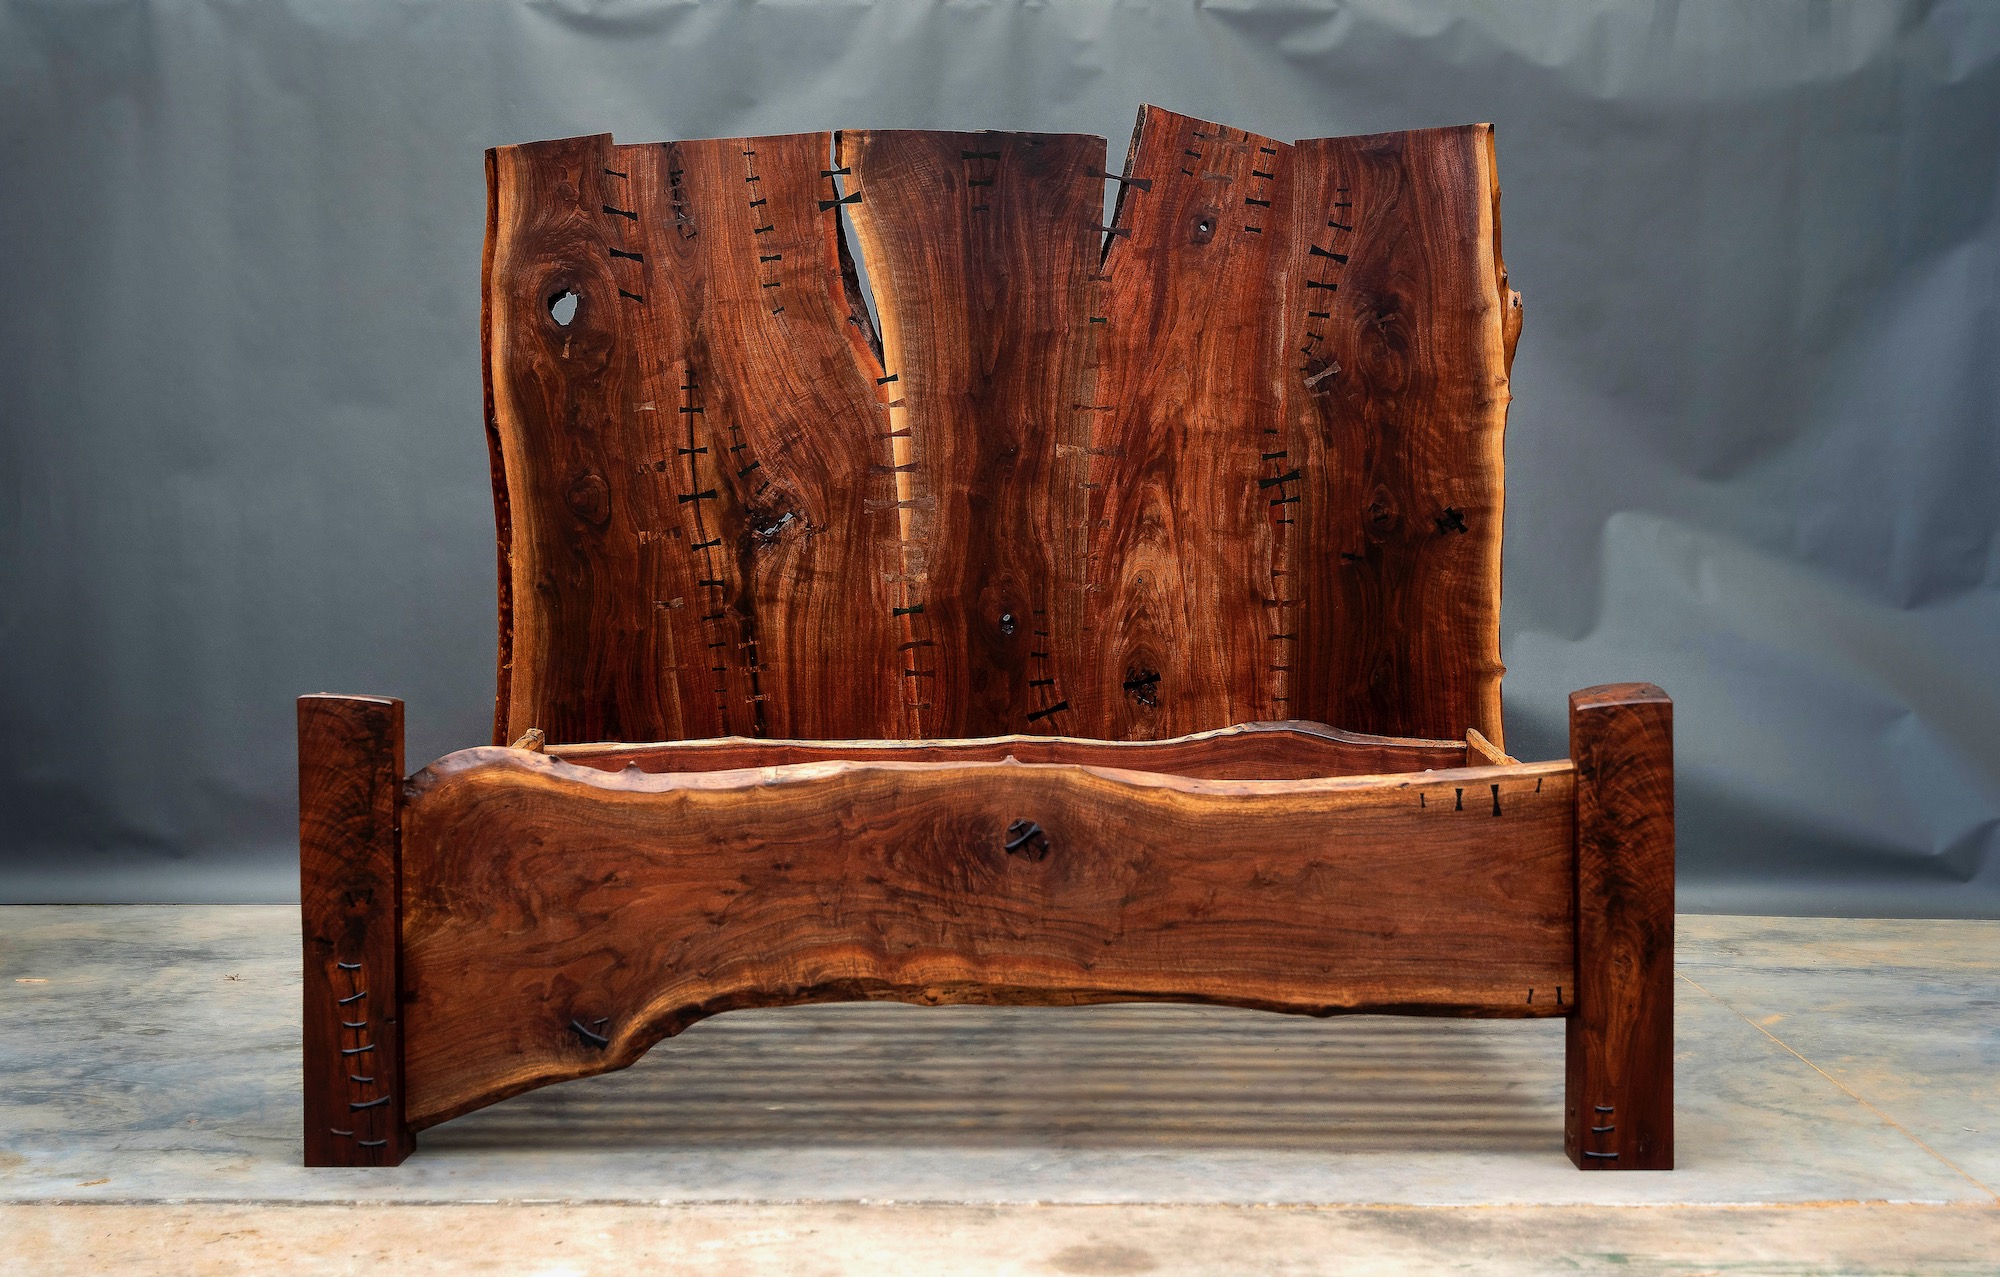
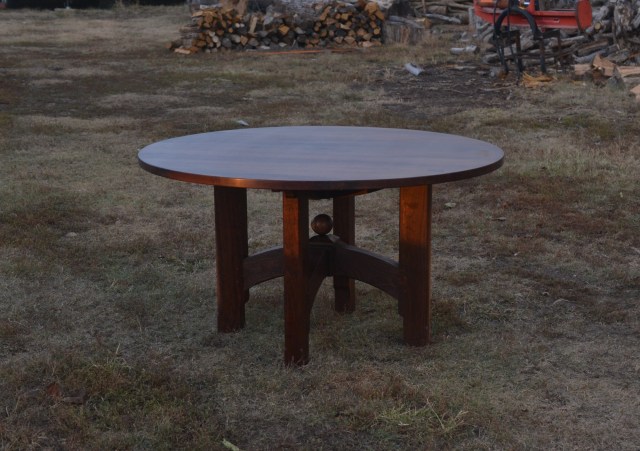
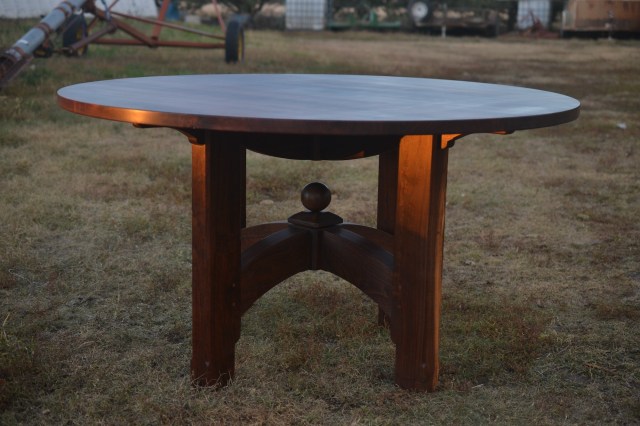
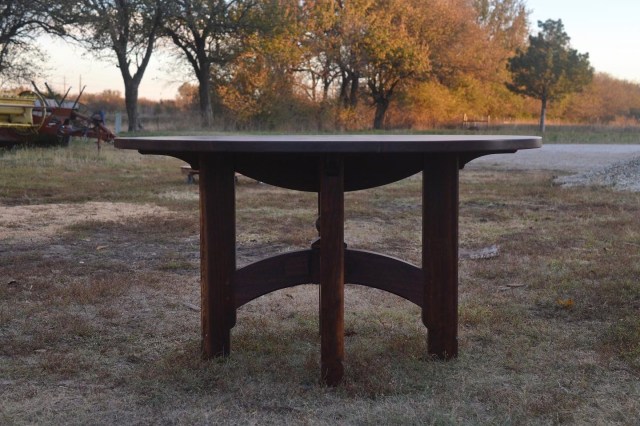
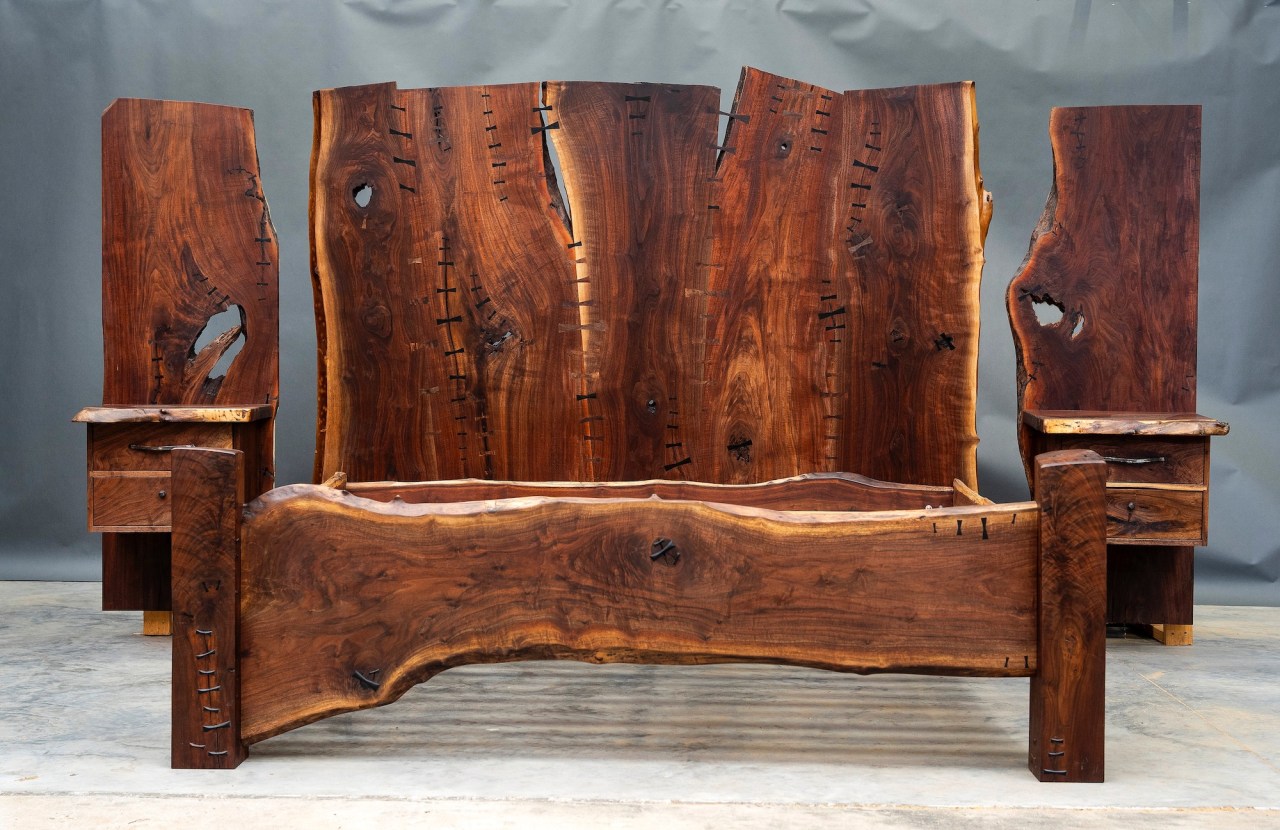
I would like to share these images of a black walnut bedroom, including a king-sized bed, side tables and a dresser, designed and built with my best friend Cody Rolph. We started this project in 2017 and finished it in 2020.

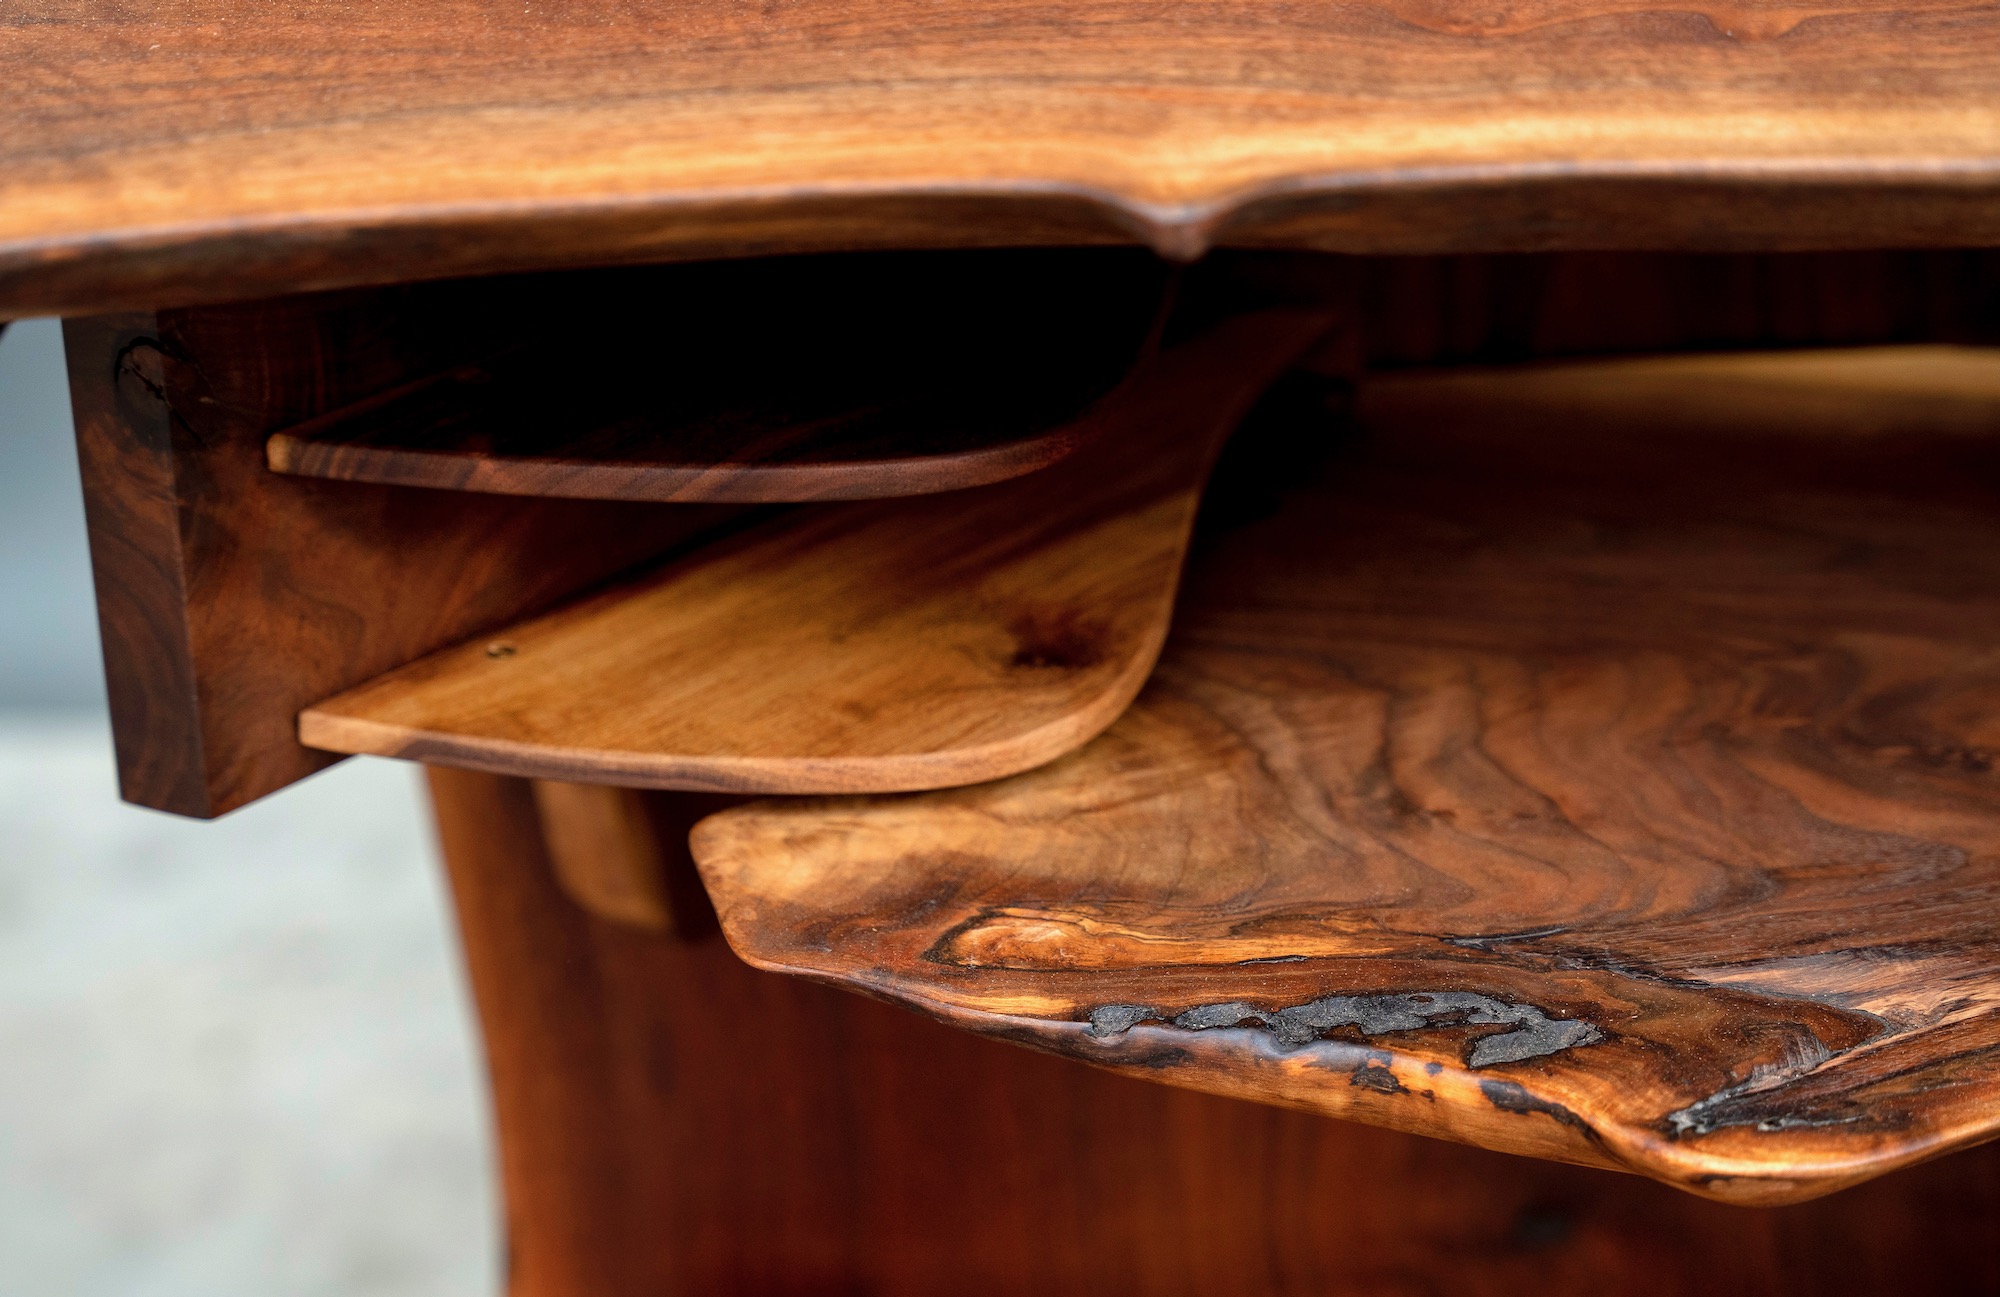
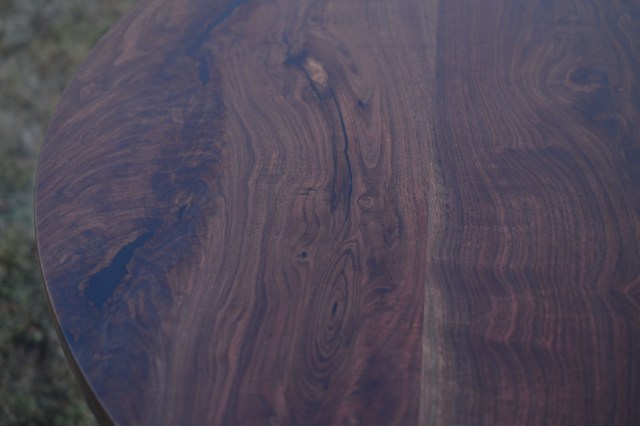
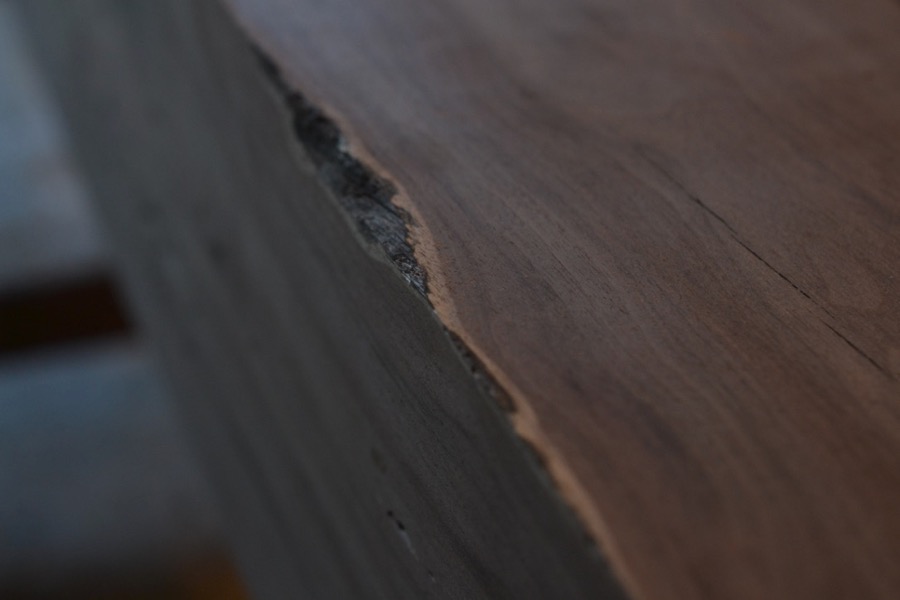
The design and joinery of the pieces in this group hopefully don’t arbitrarily feature pretty slabs of wood, but intend to capture or rather release the light and cadence of the old trees we collaborated with to build humble furniture. We try to see our human efforts humbly in the light of the wrought out witness which the trees spent their lives fashioning.

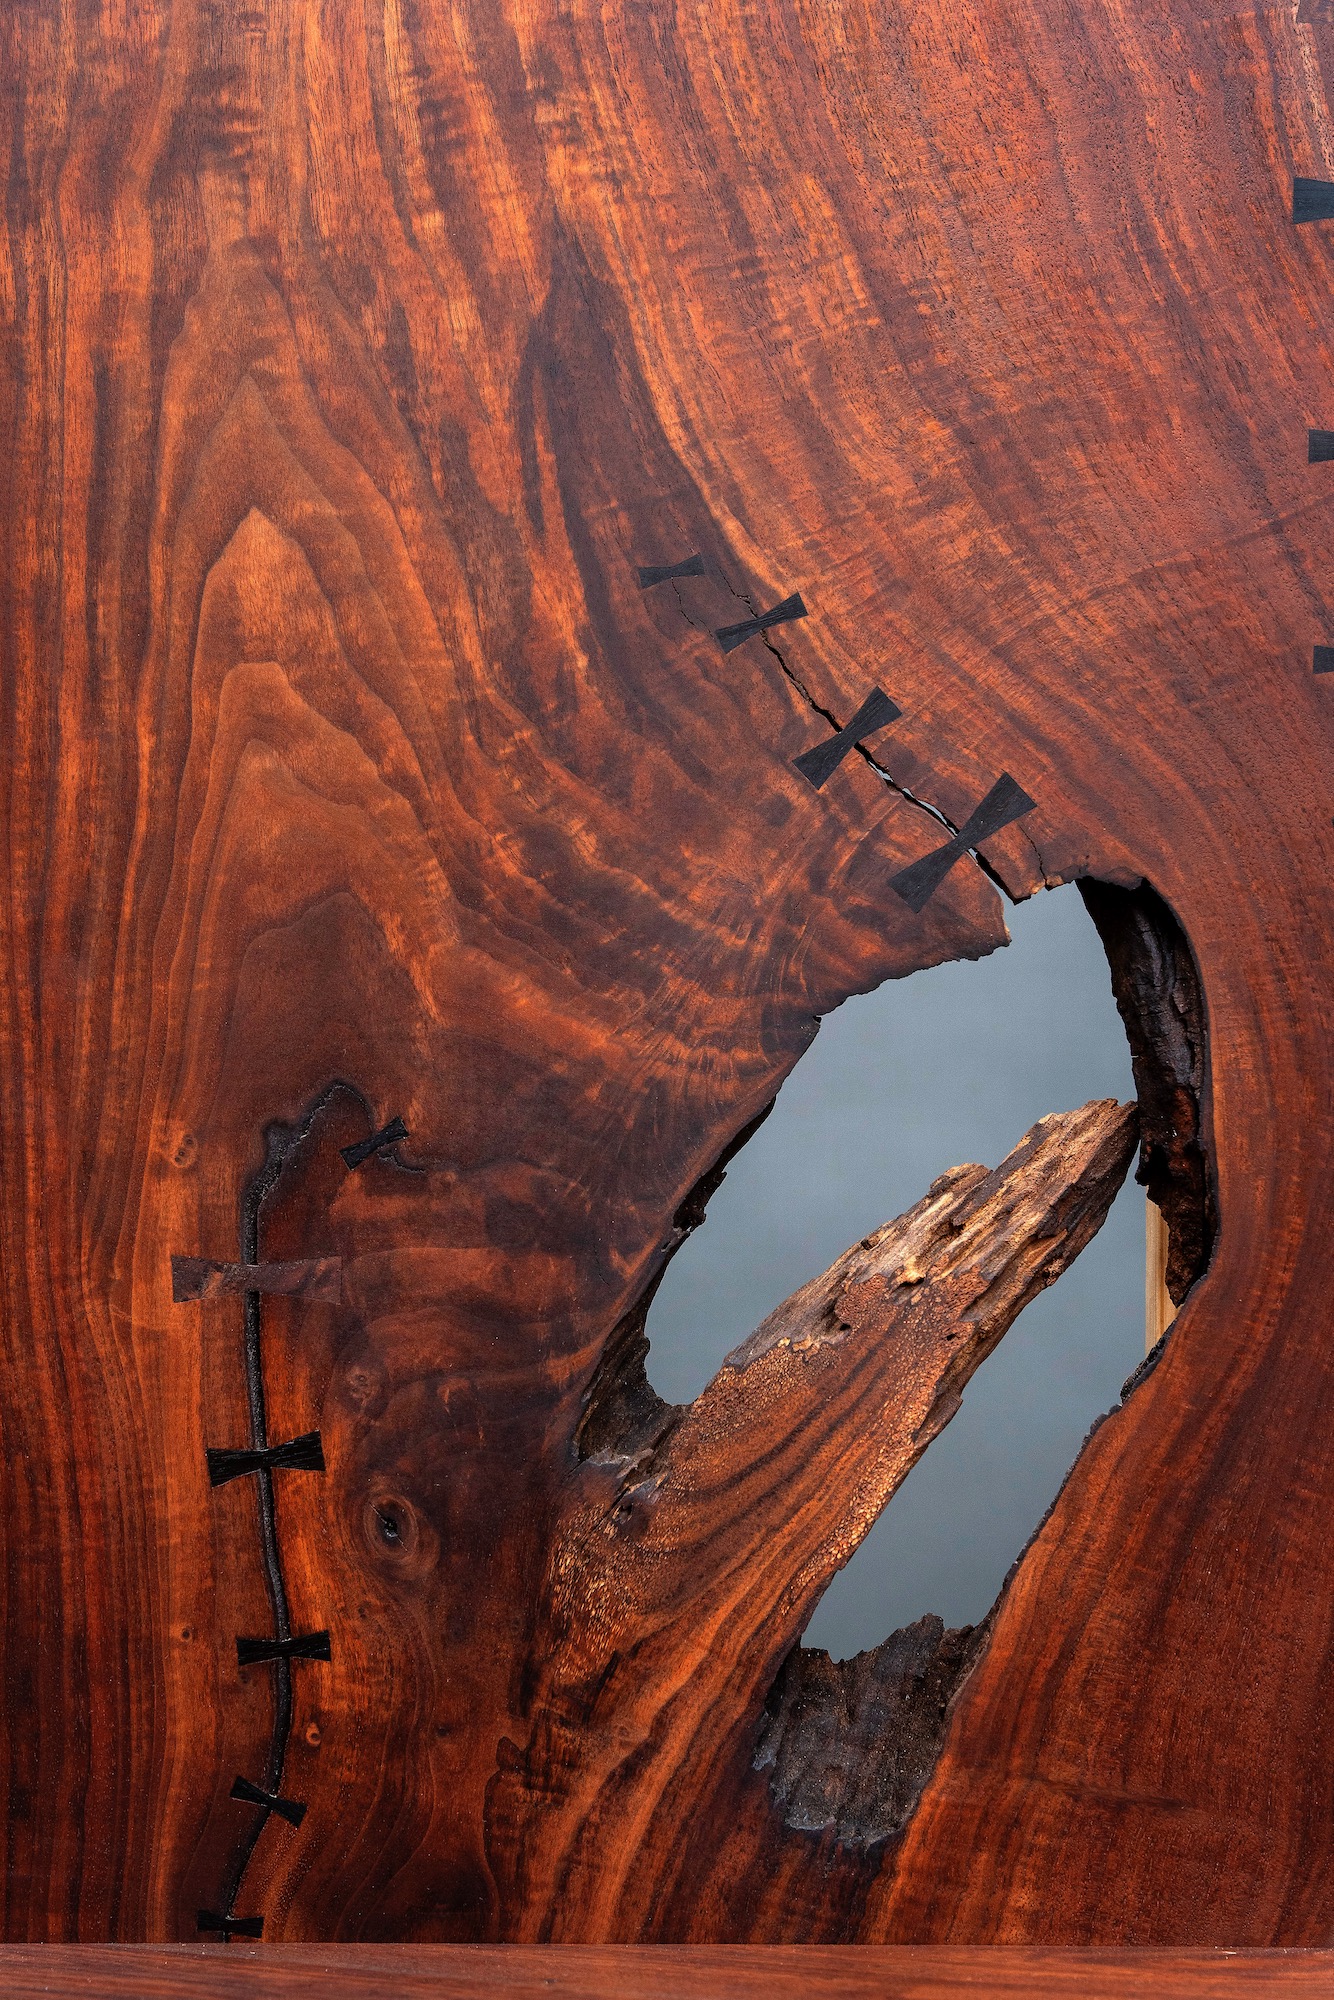
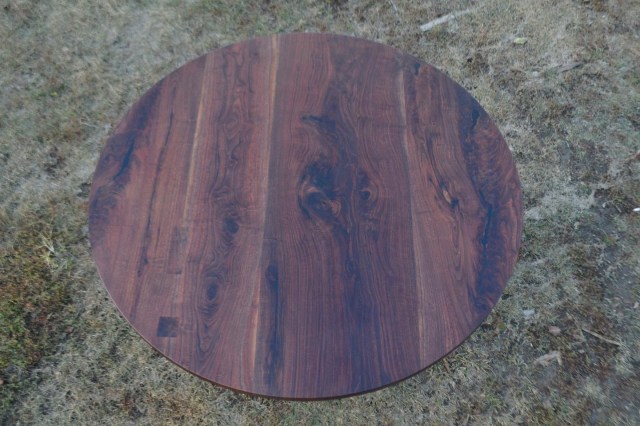
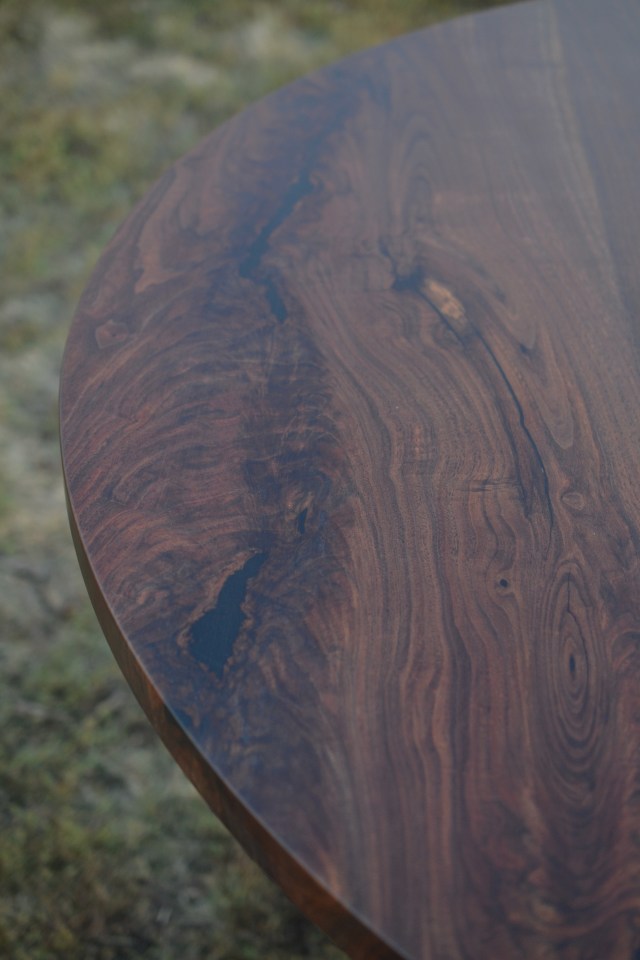
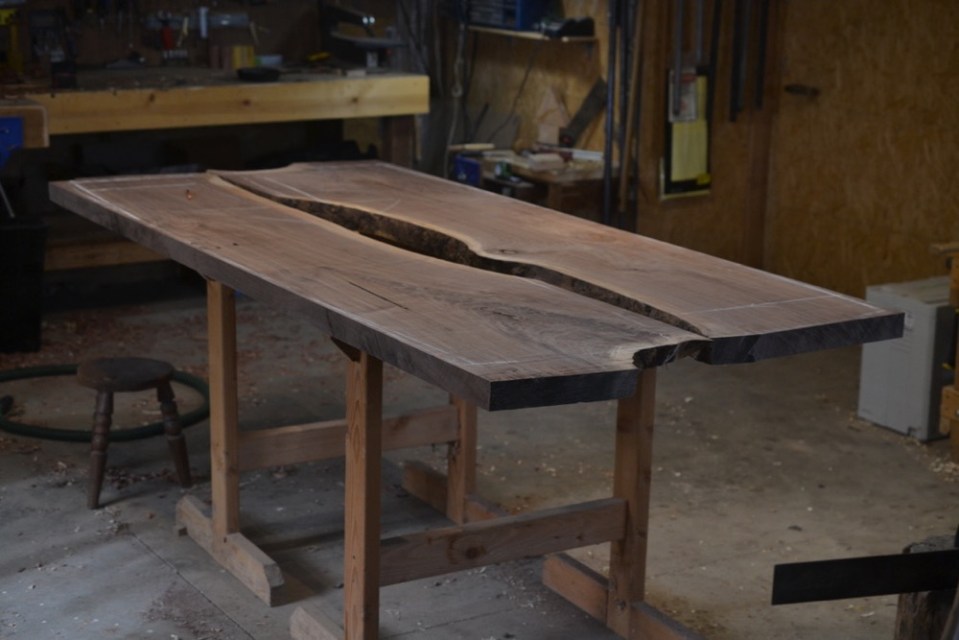
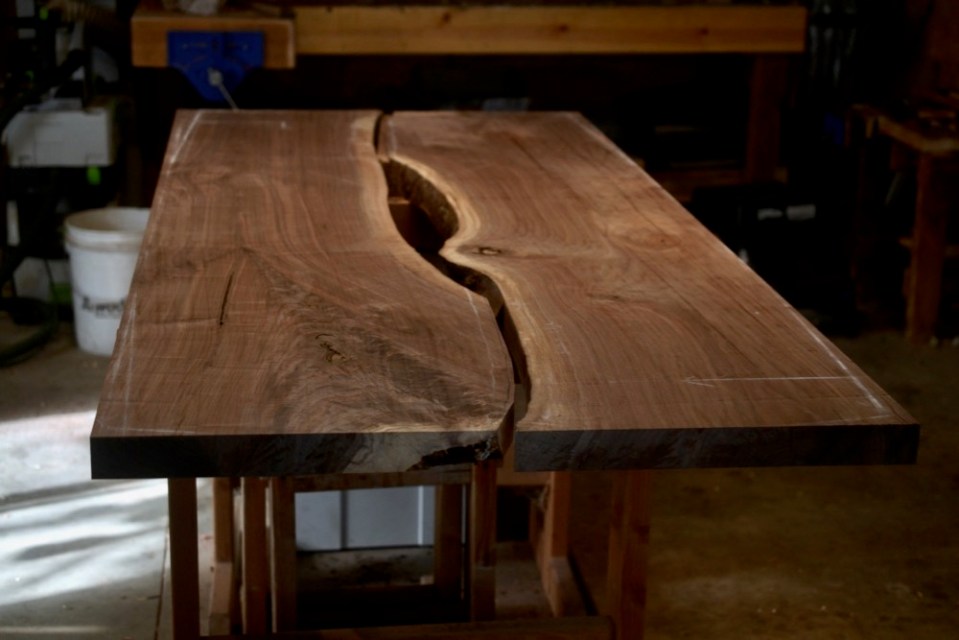
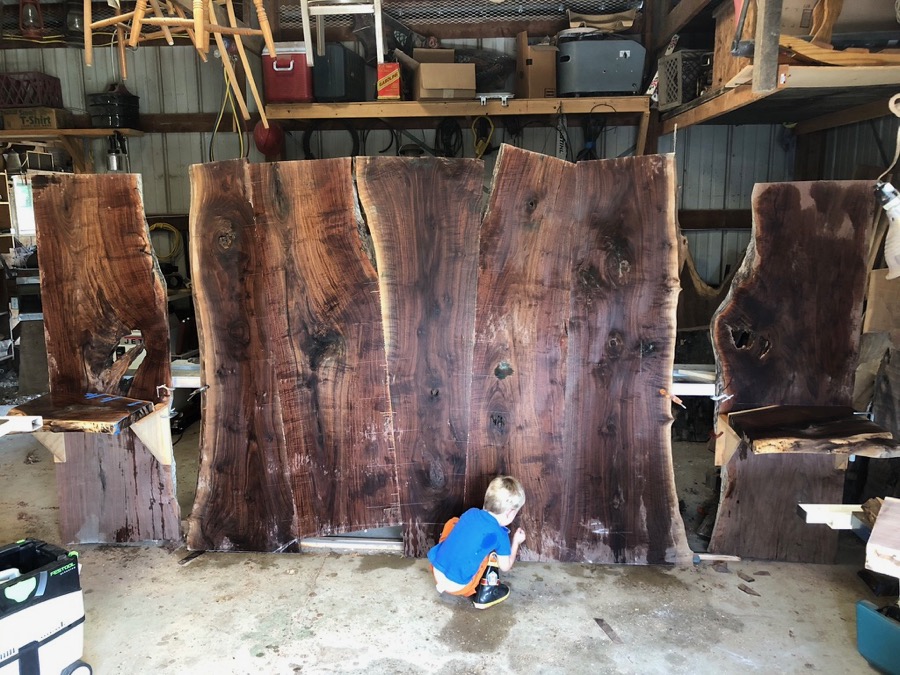
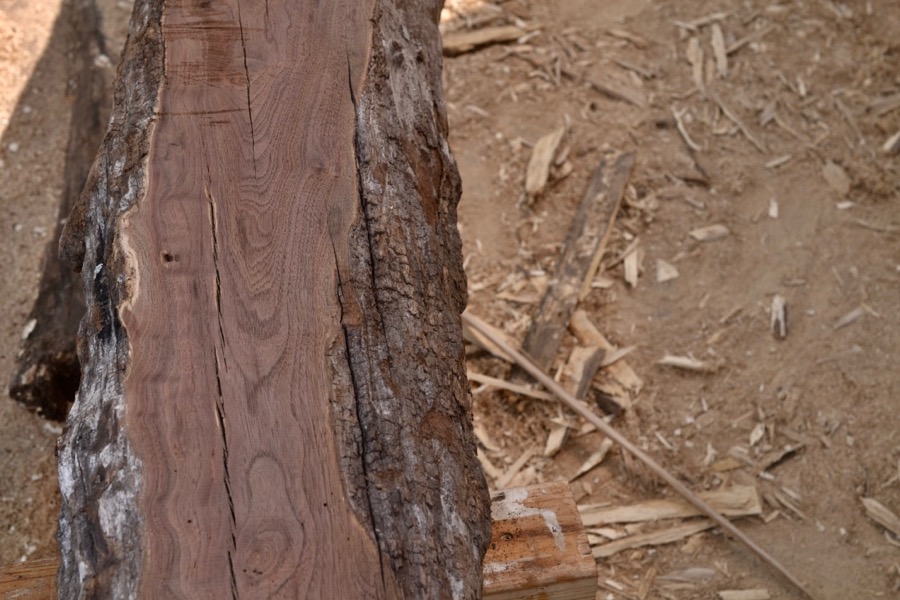
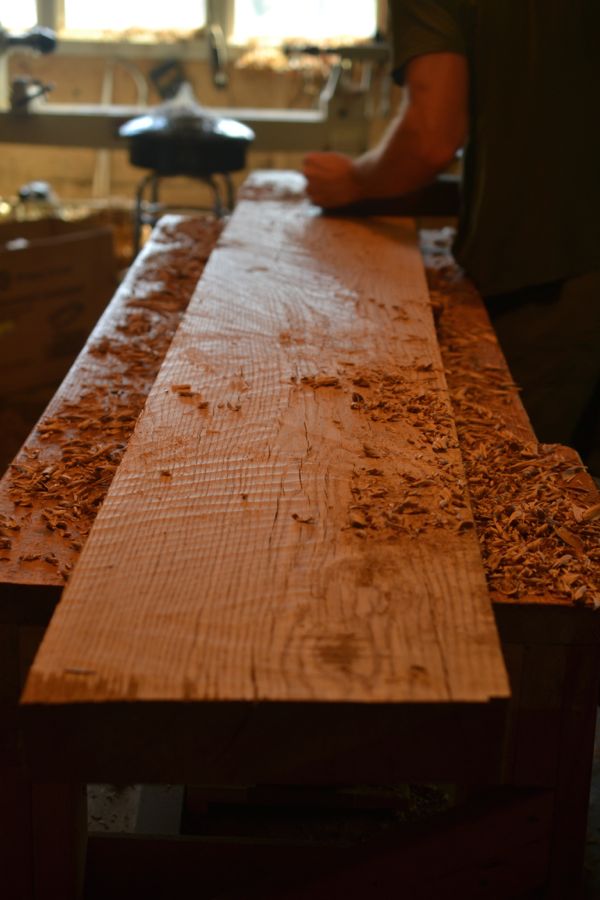
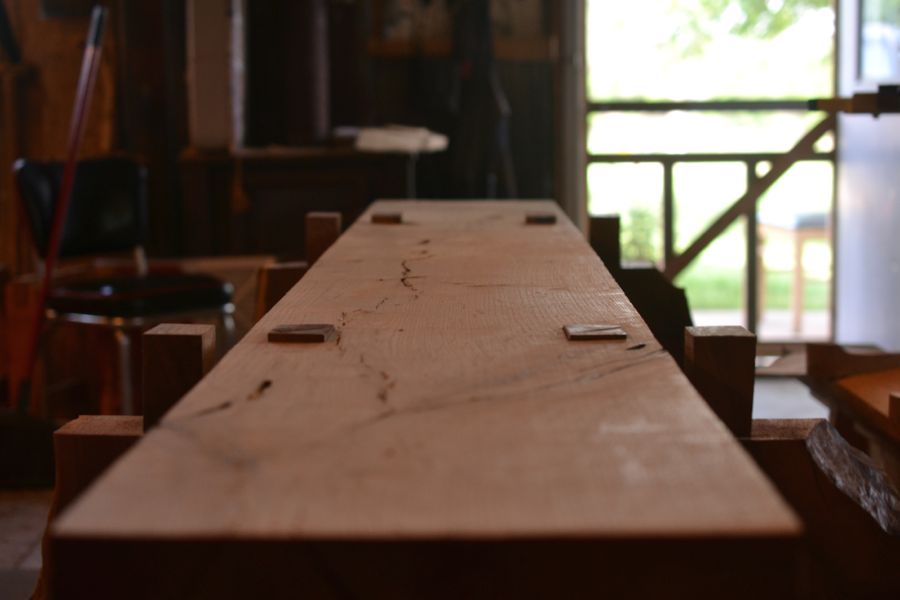
One of the trees we used for this came from the Walnut River valley near Augusta, Kansas, where it was uprooted and set for a number of years suspended by its roots and crowns. My personal experience suggests this process of drying “in the log”lends a quality to the color- different to other air drying methods. Another walnut tree we used came from Cody’s land in a draw on the county line between Greenwood and Elk counties. A third came from a farm near Winfield, KS- on the banks of the Arkansas River- where we scavenged the rejected leavings of a logging operation. All of these trees have peculiar and noble stories and voices, as expressions of a land and of its mineral and even spiritual atmosphere.

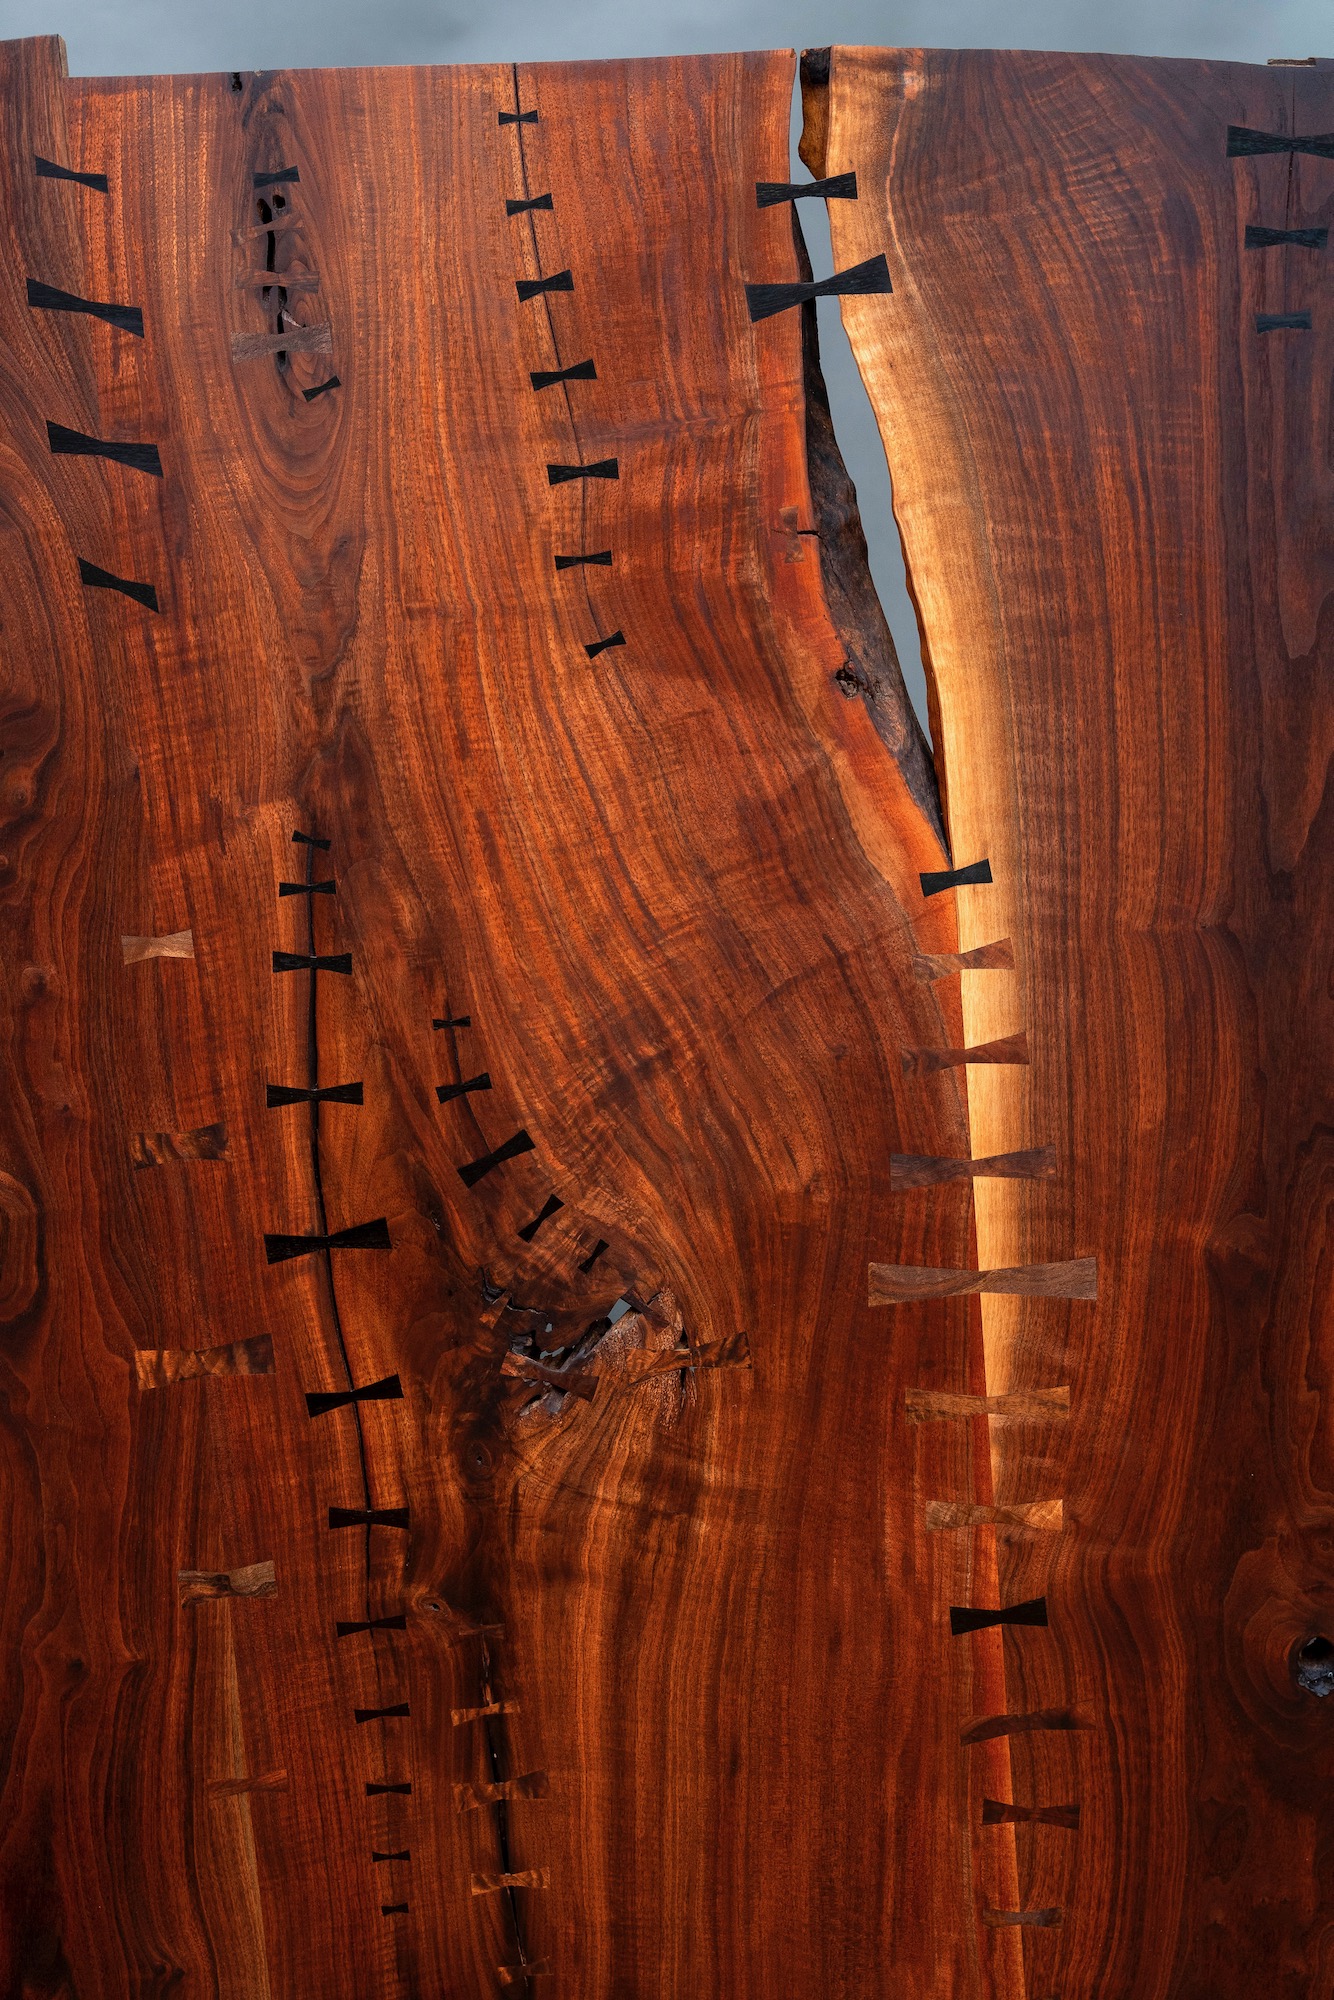
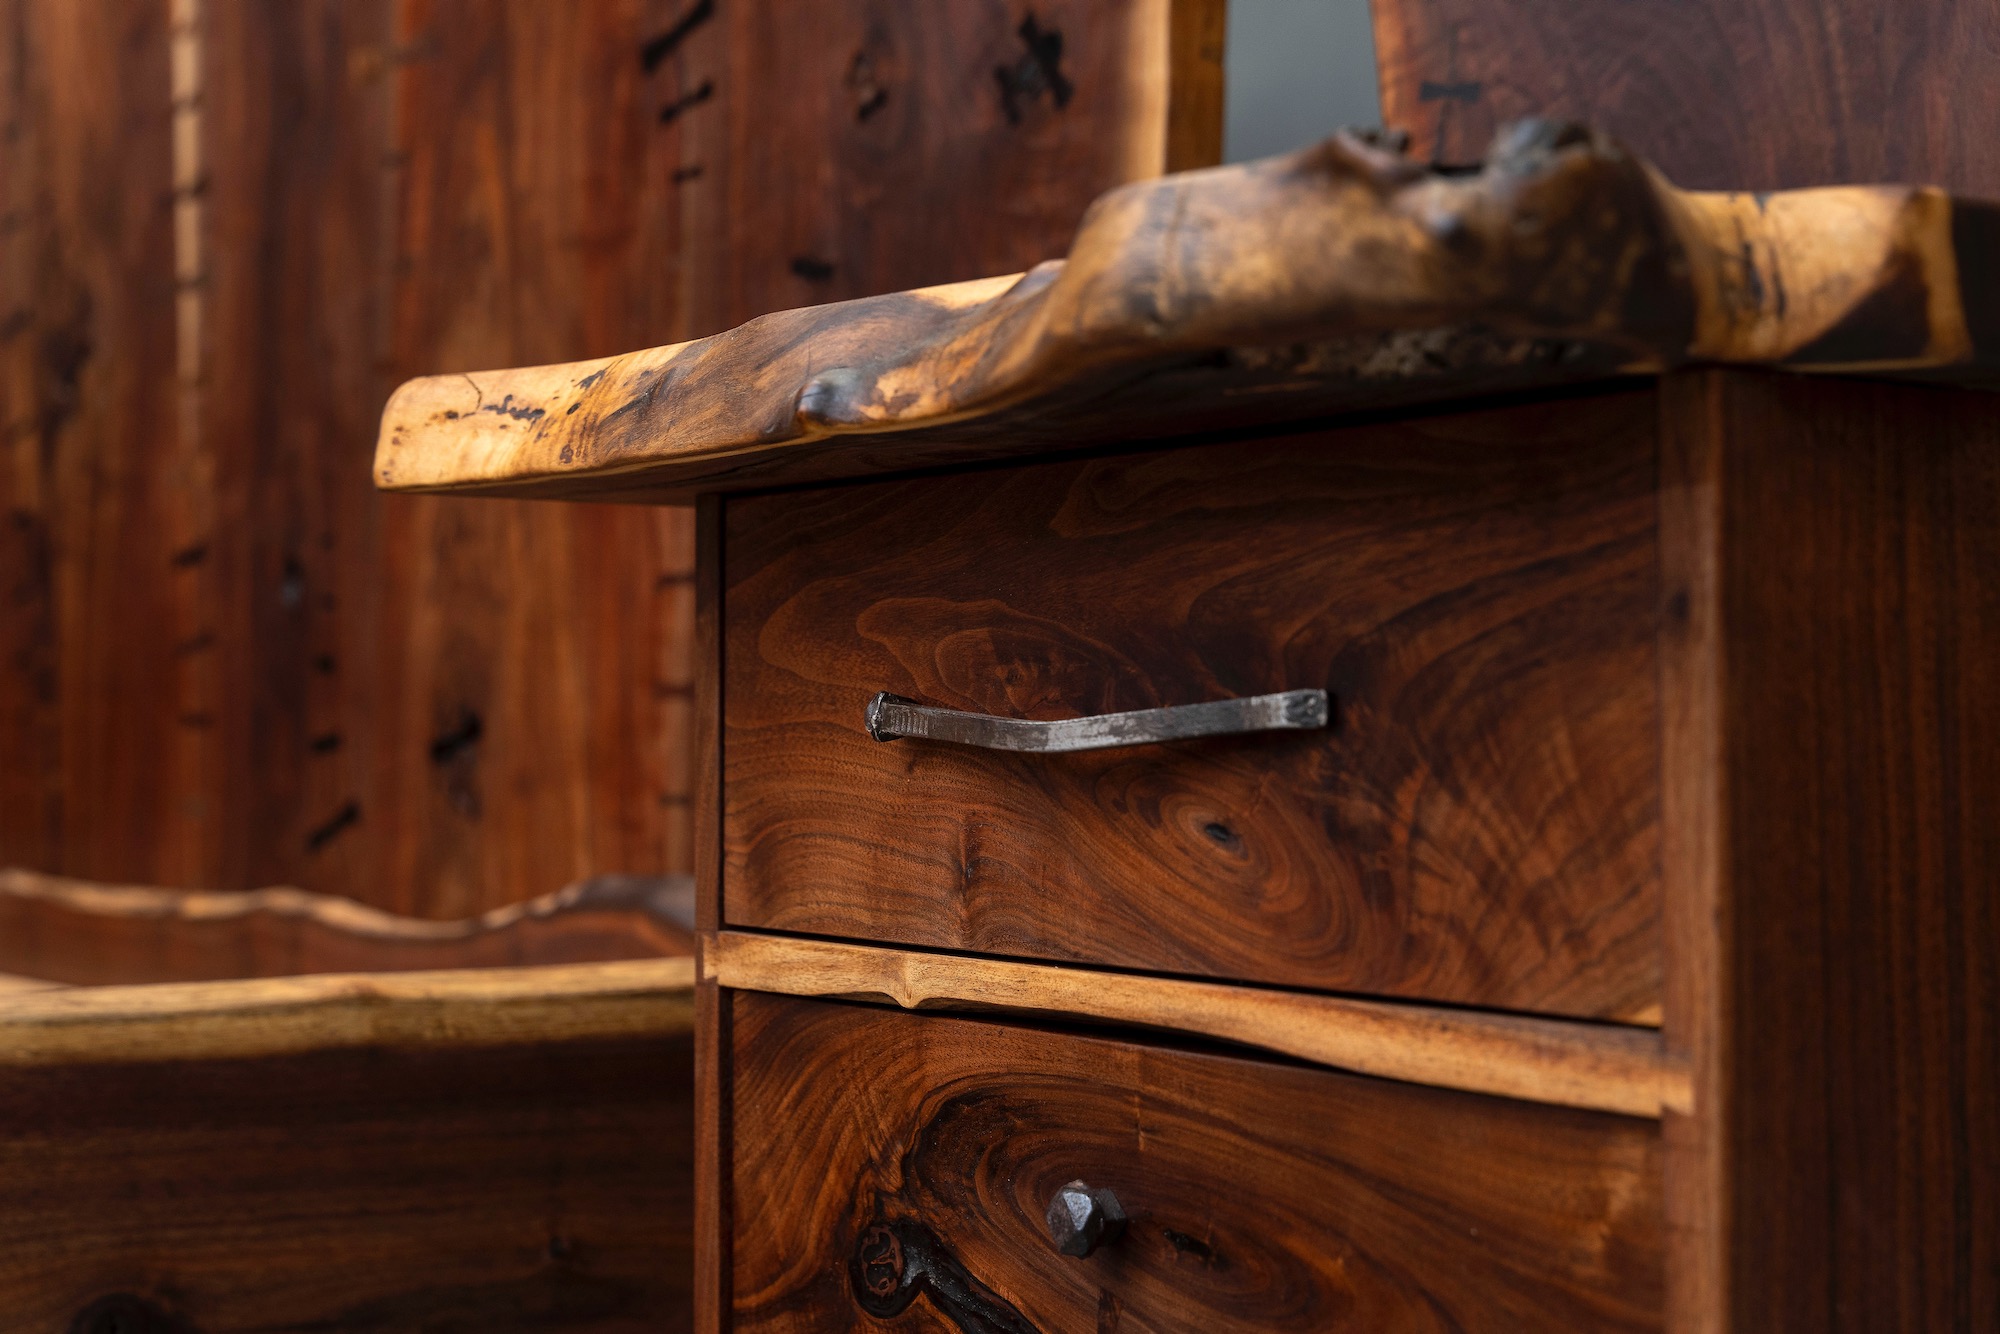
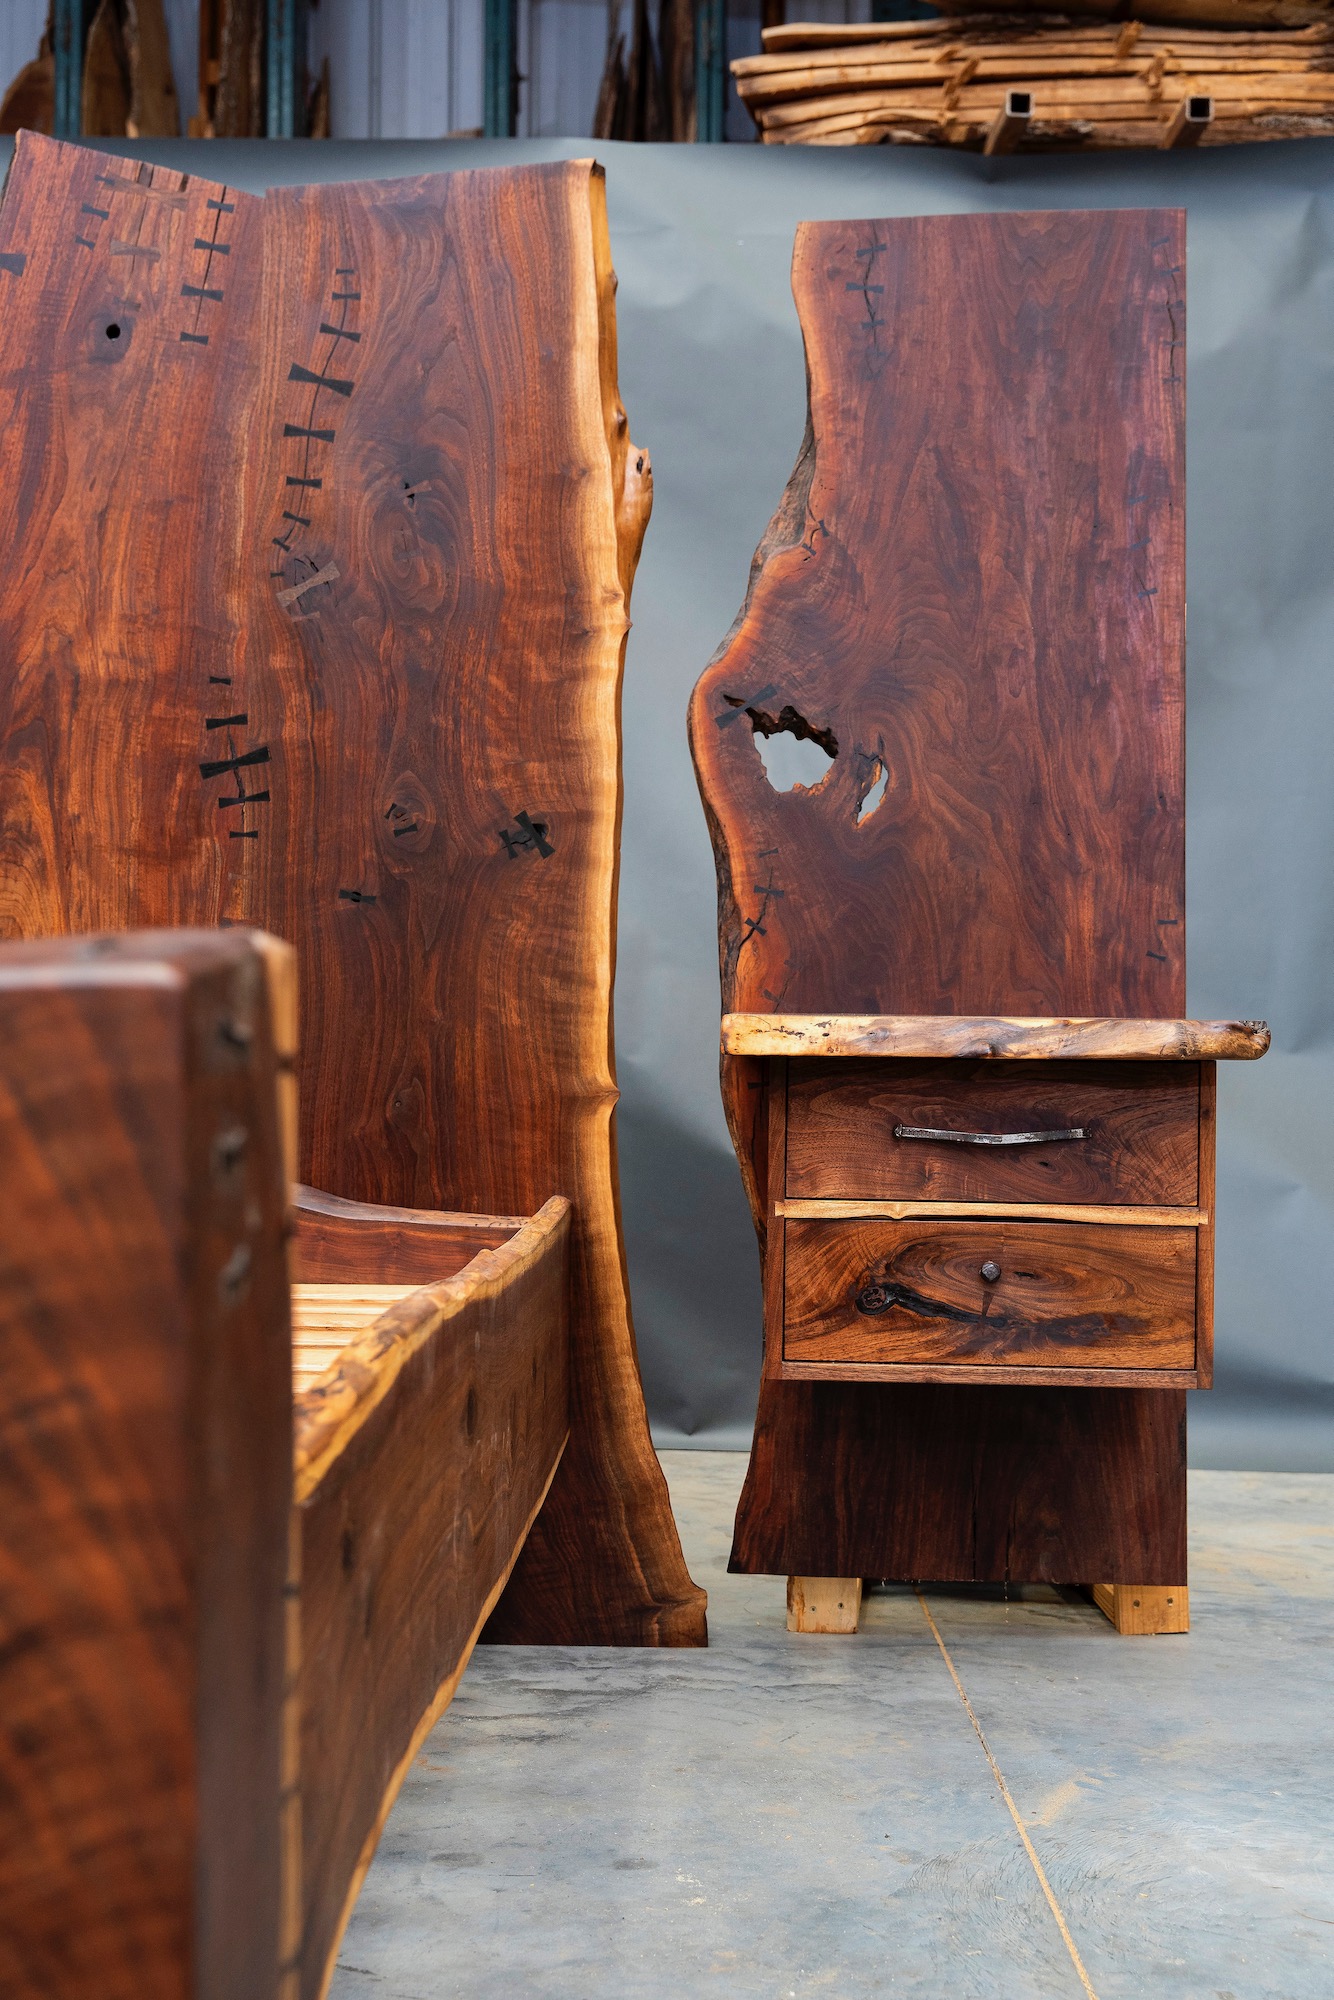
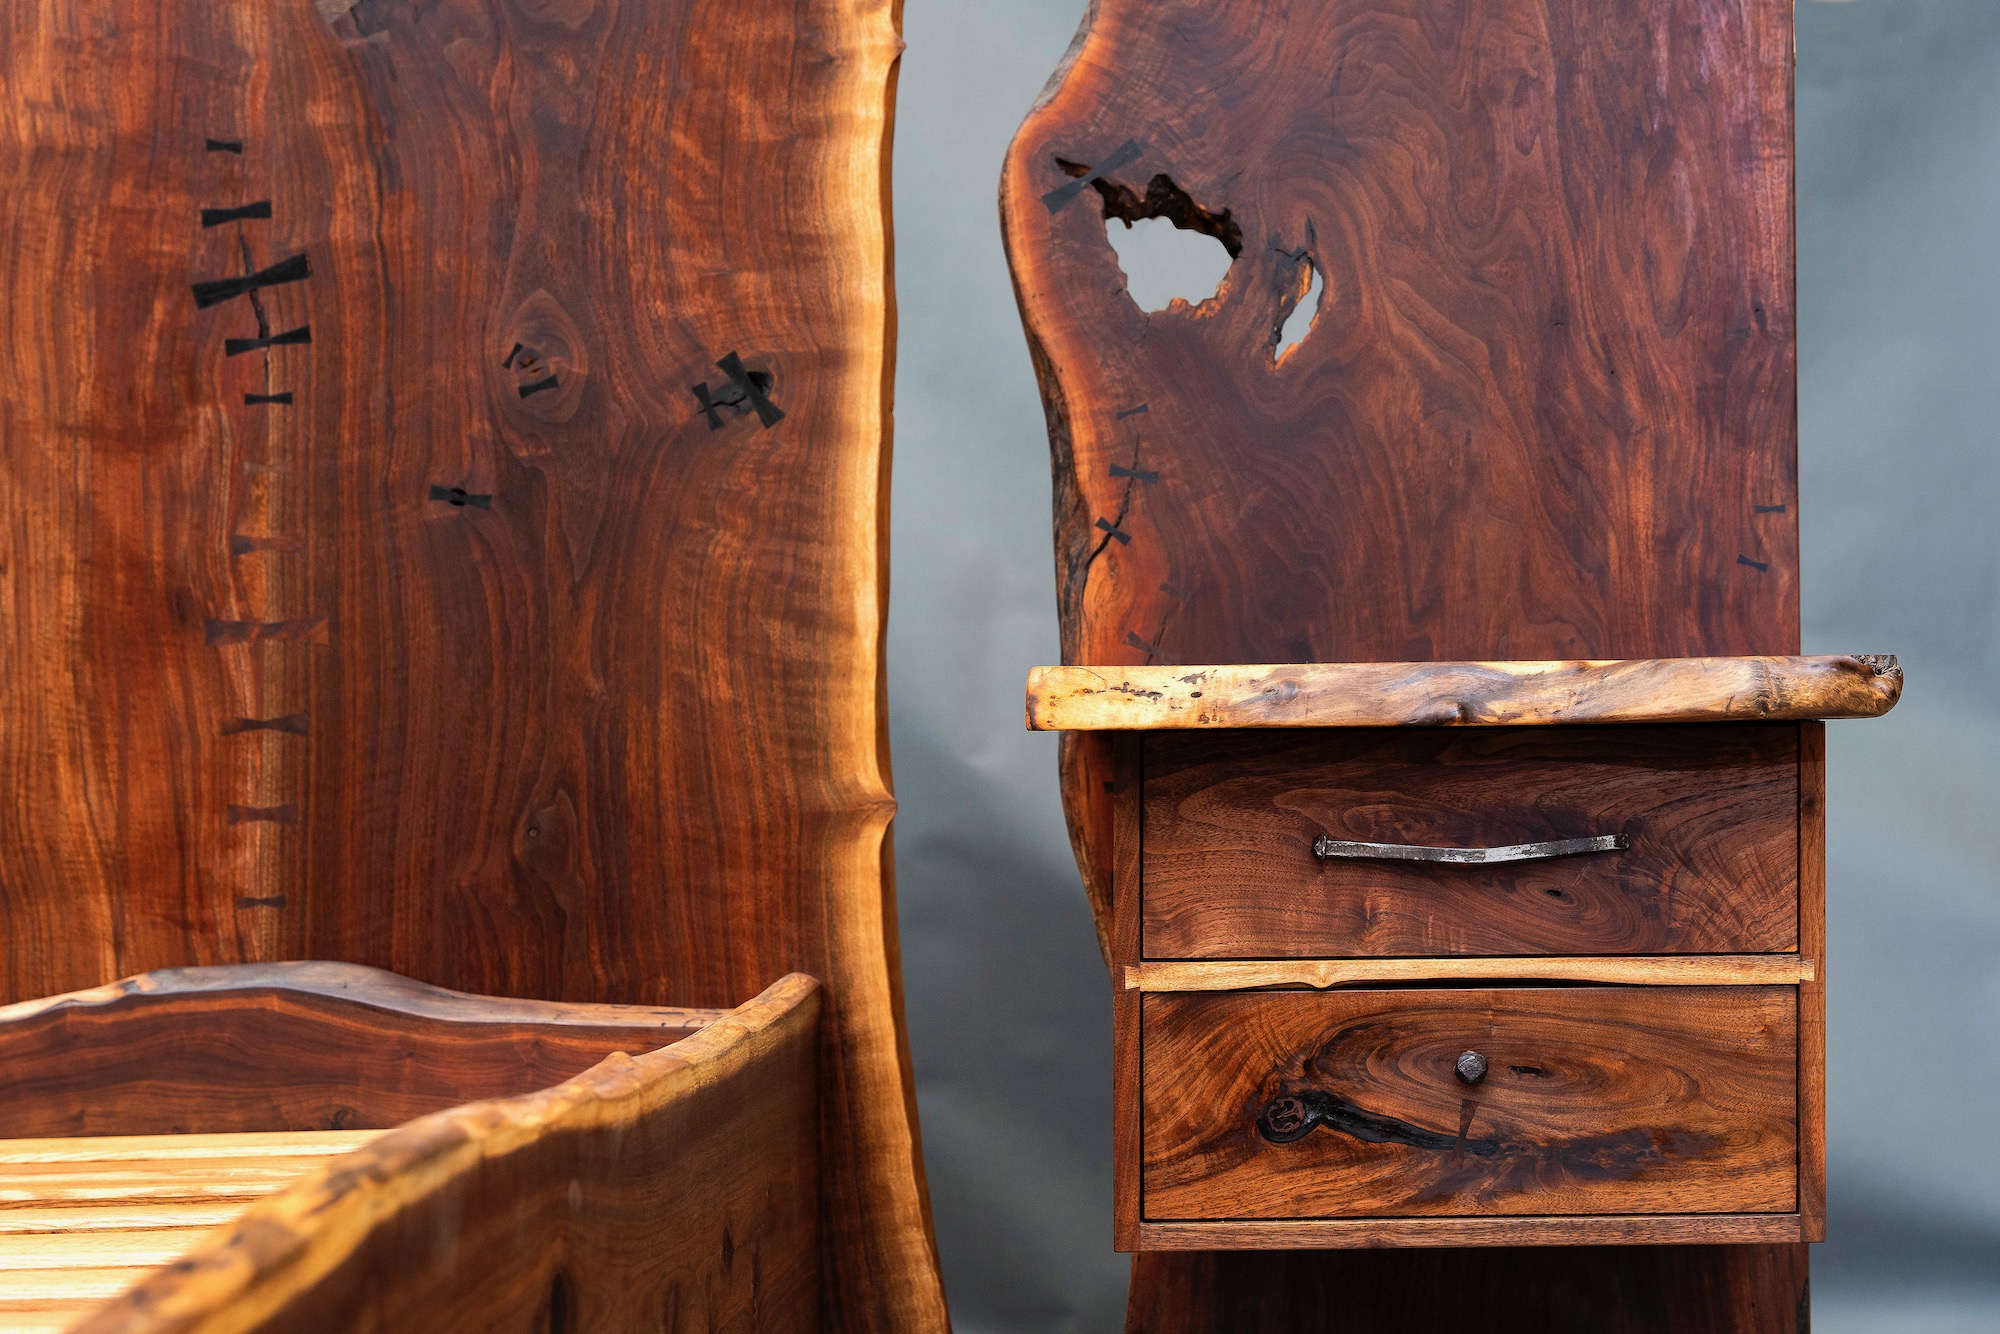
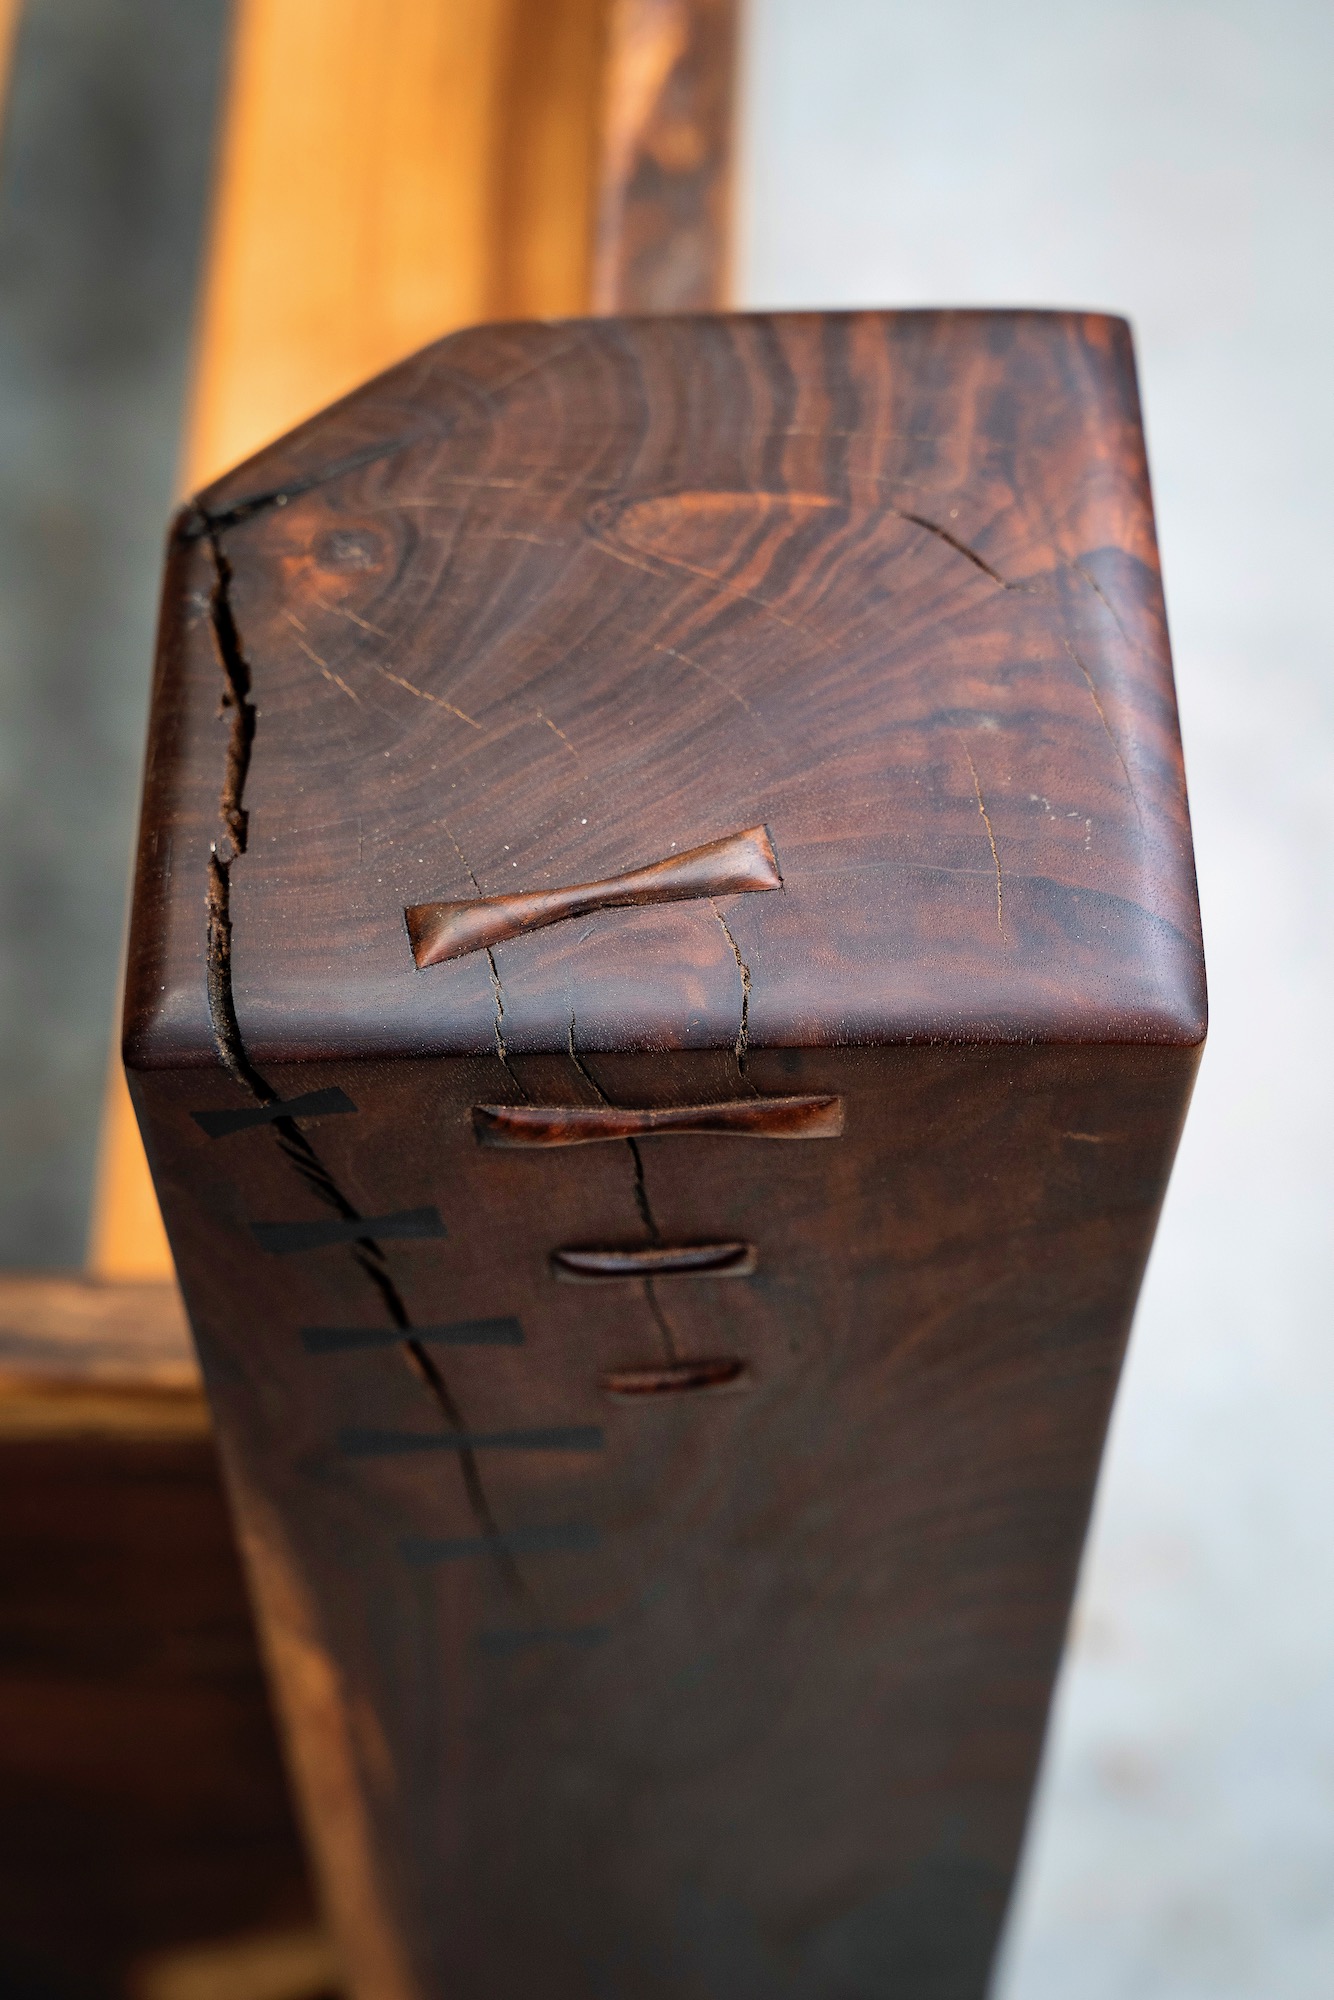
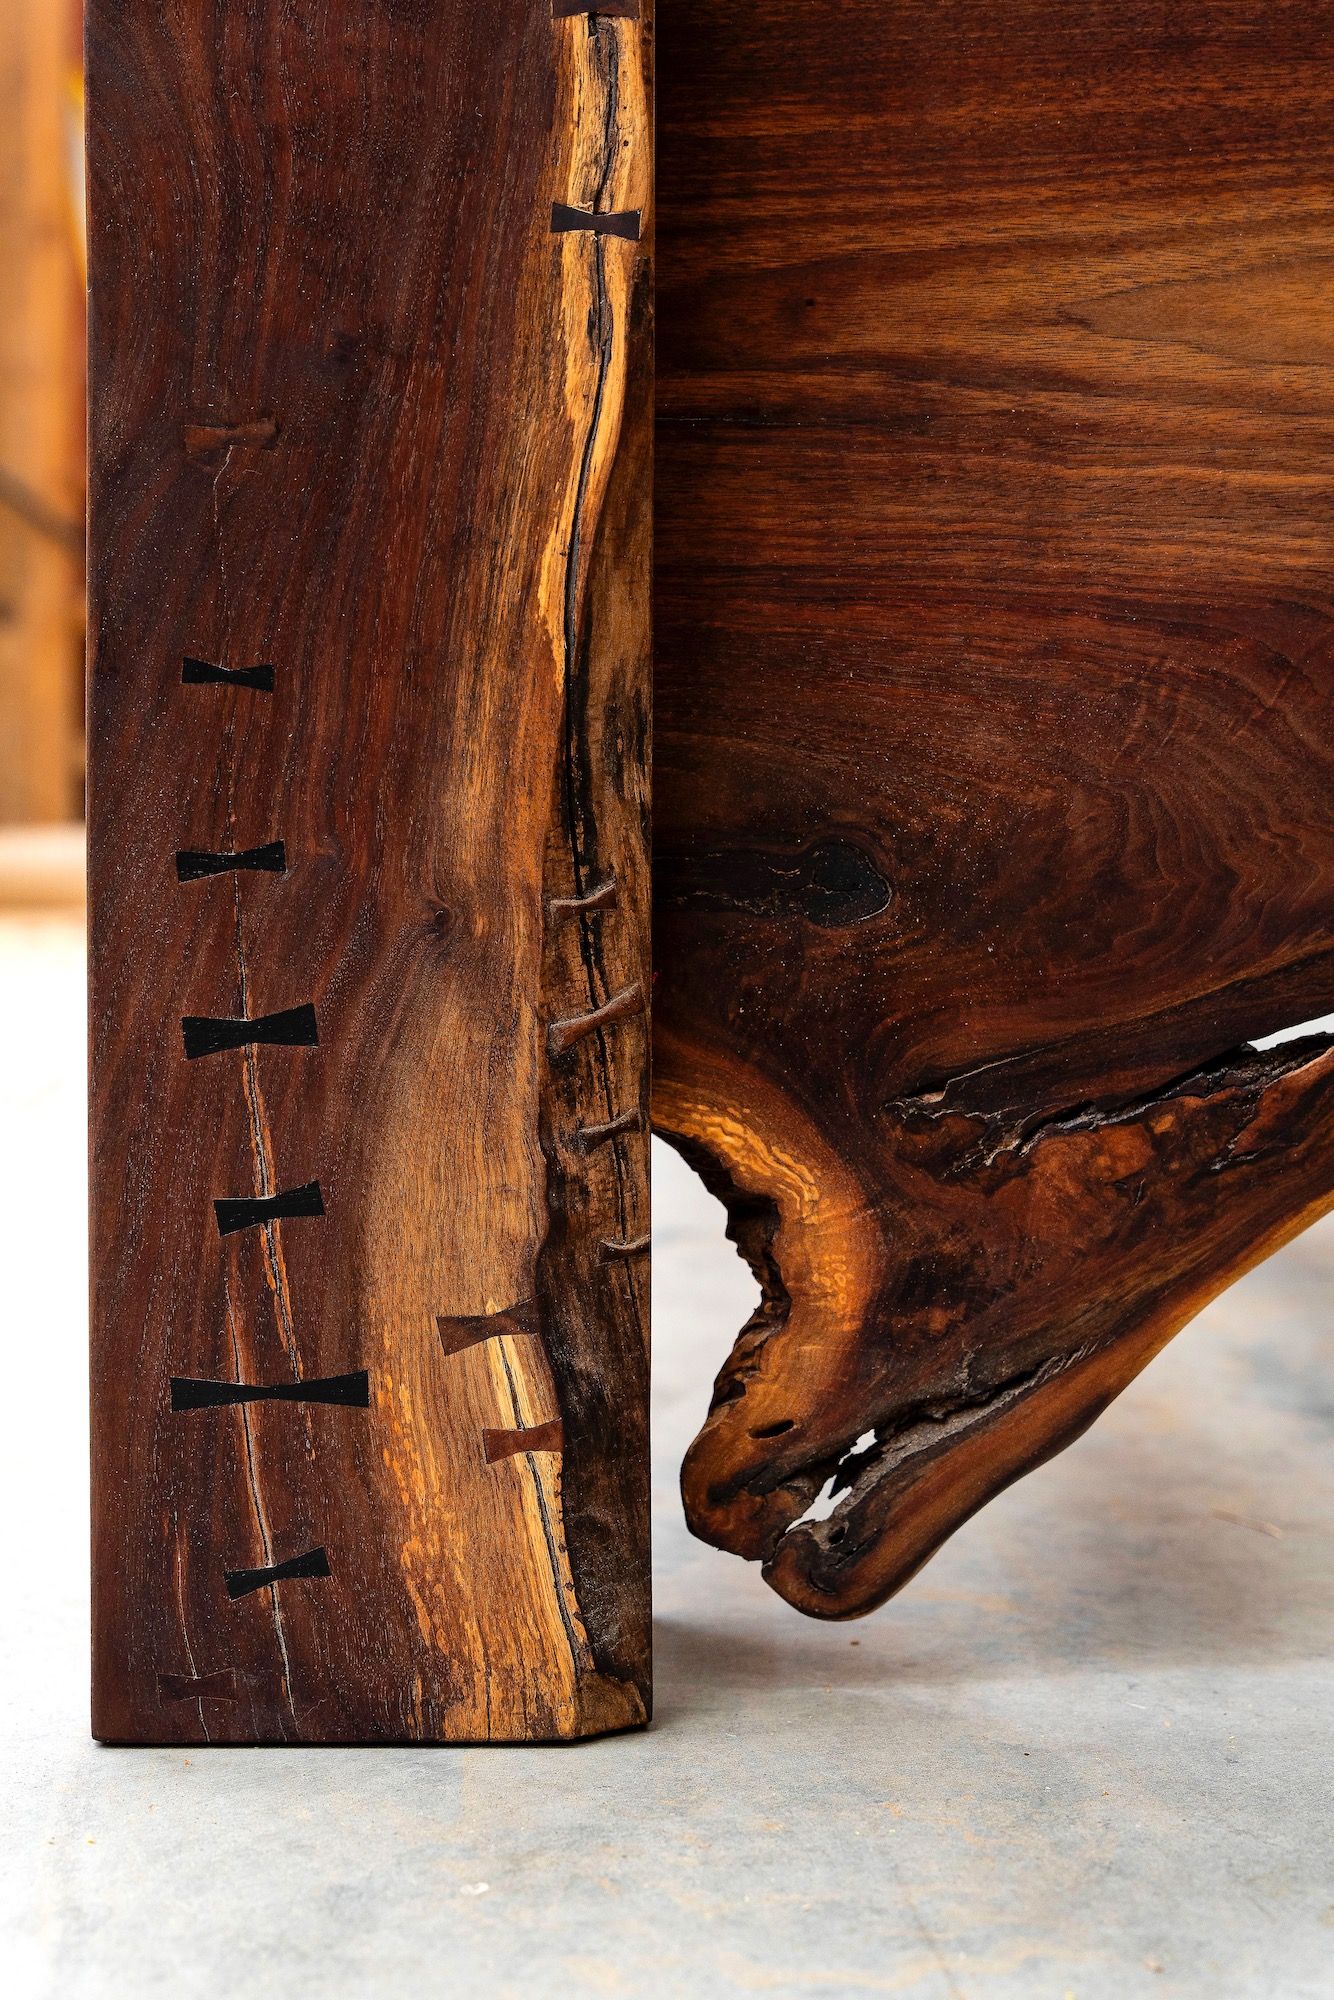
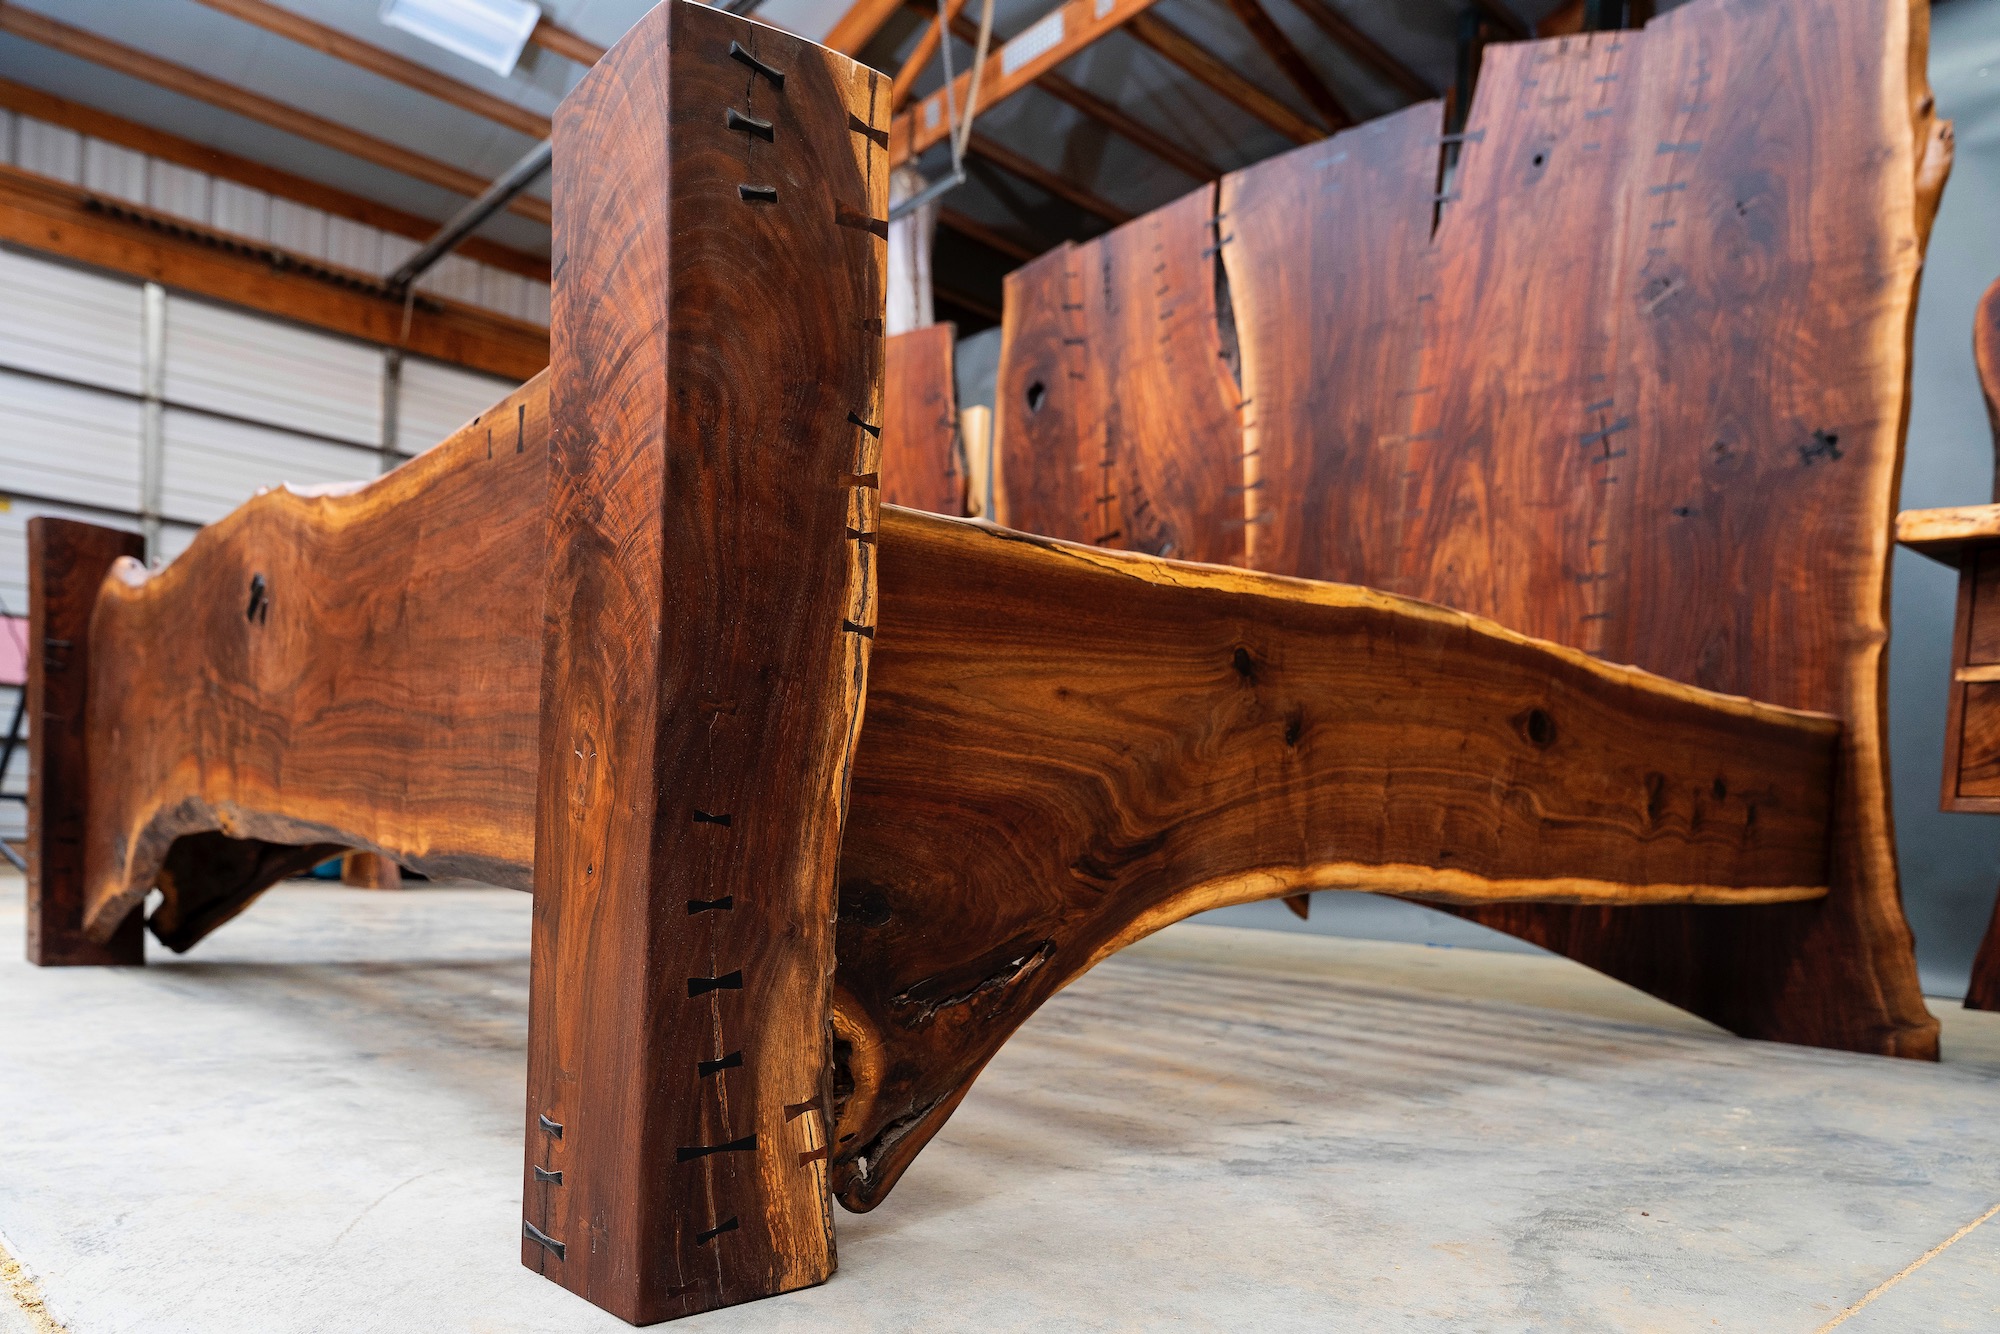
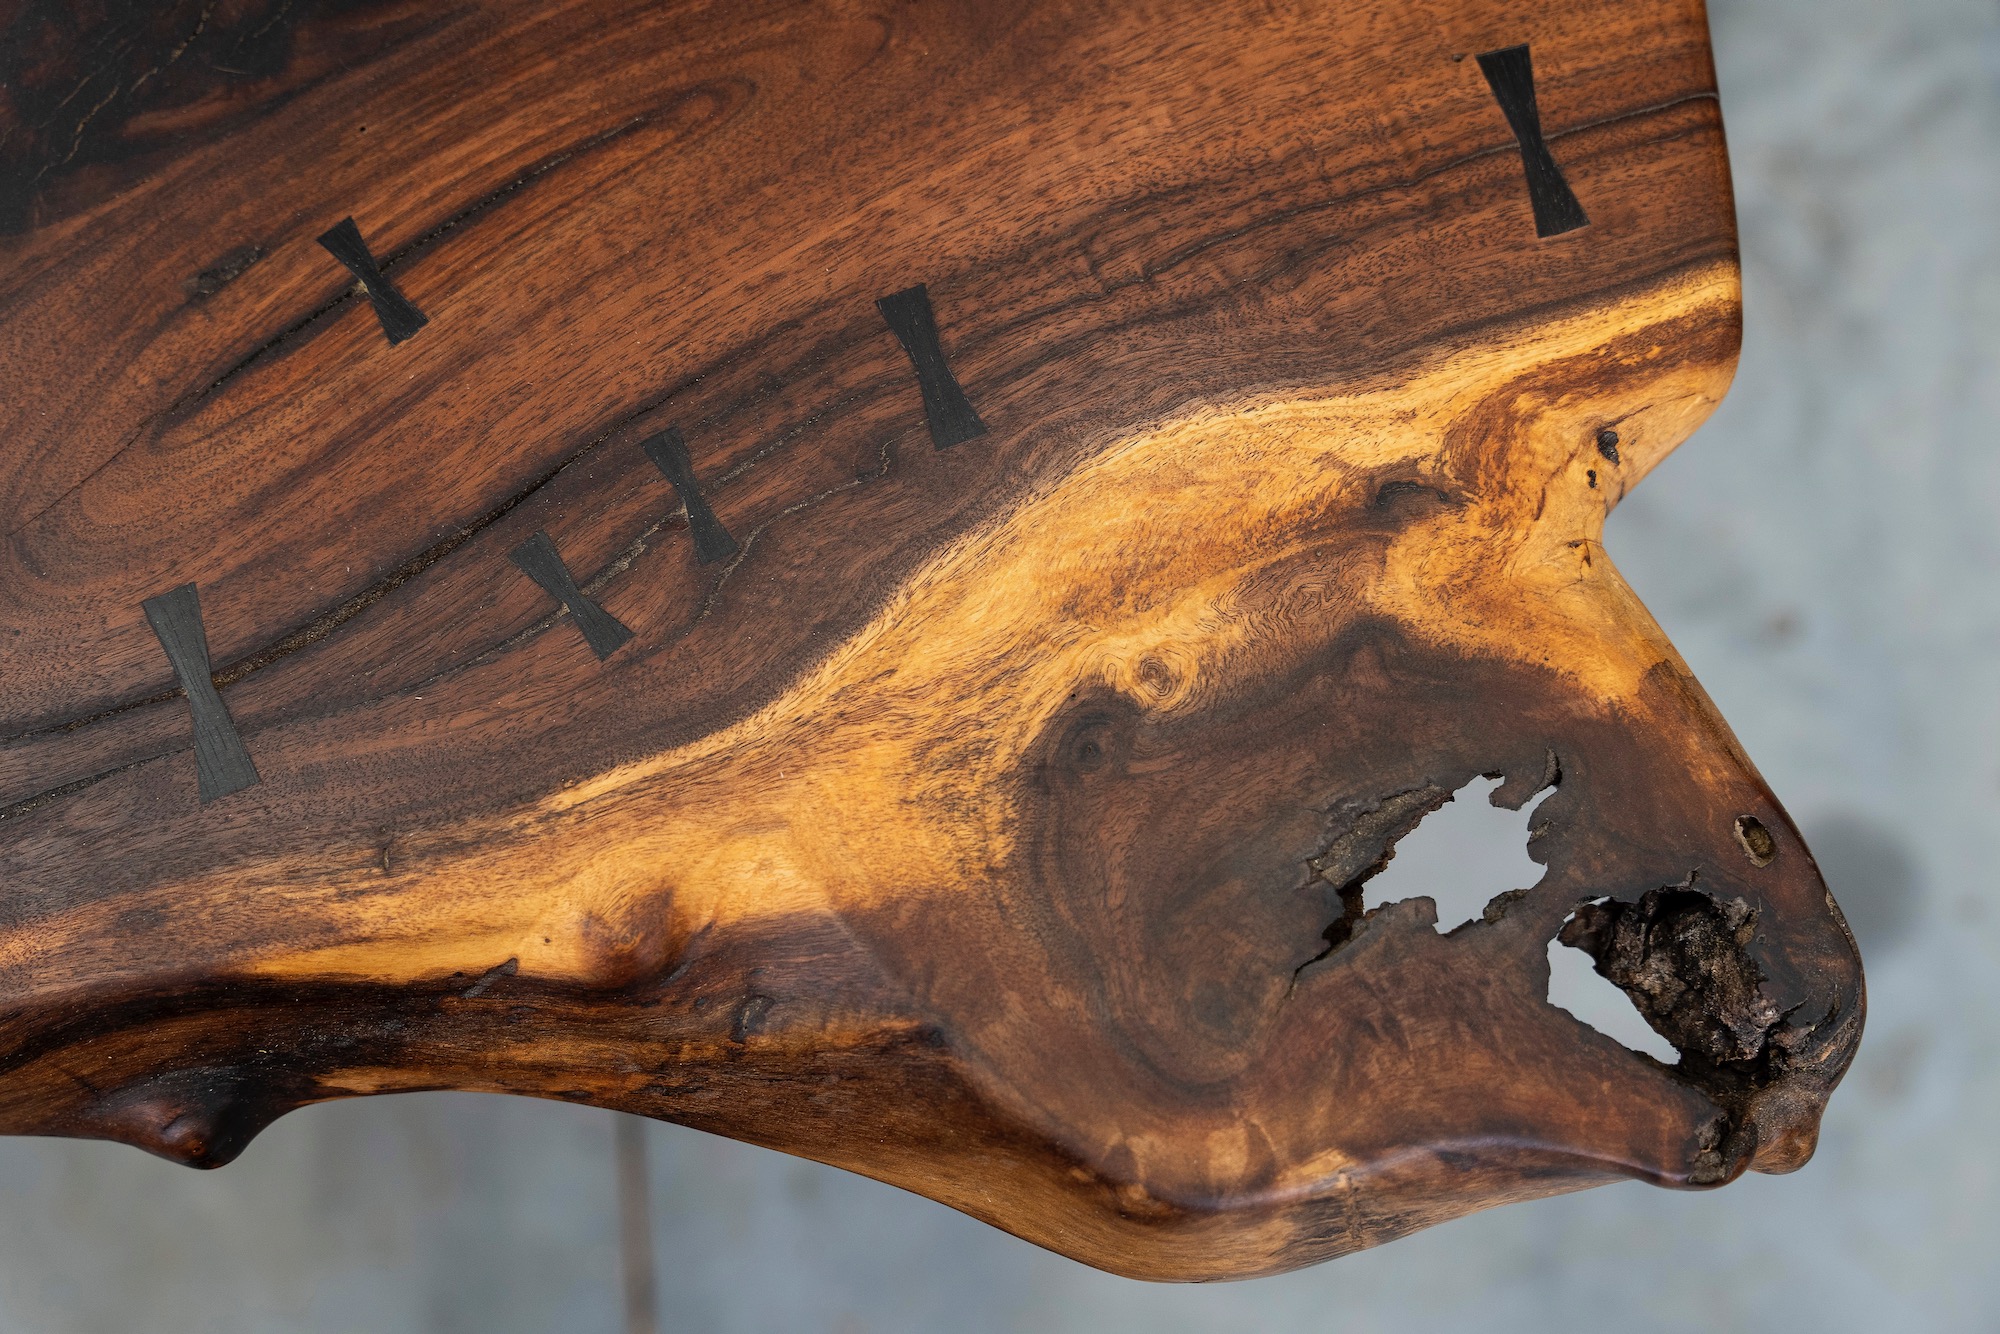
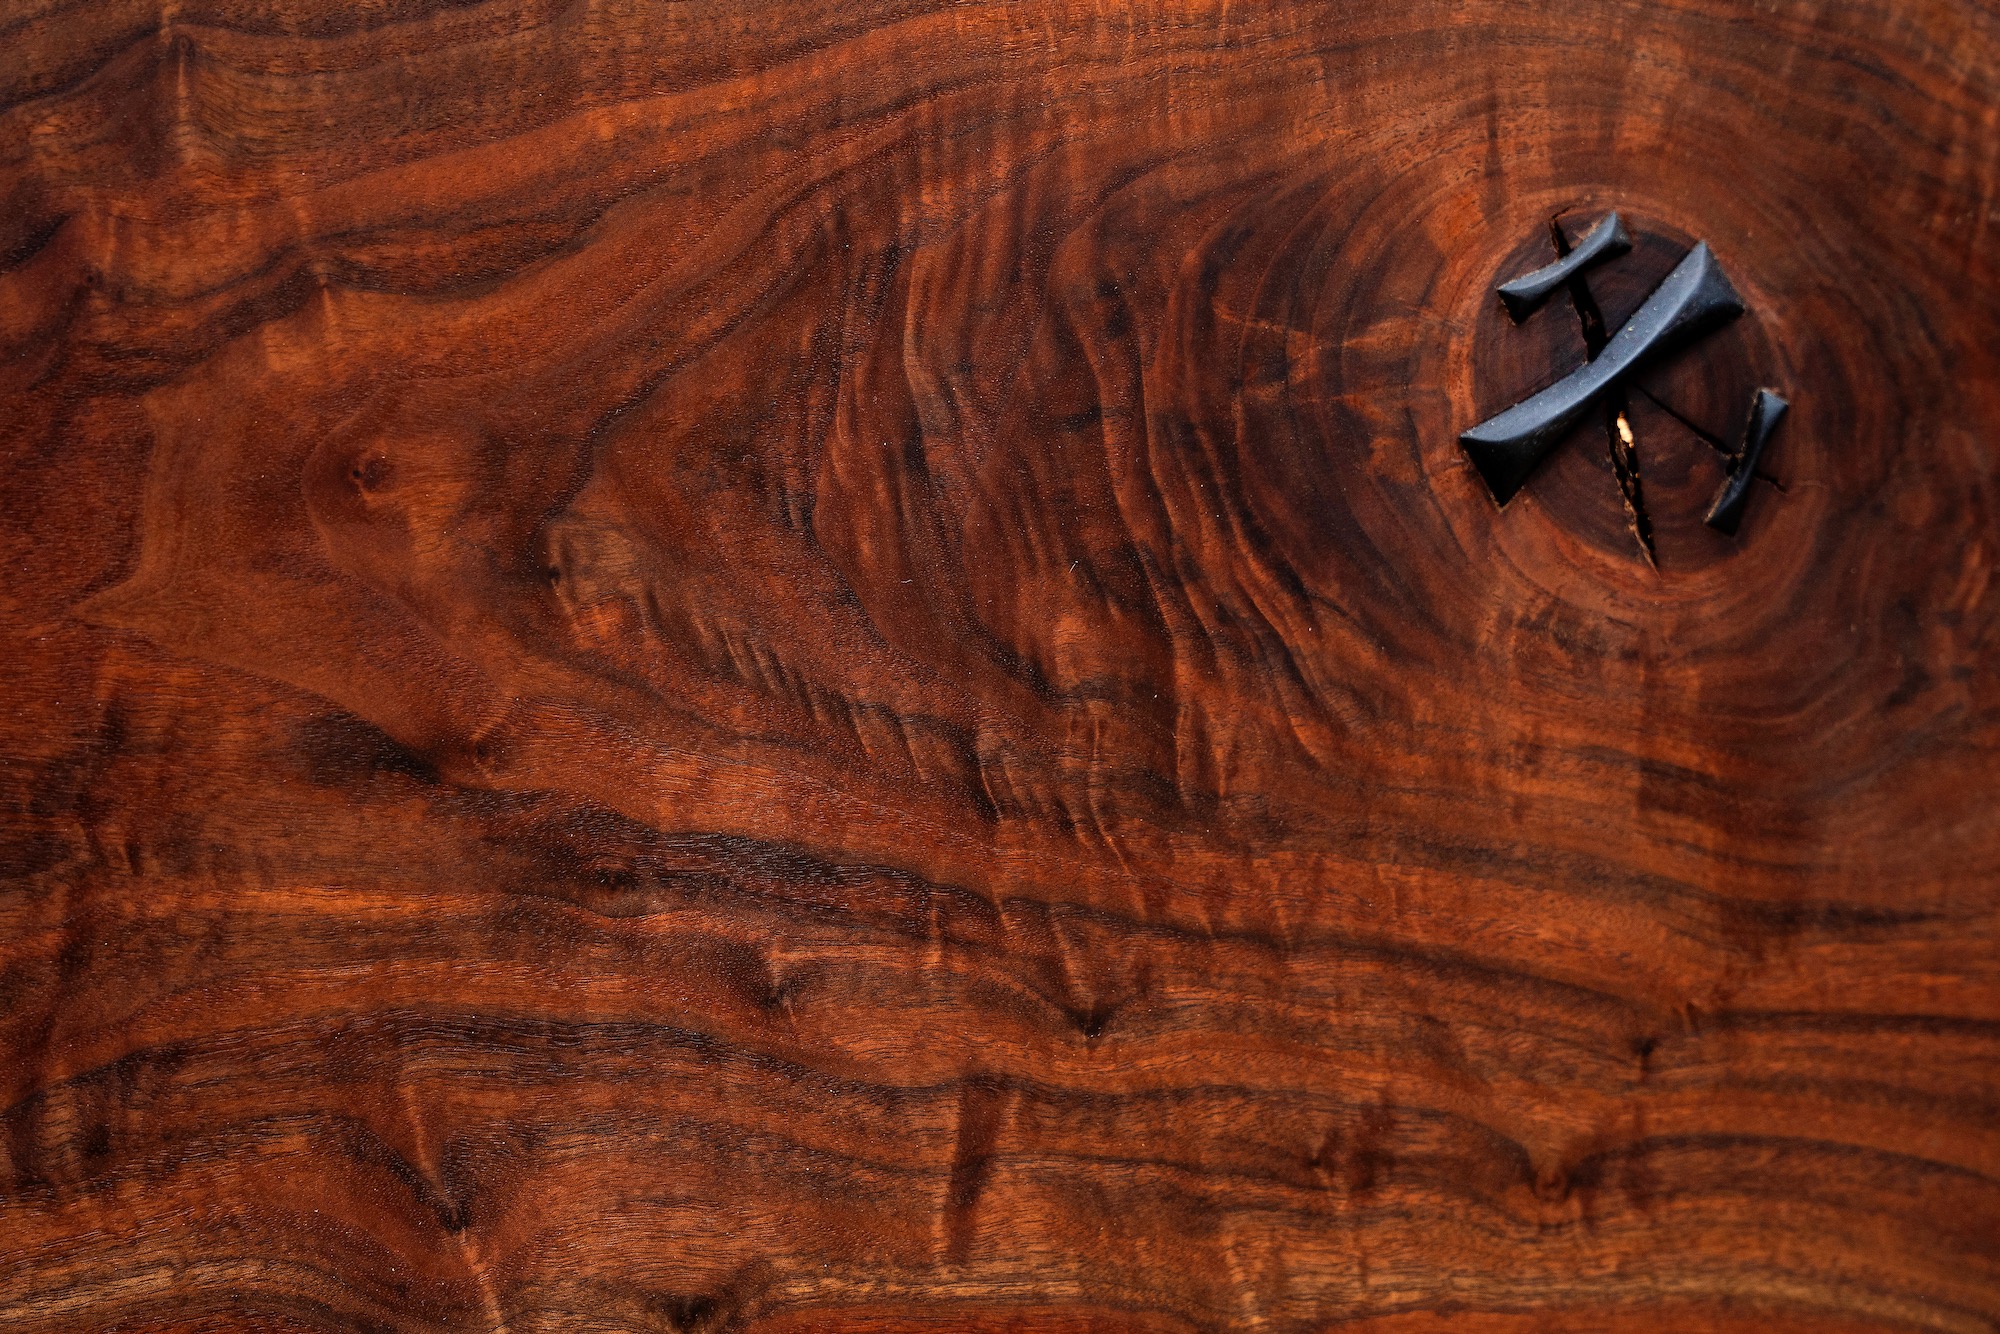
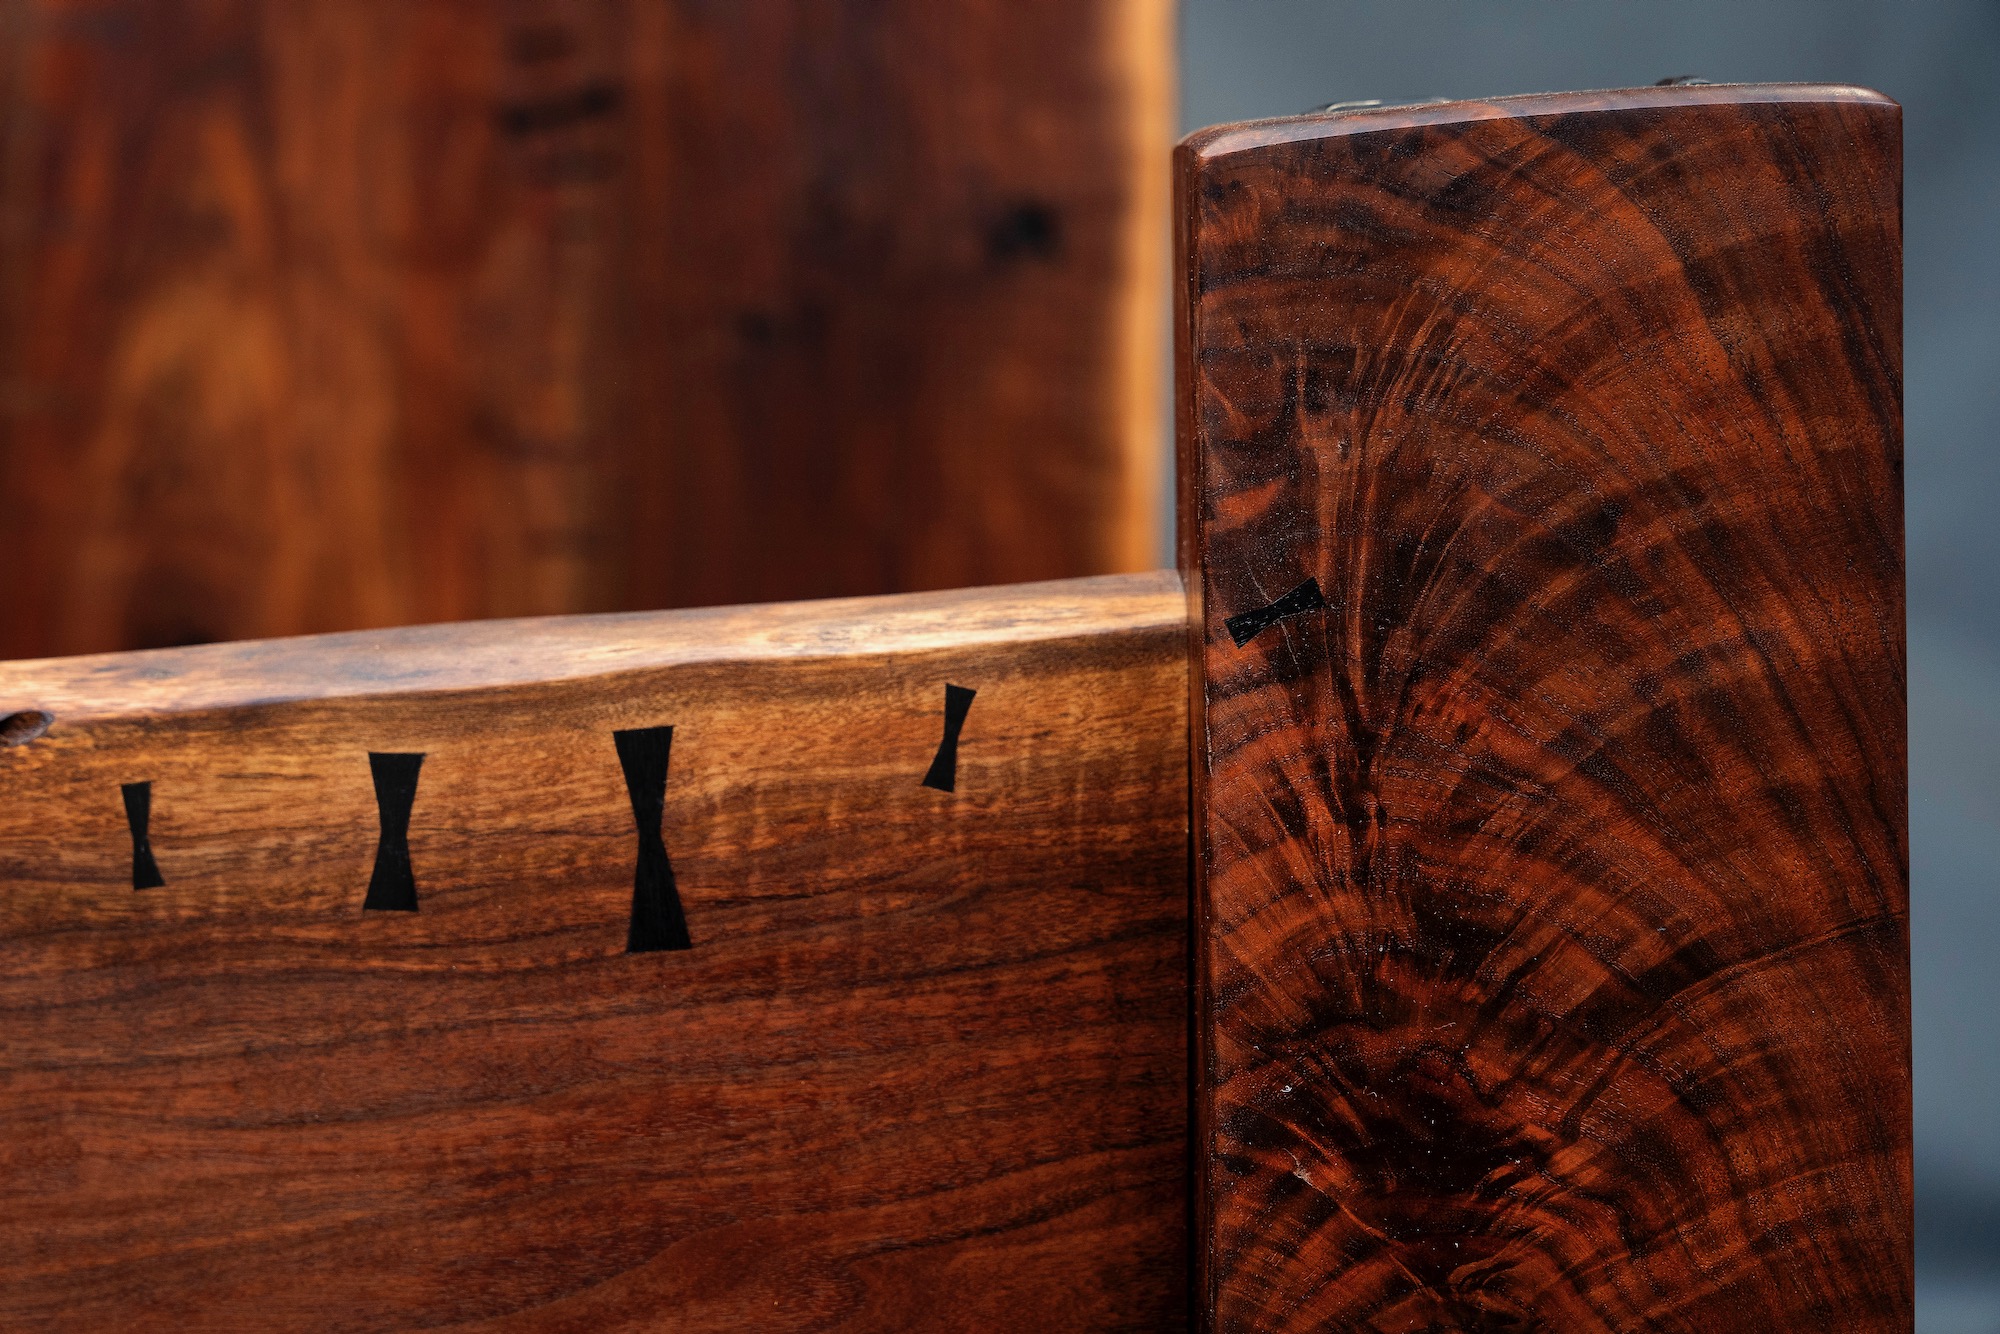
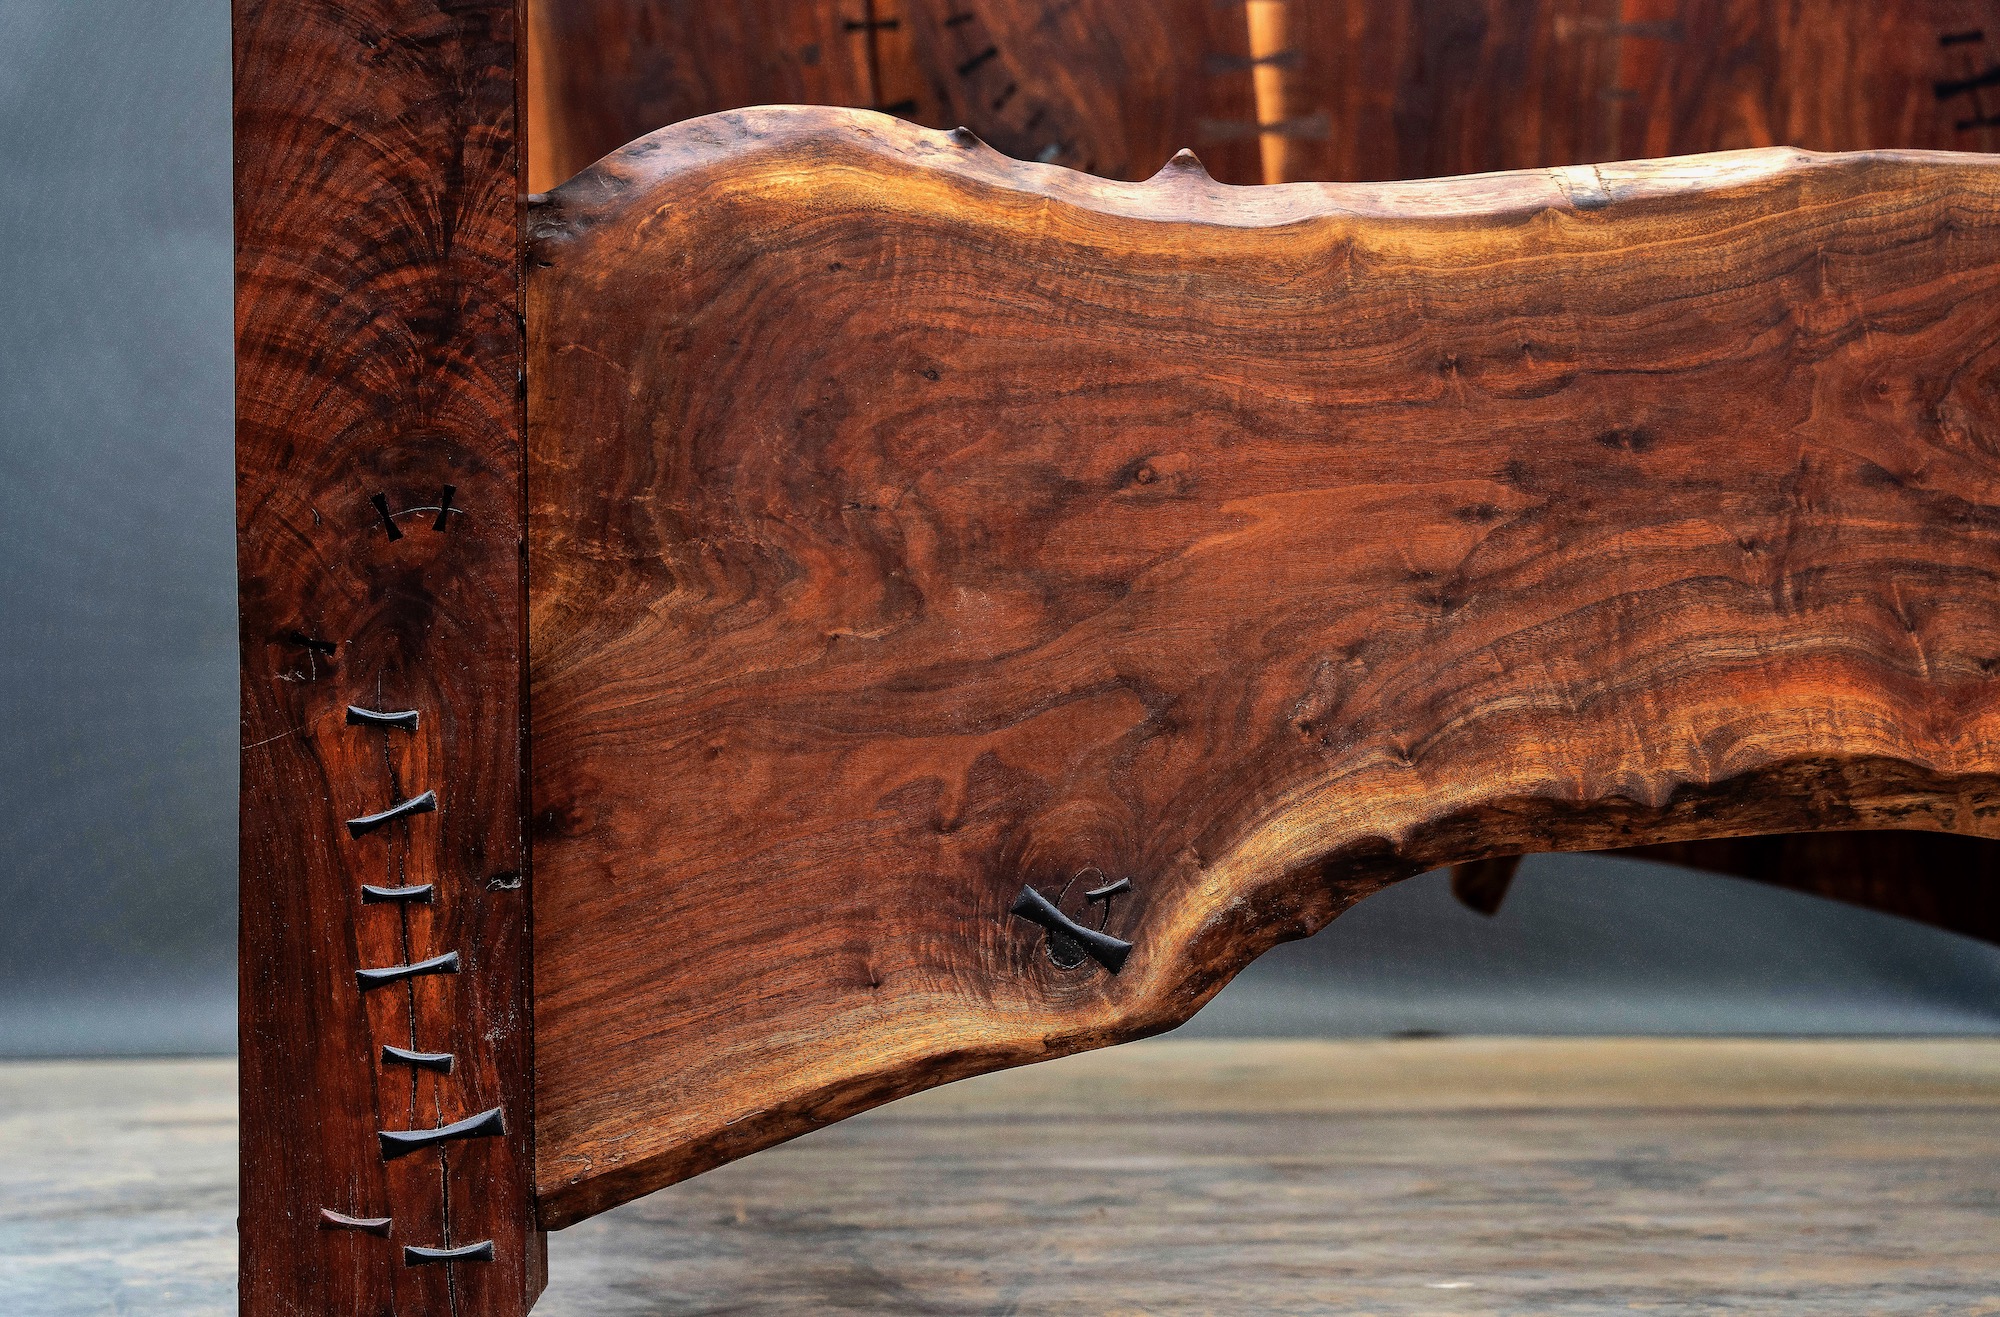
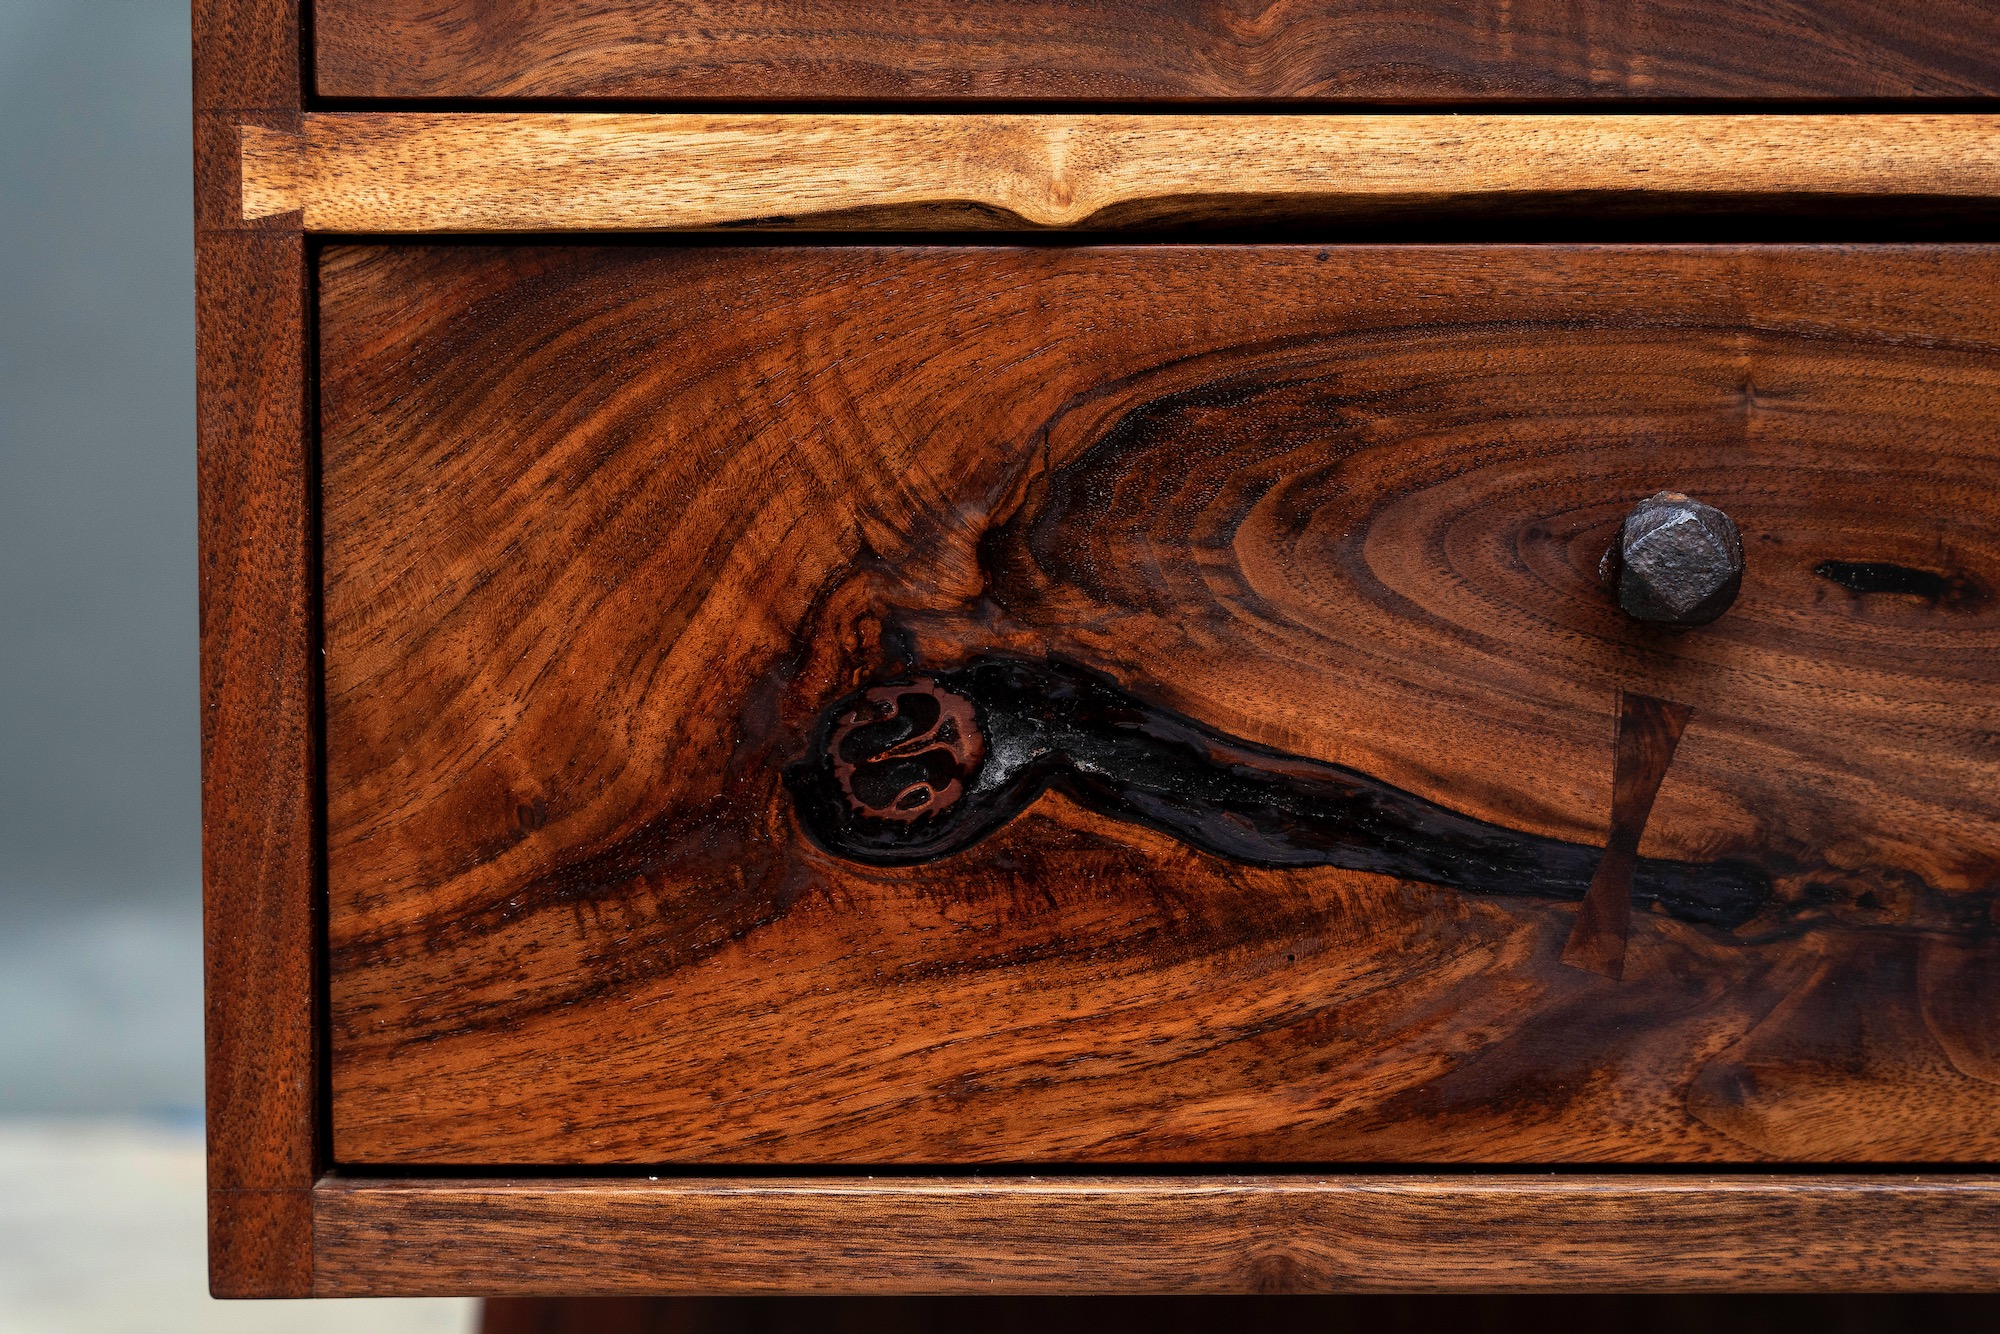
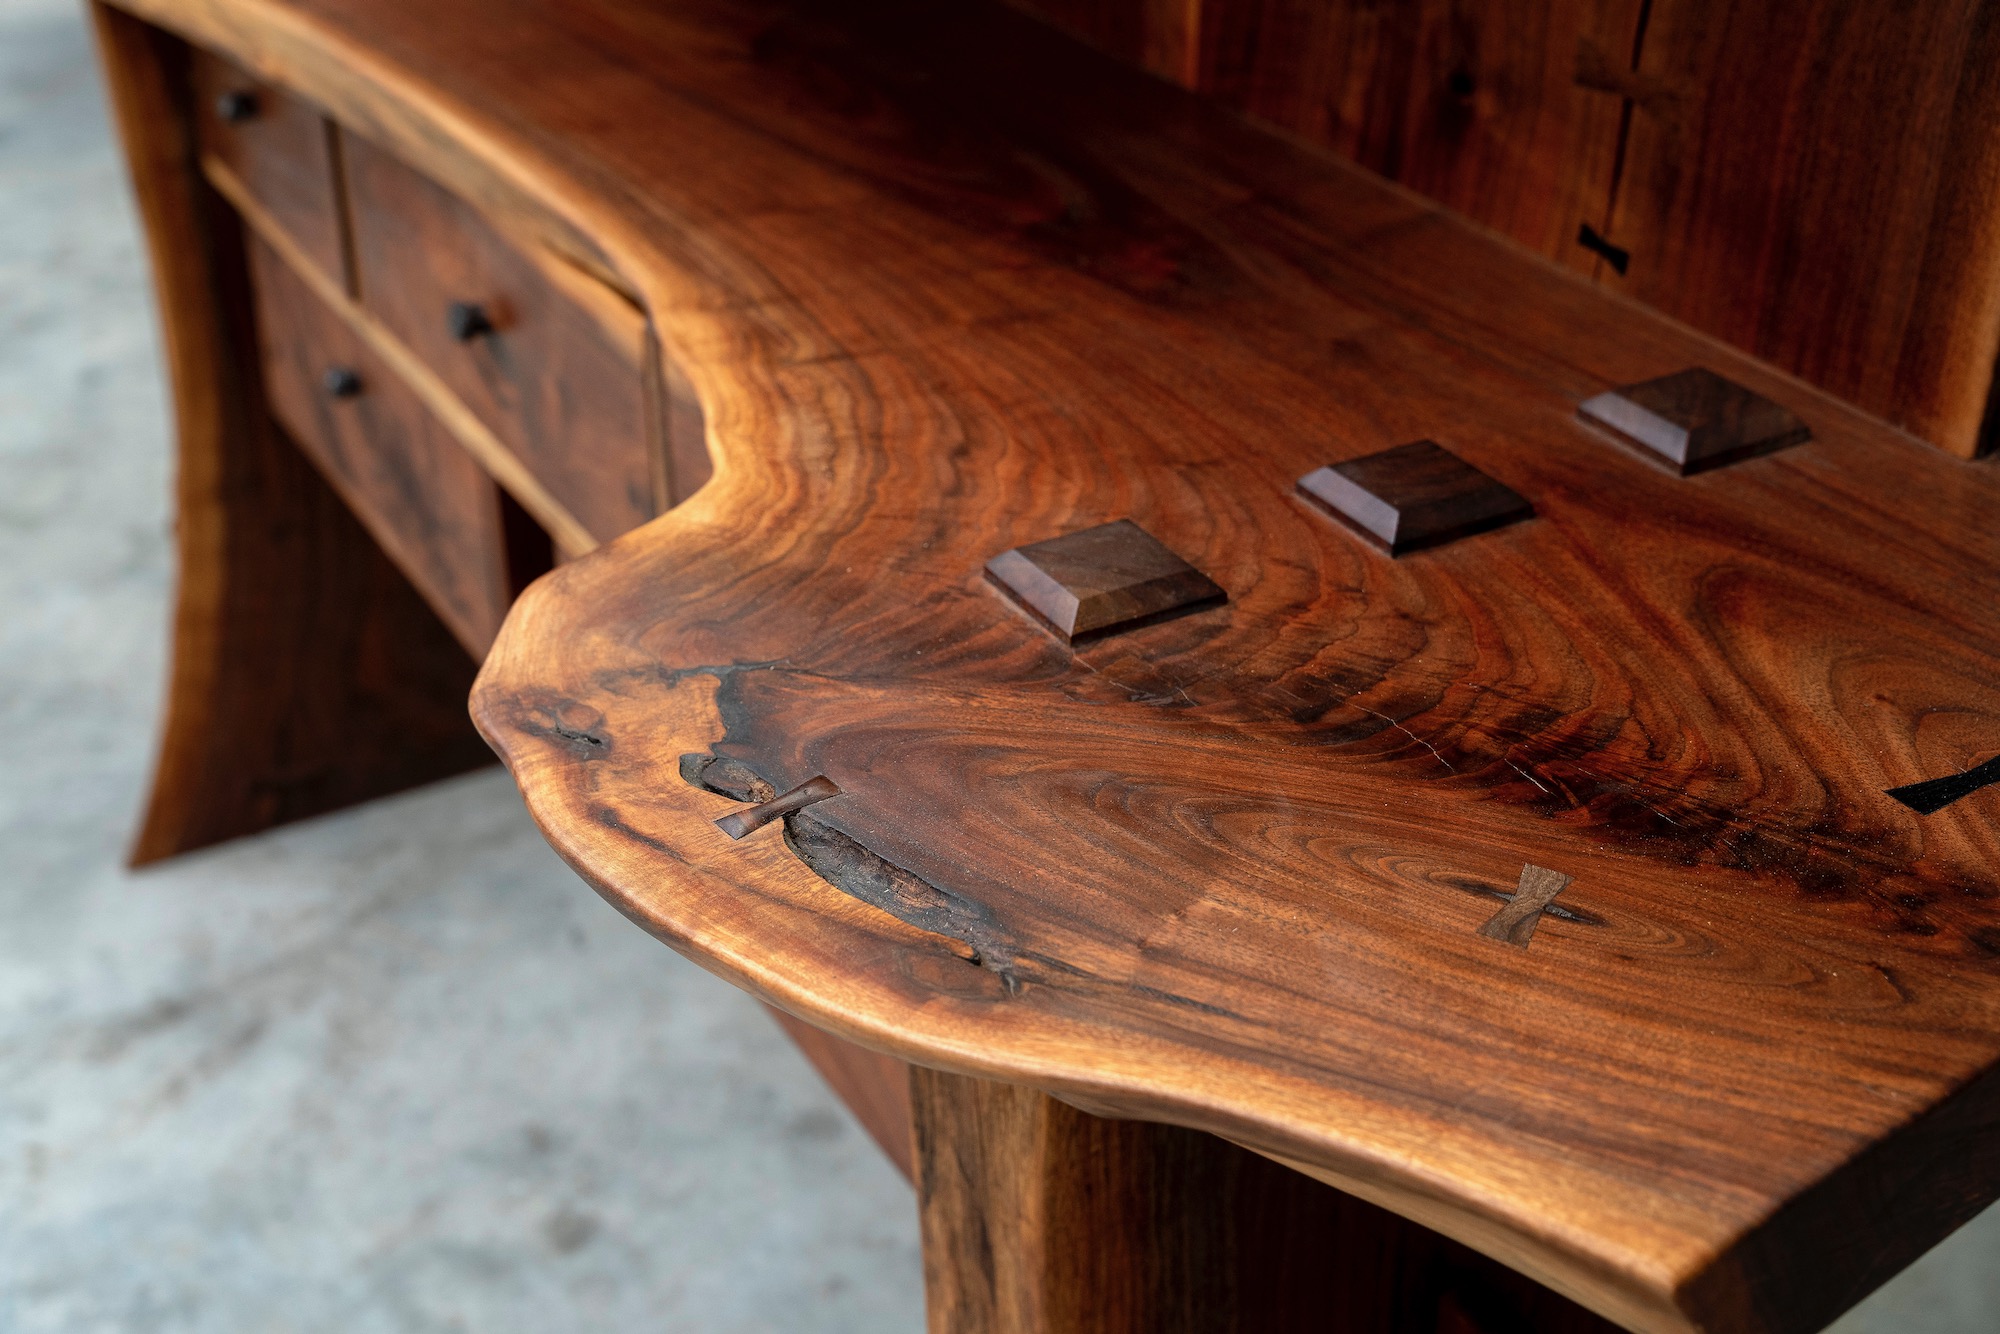
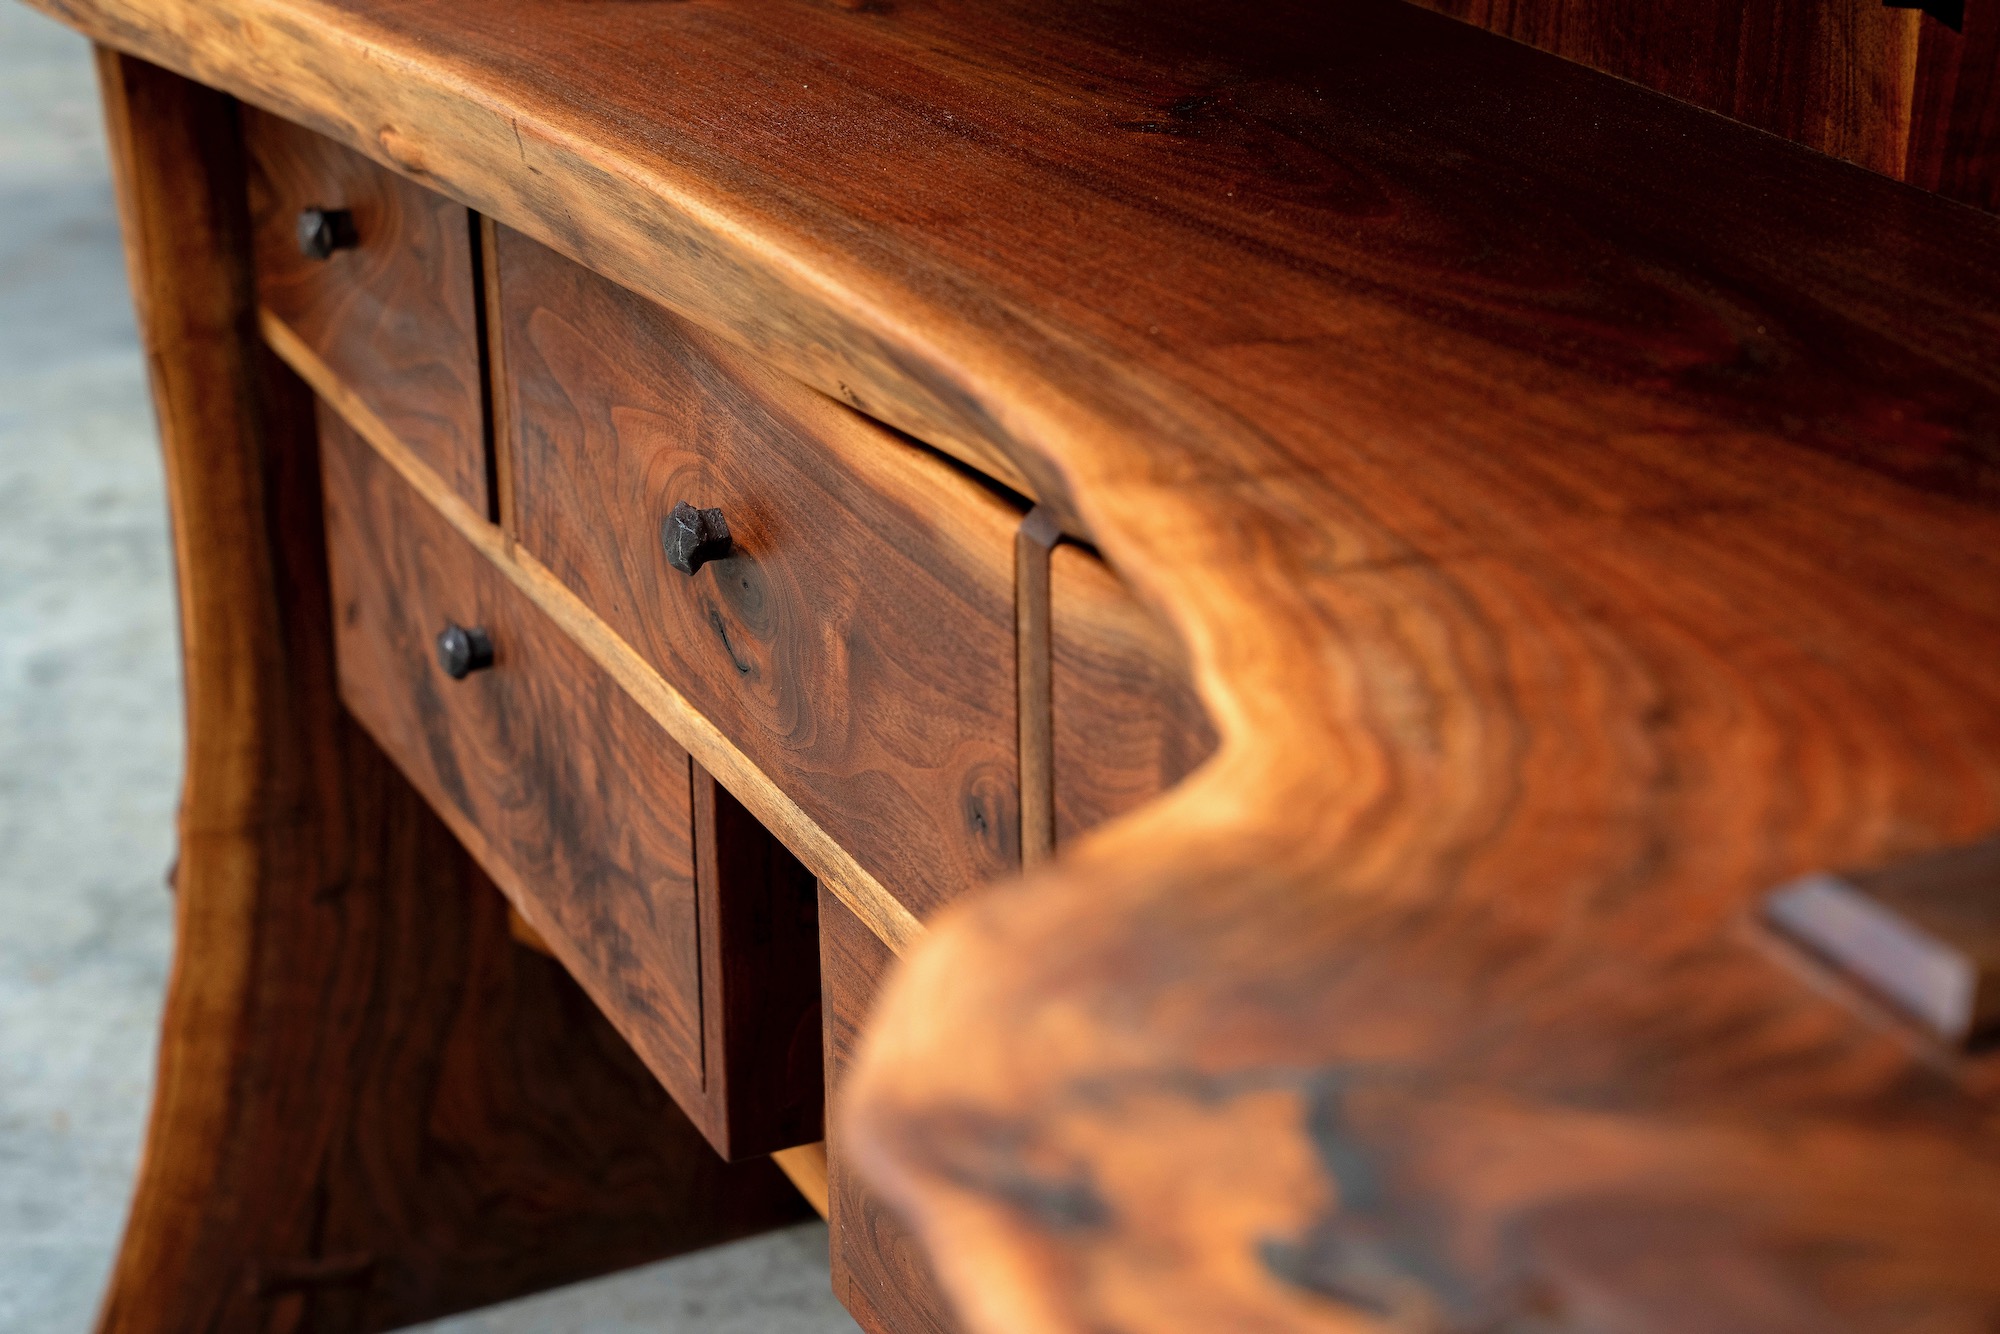
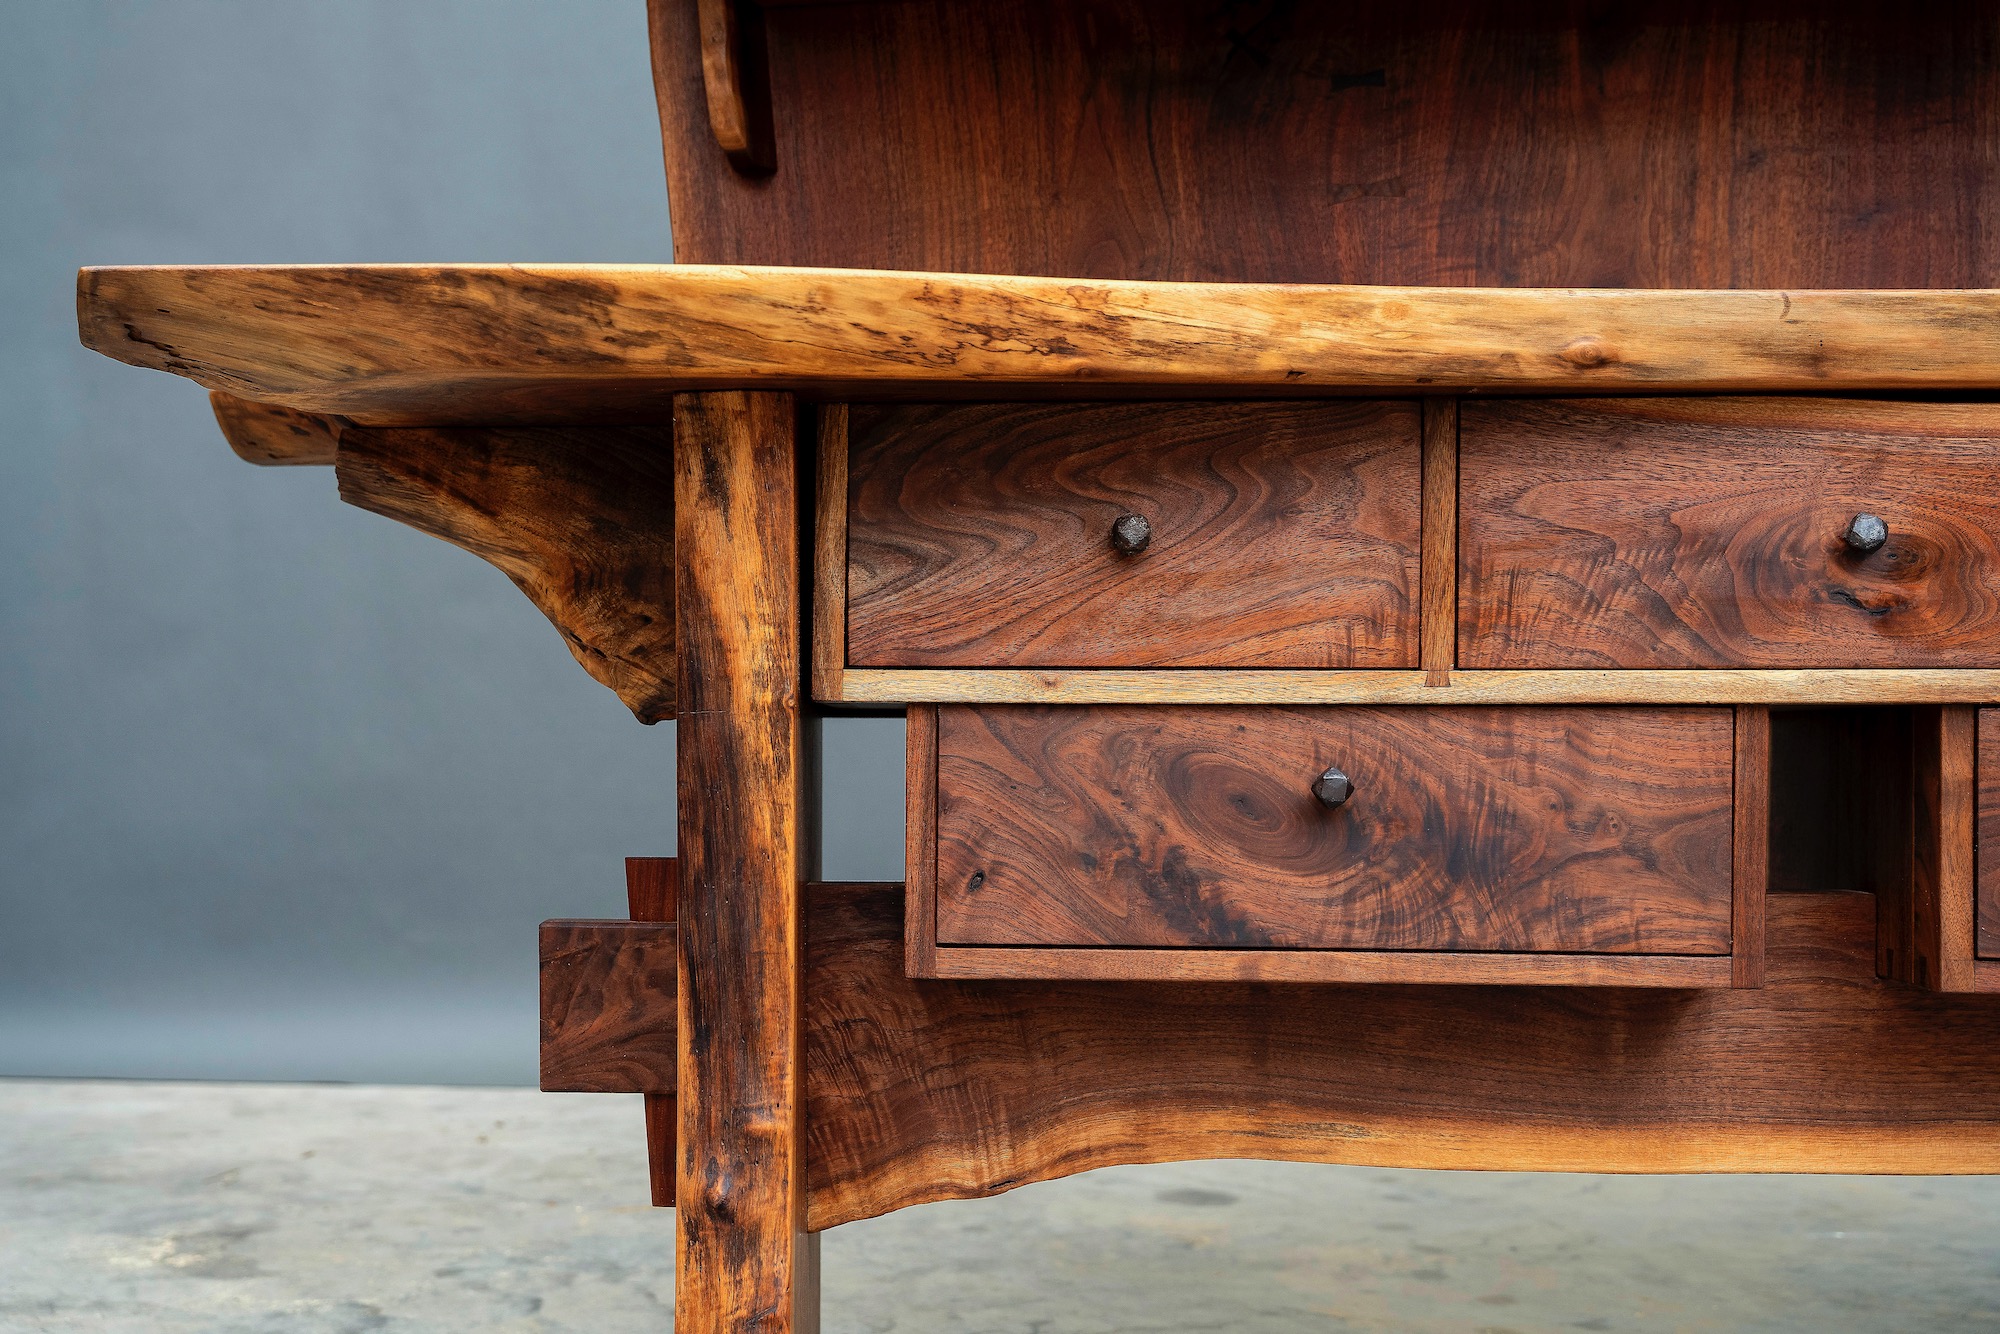
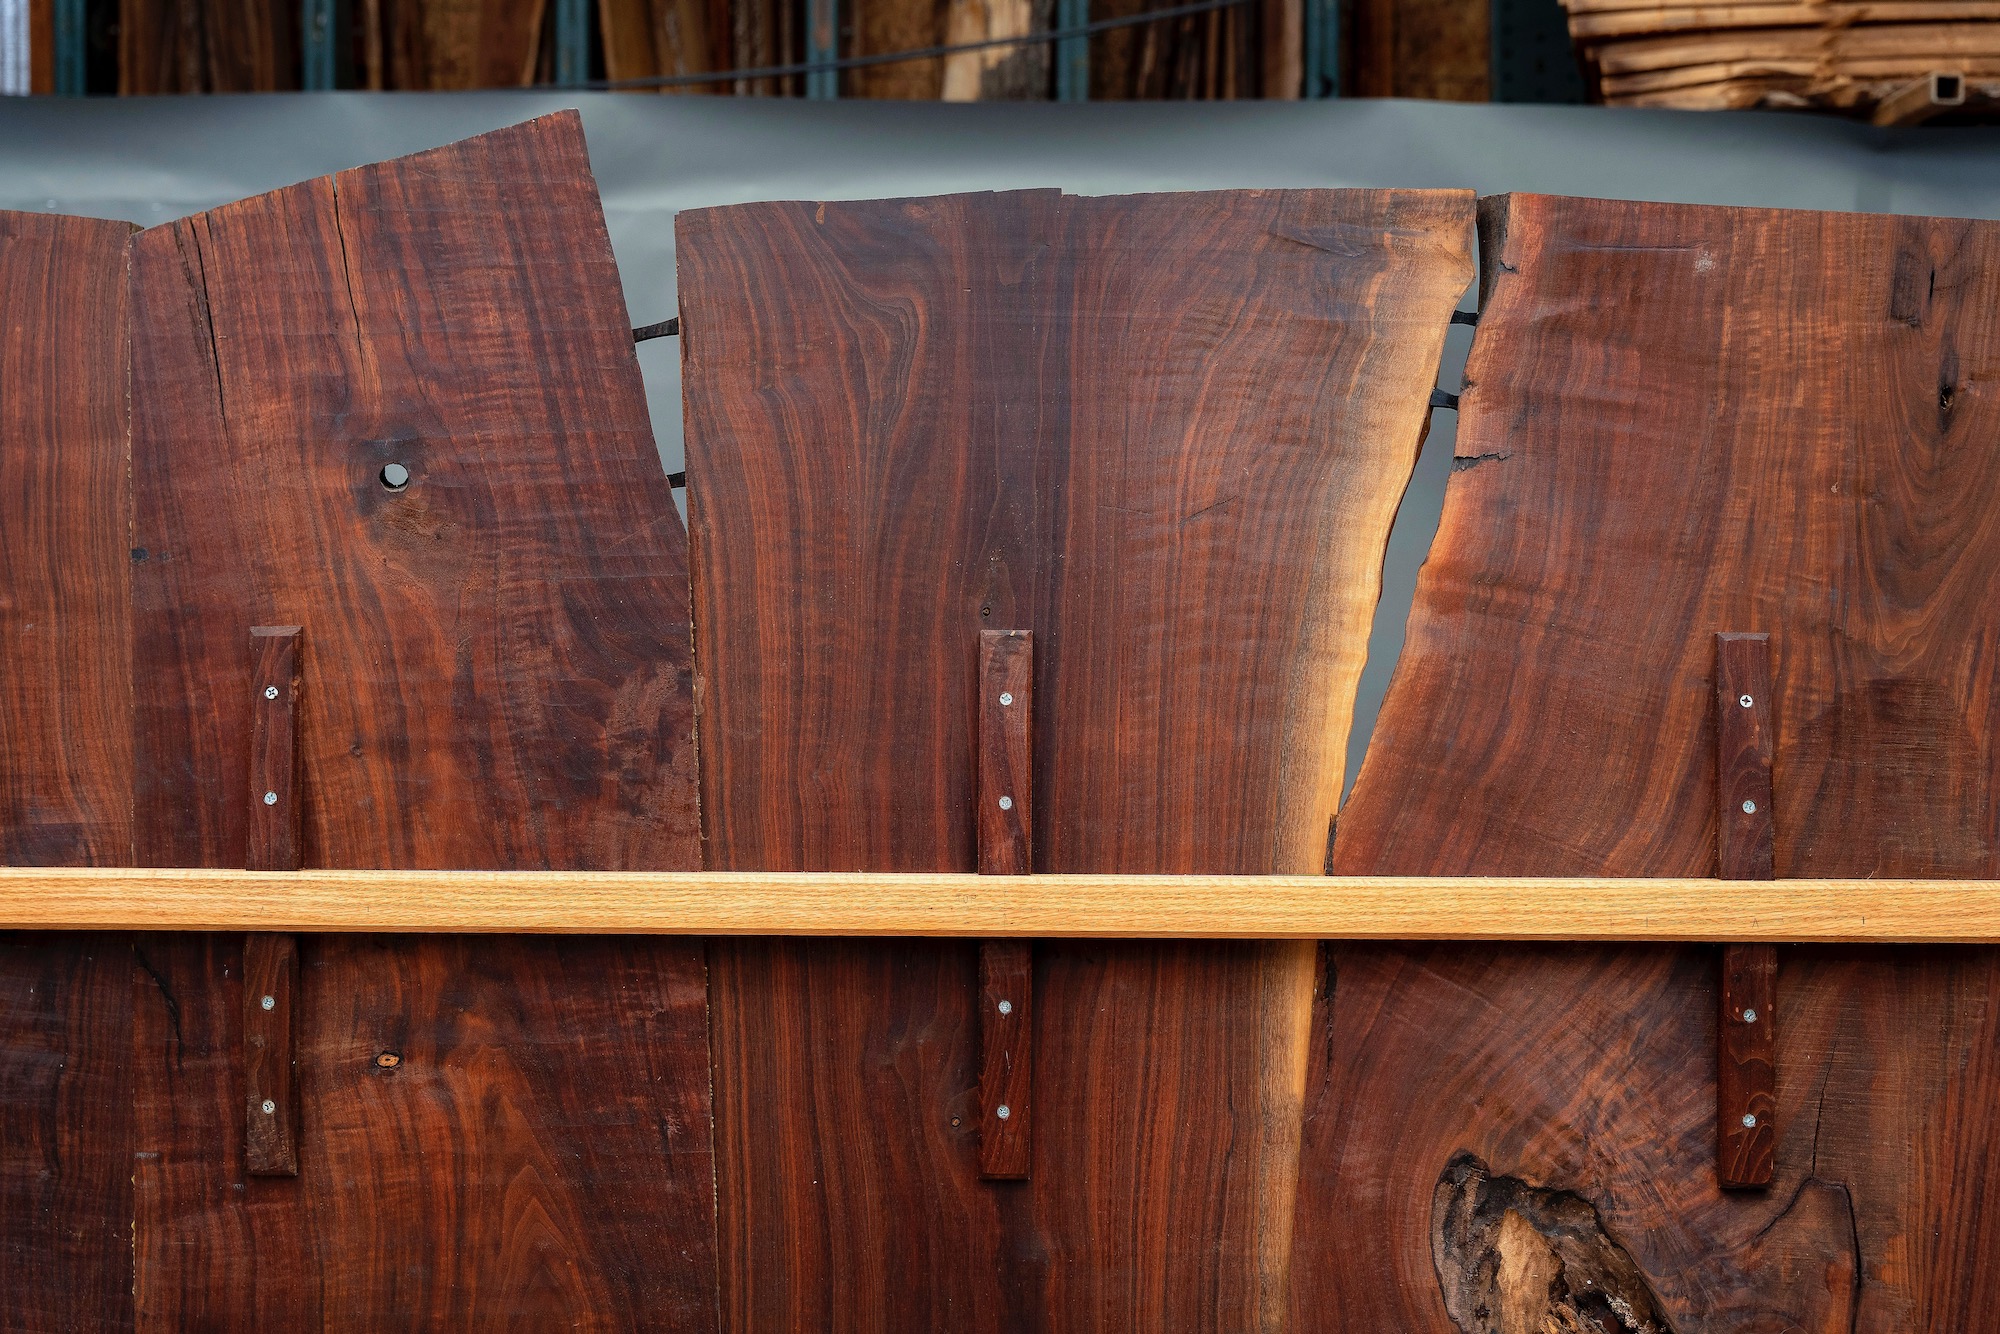
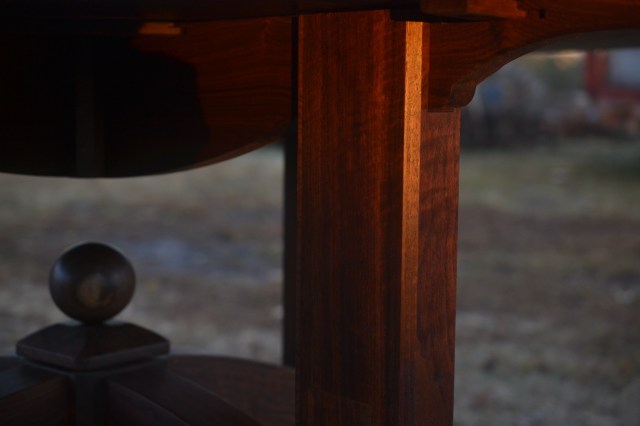
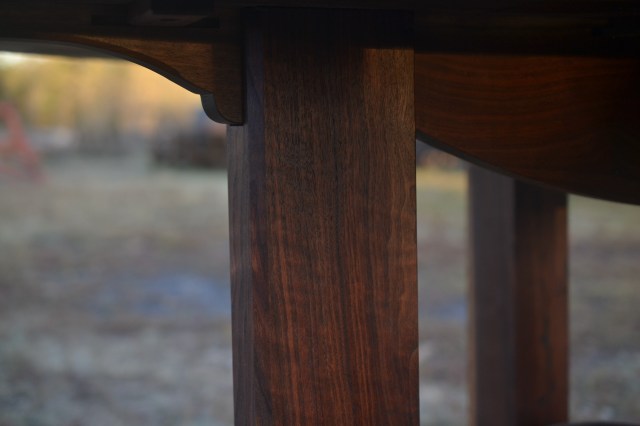
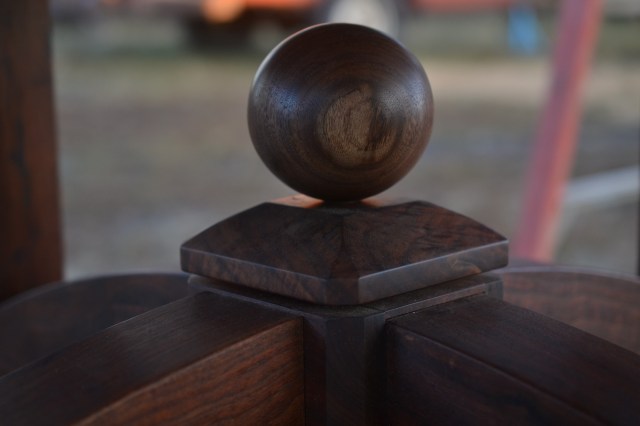
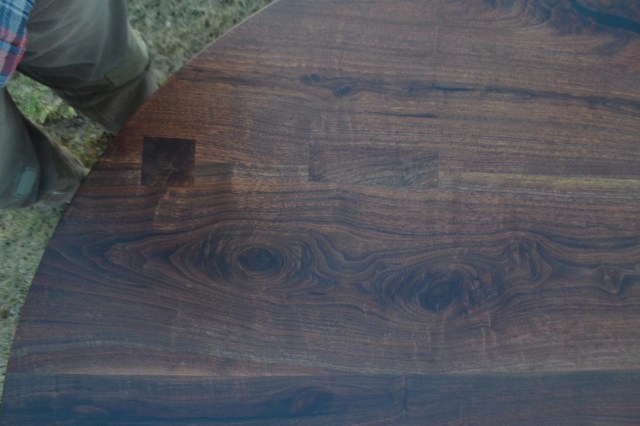
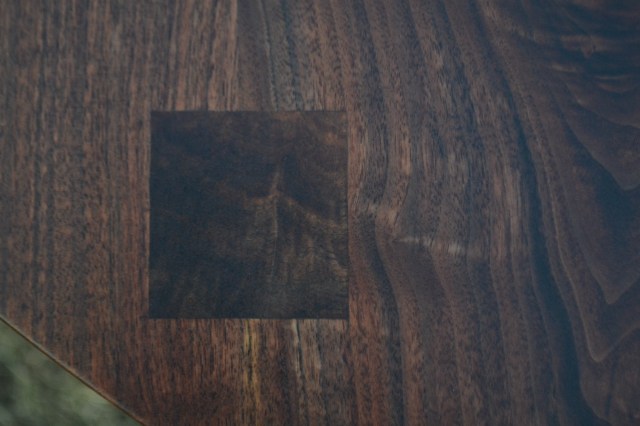
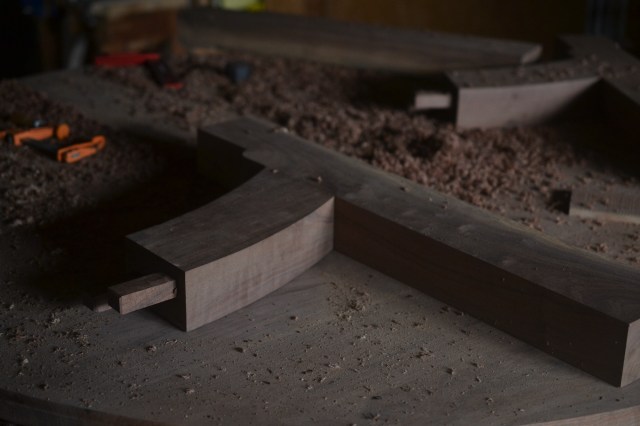
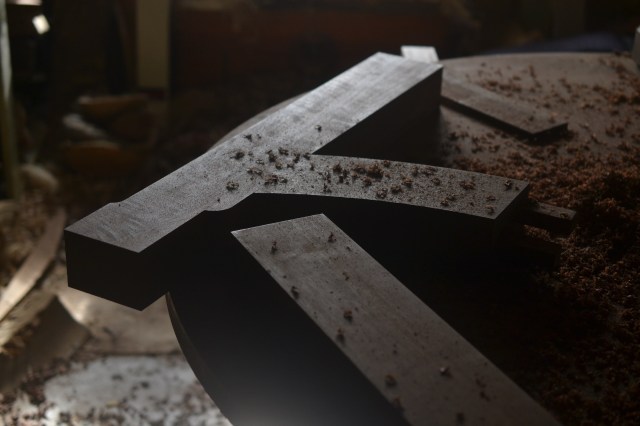
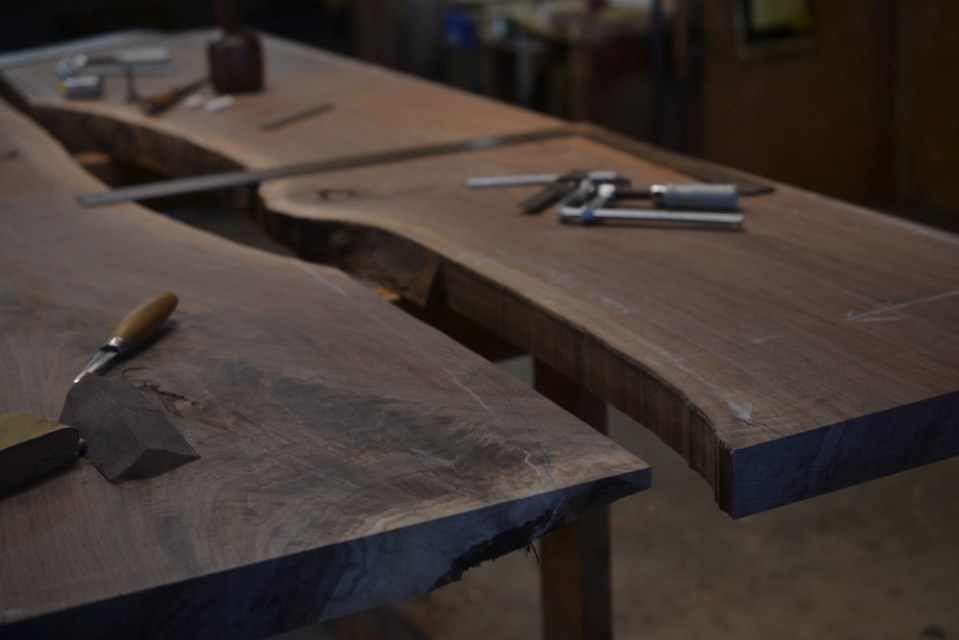
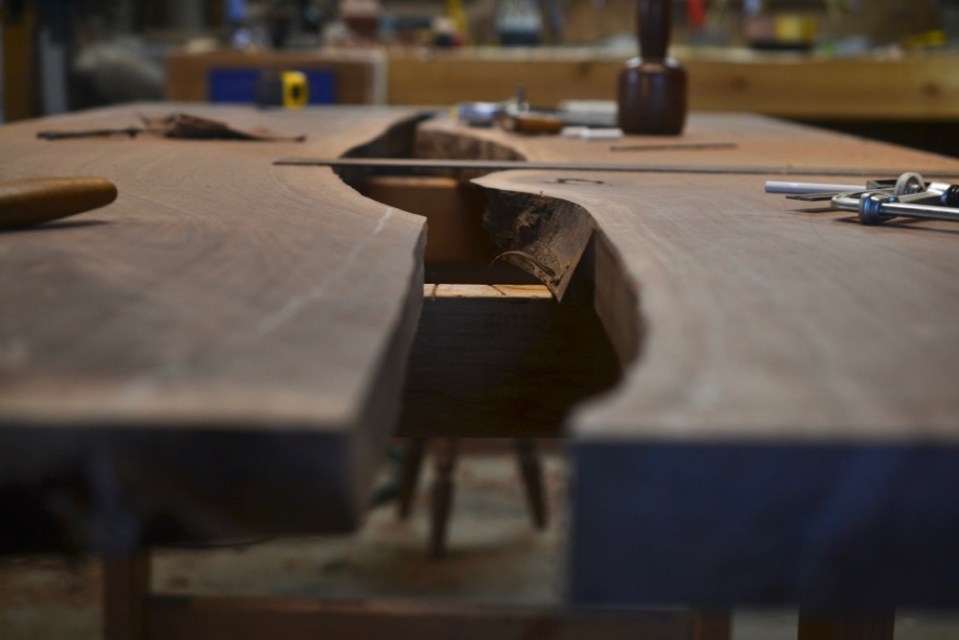
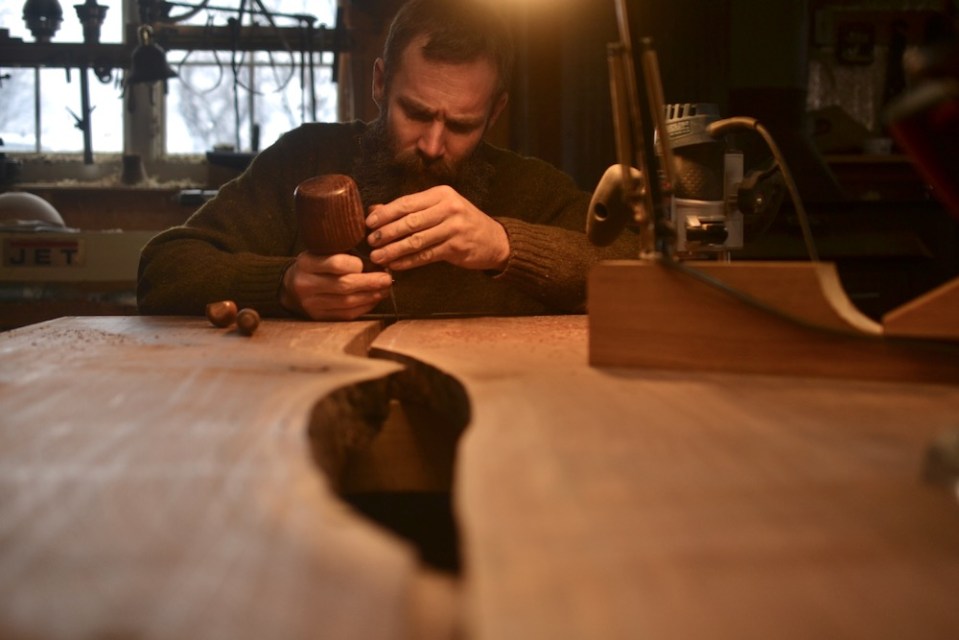
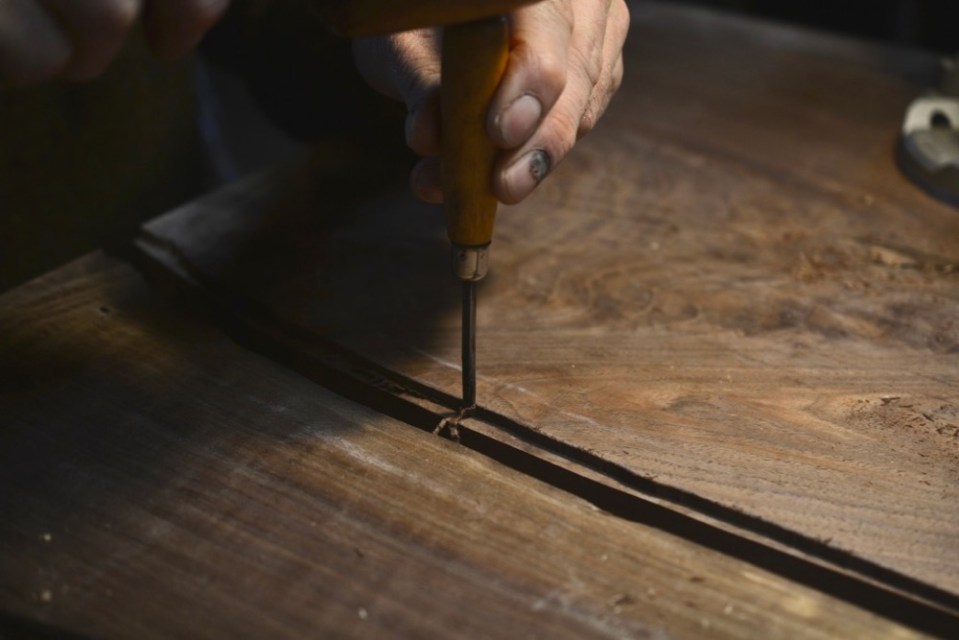
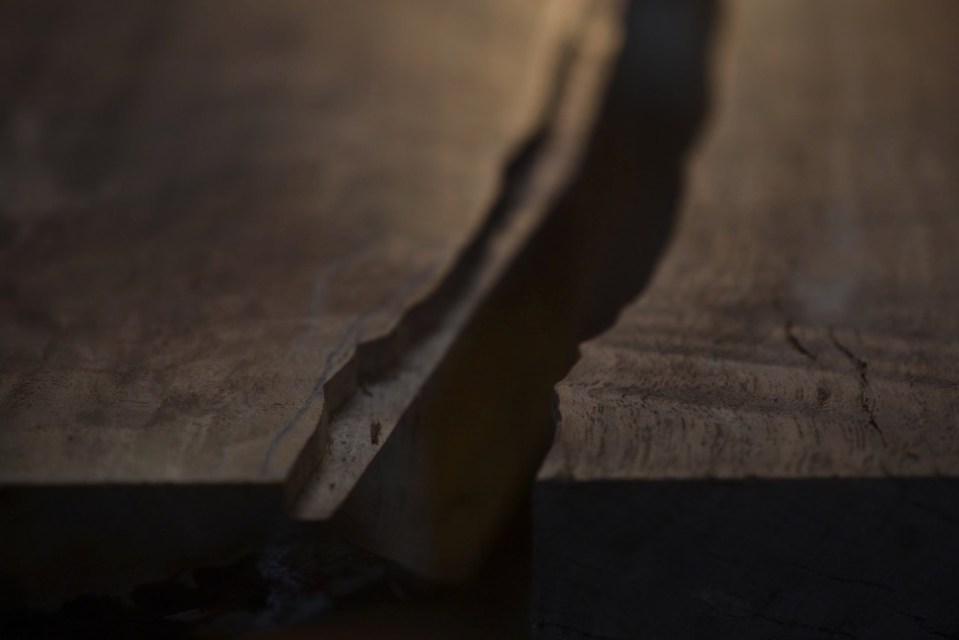
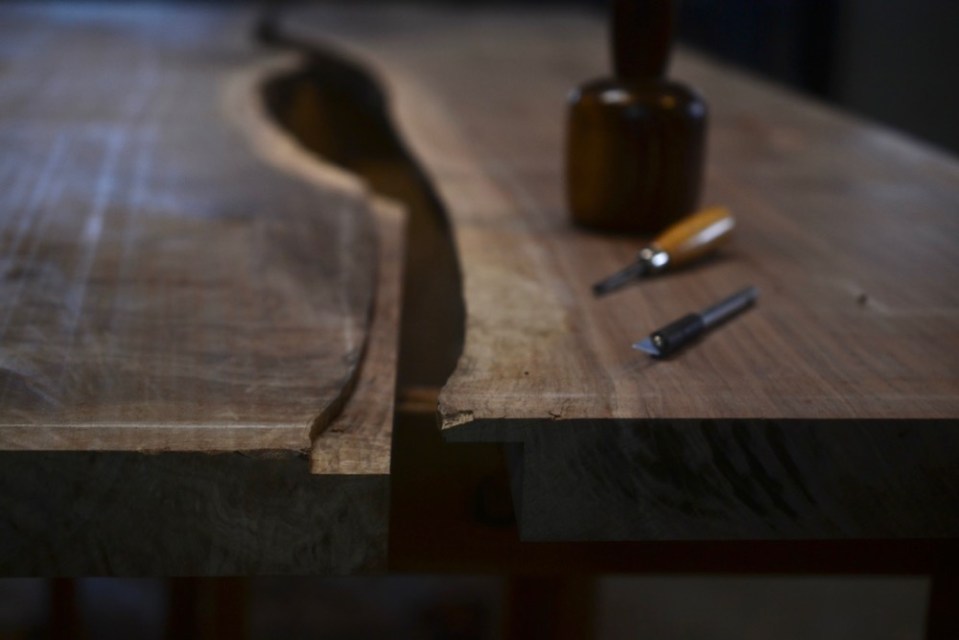
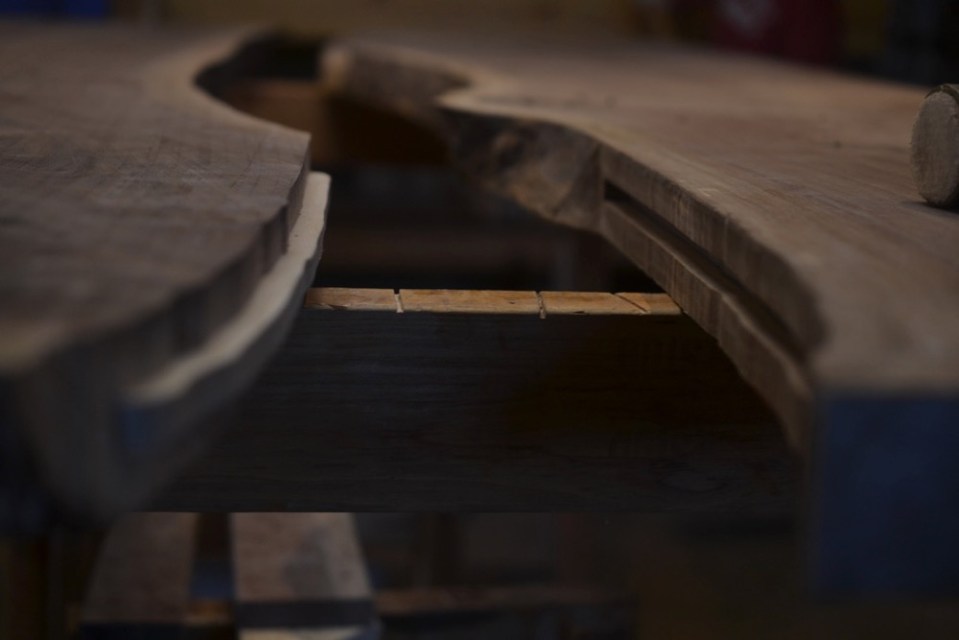
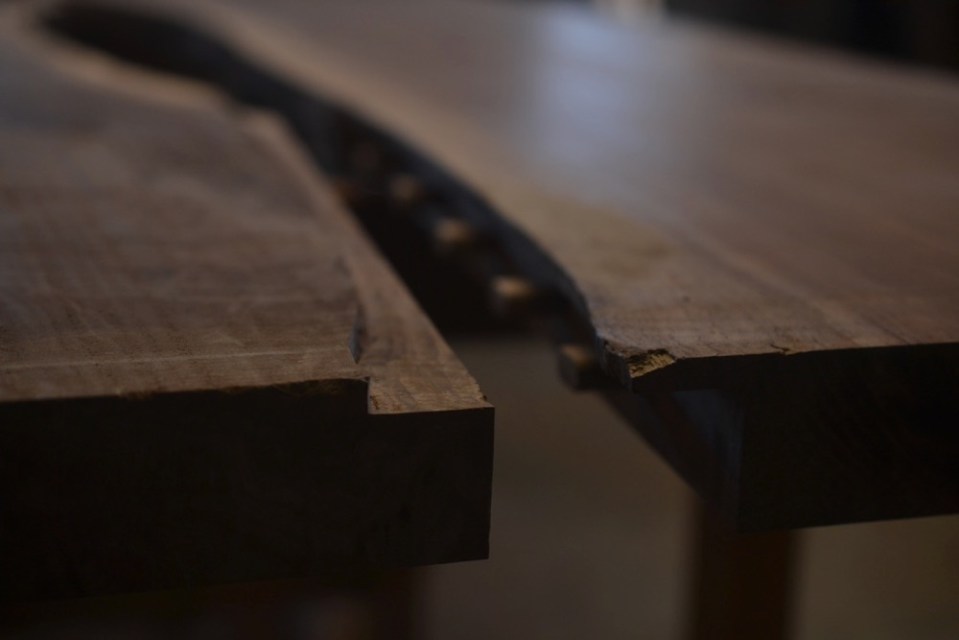
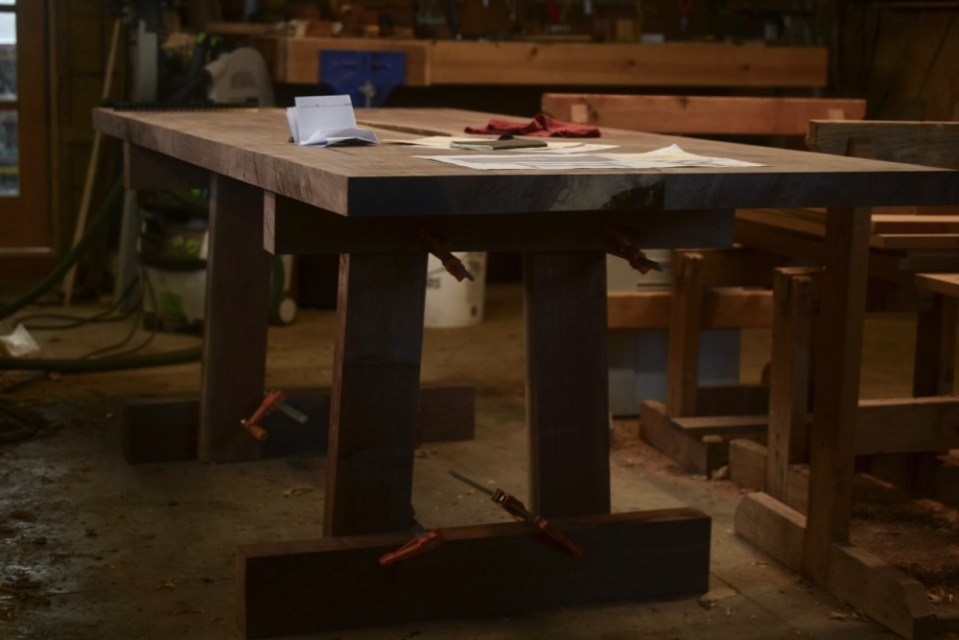
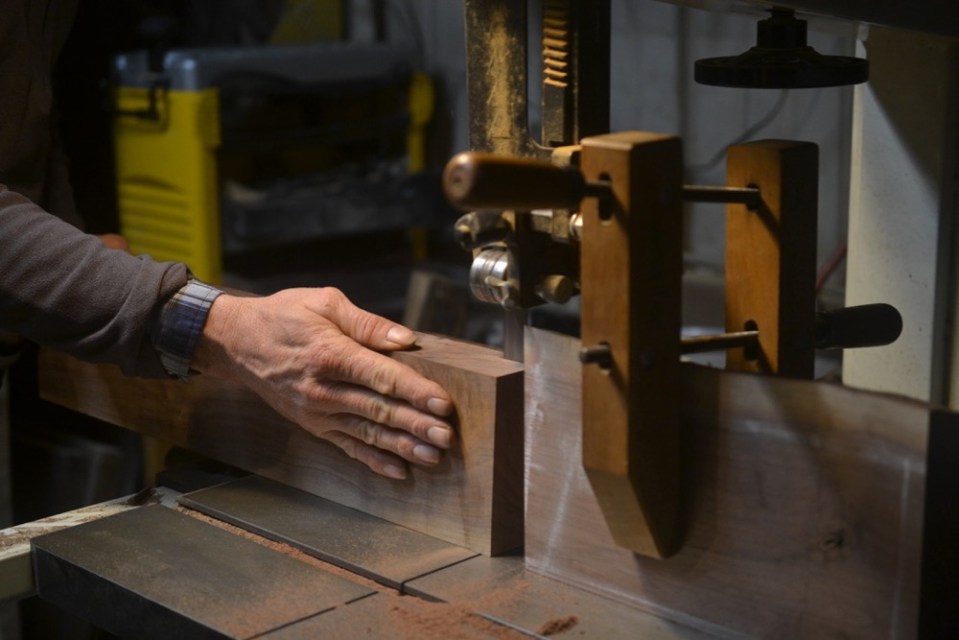
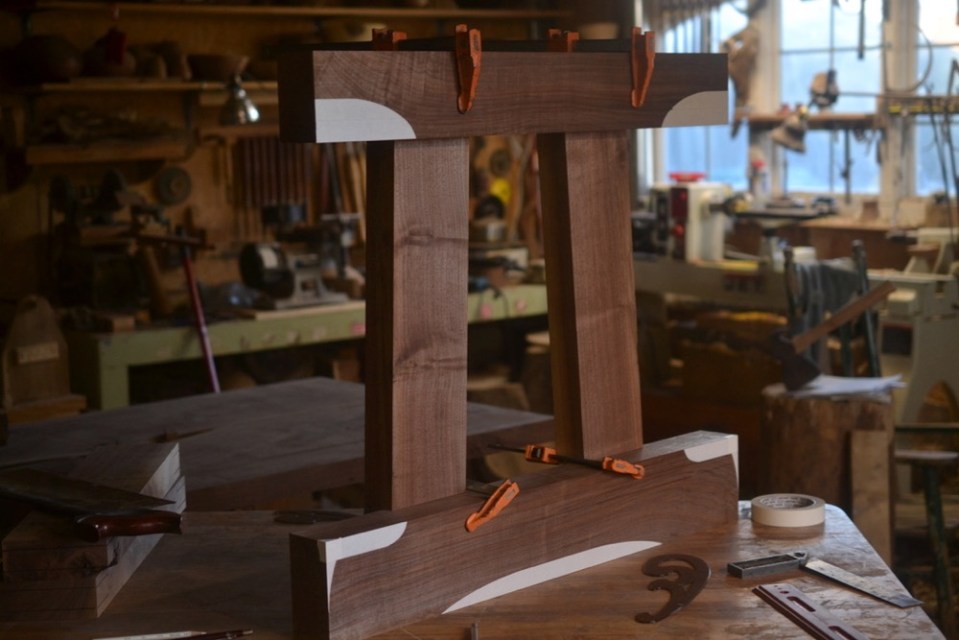
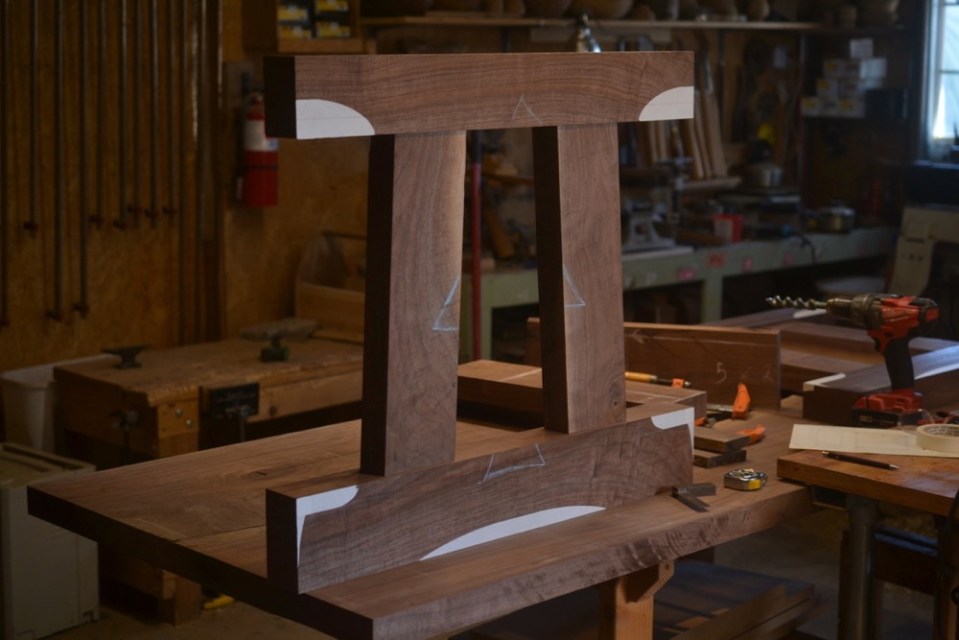
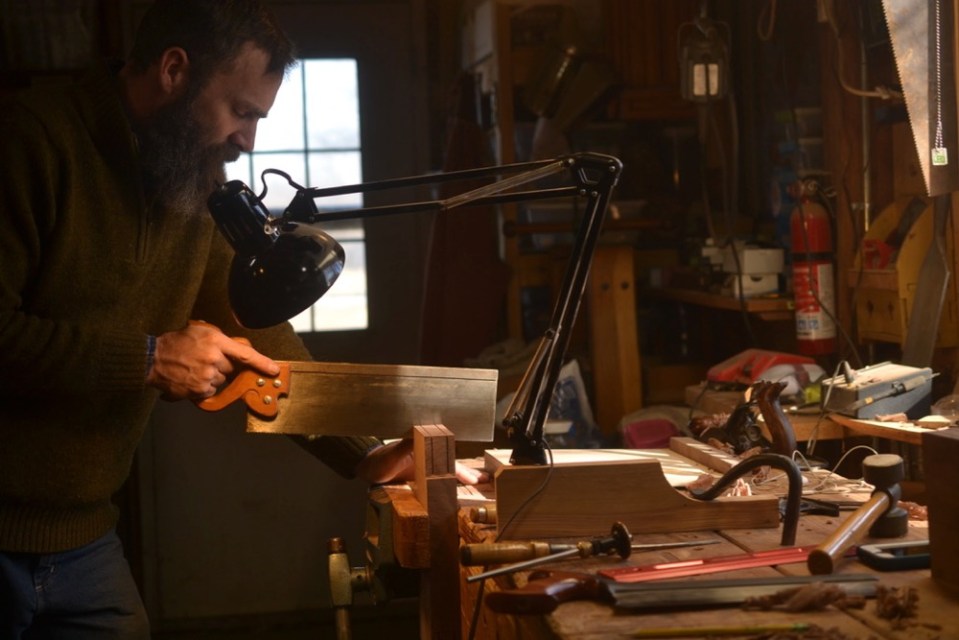
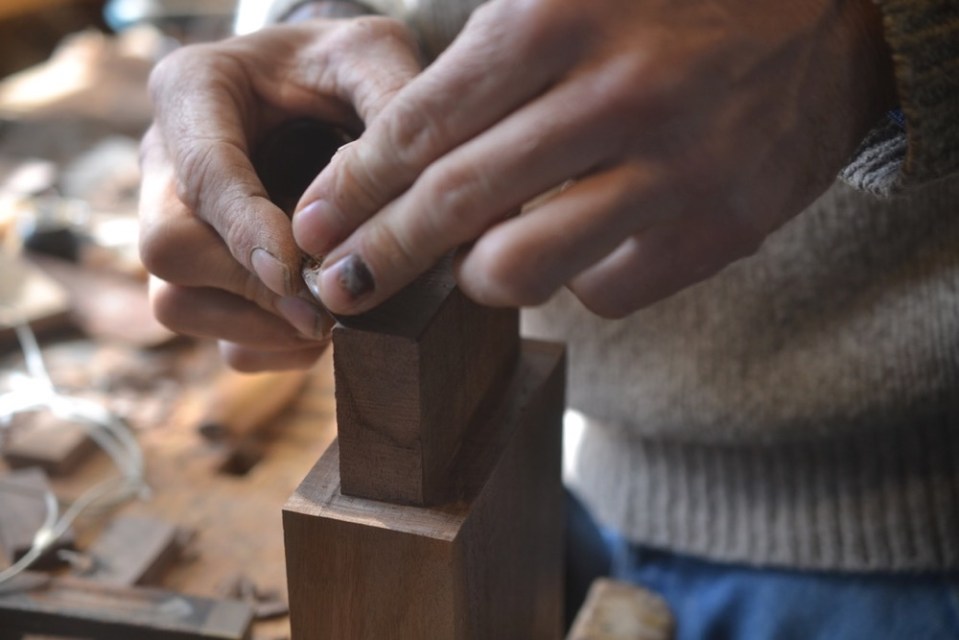
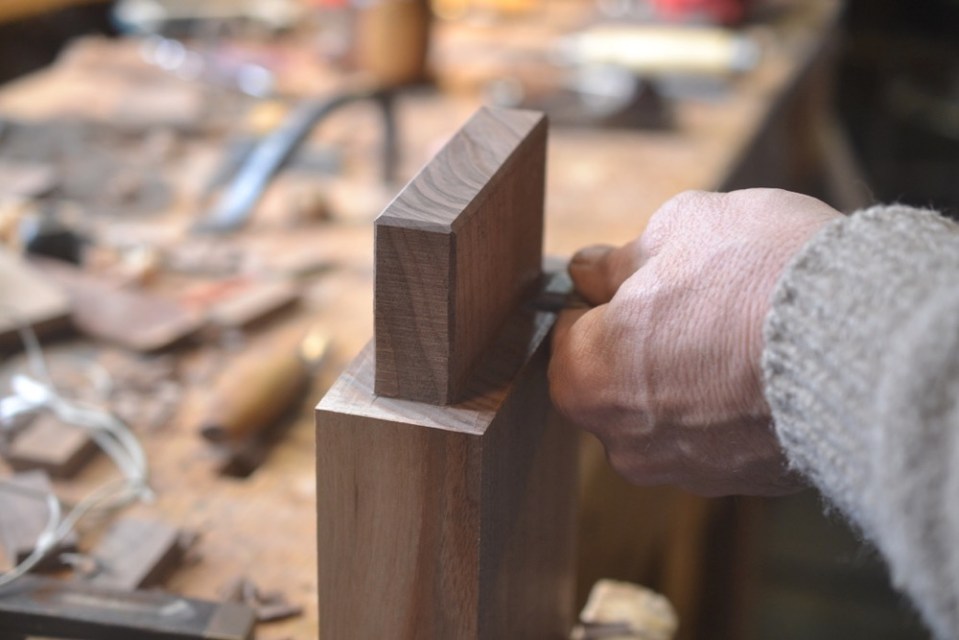
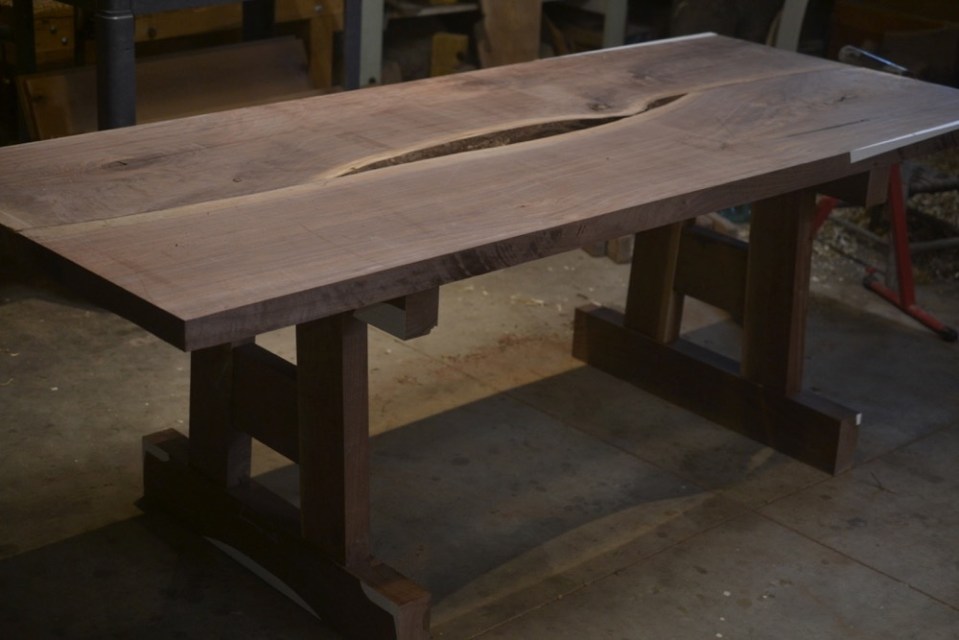
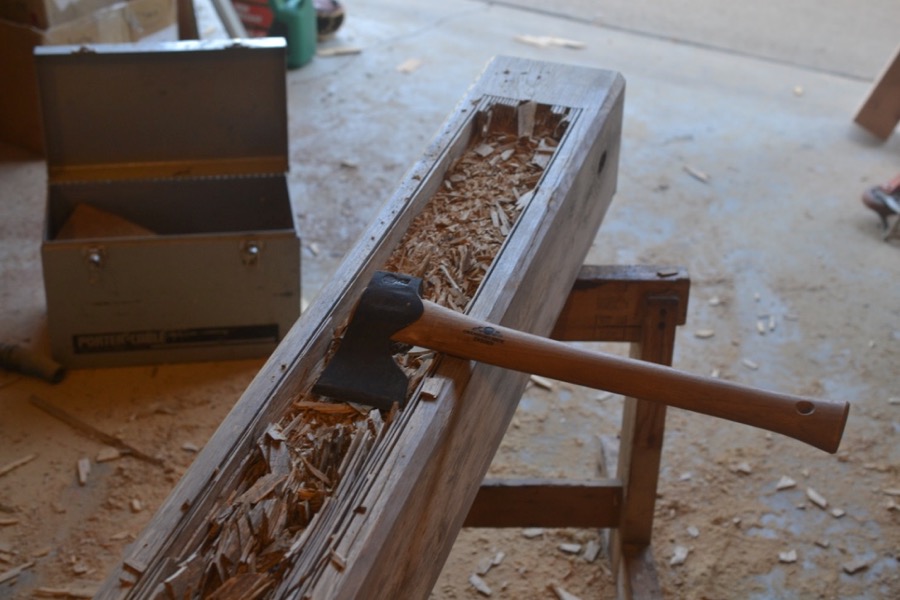
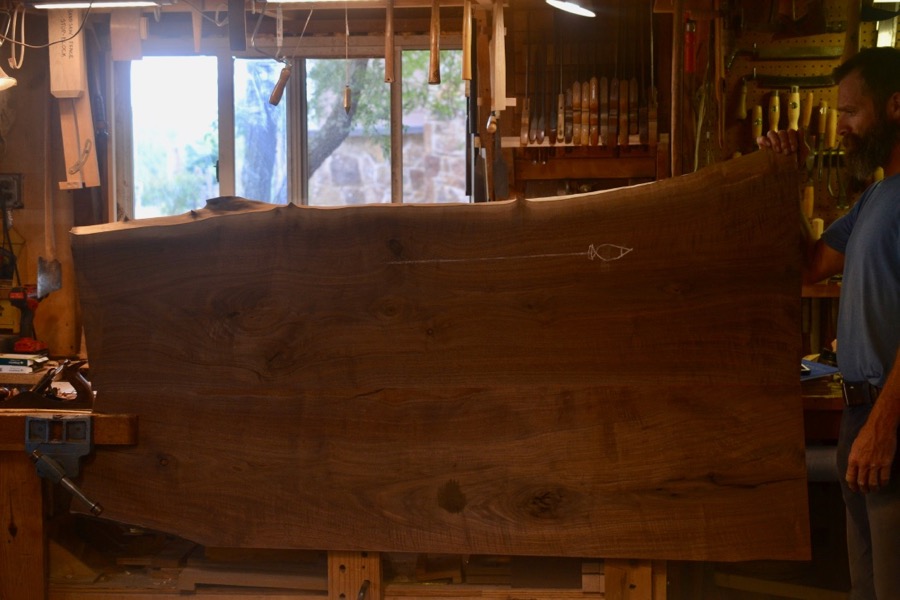
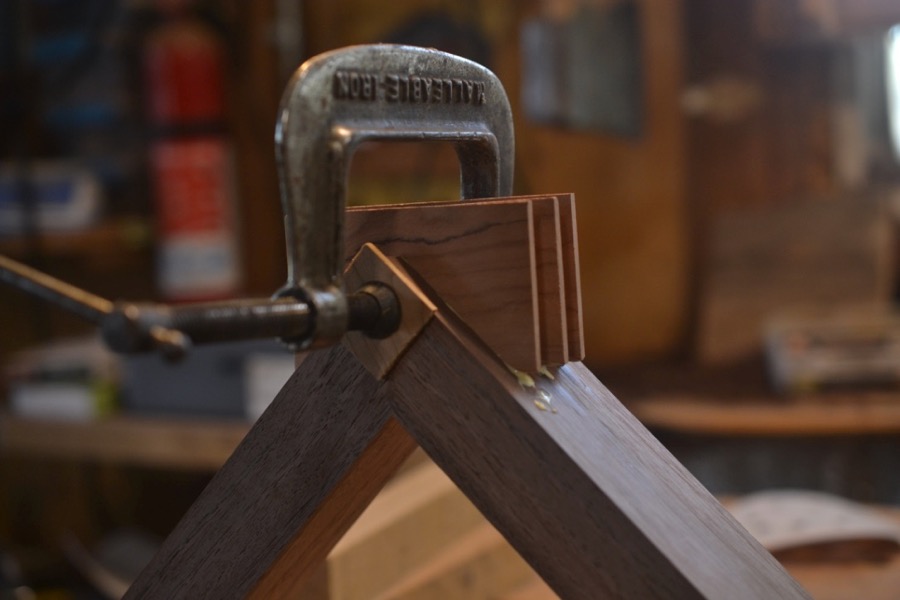
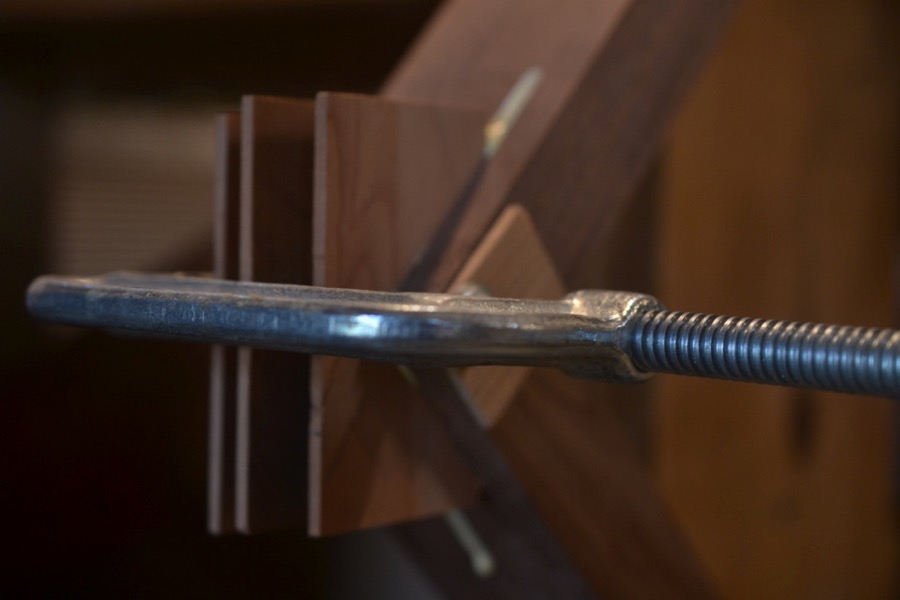
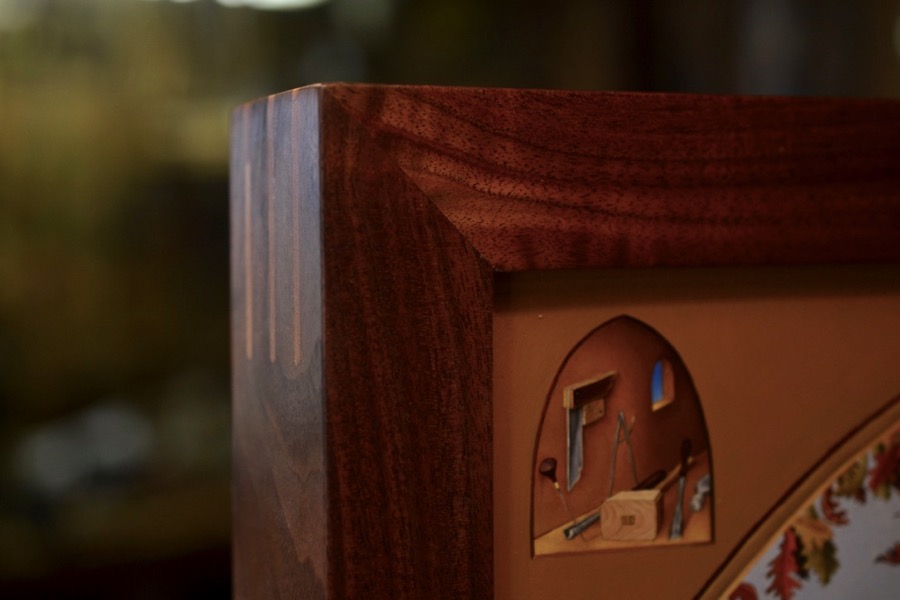
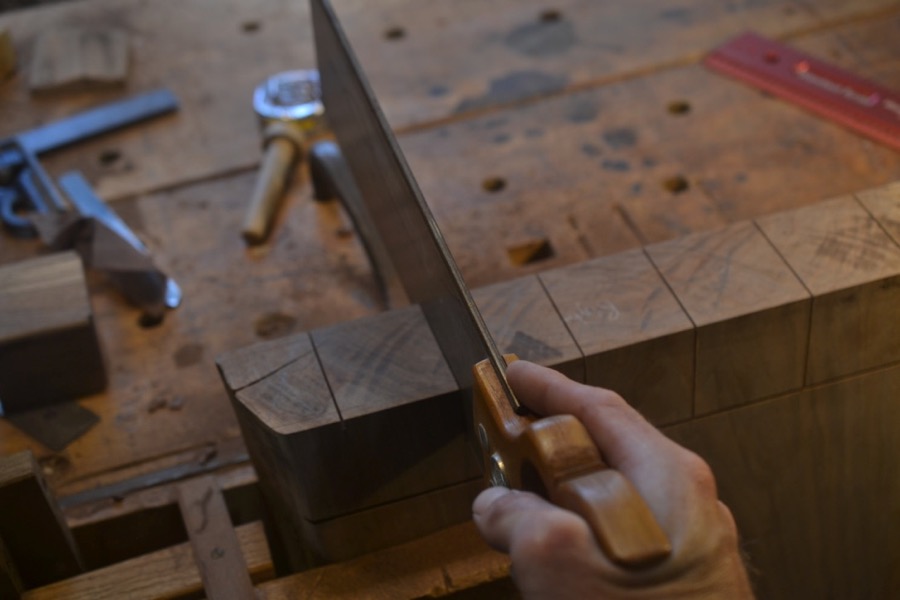
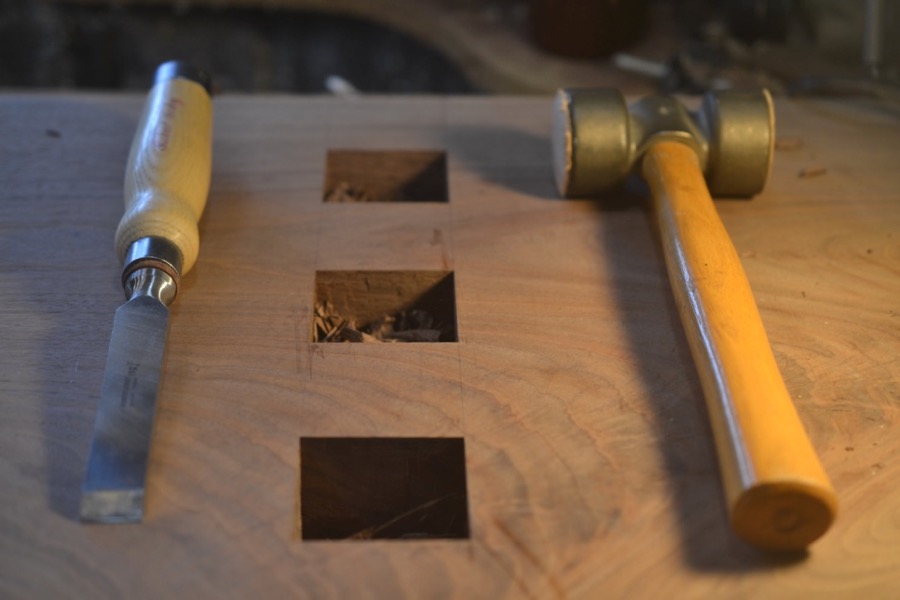
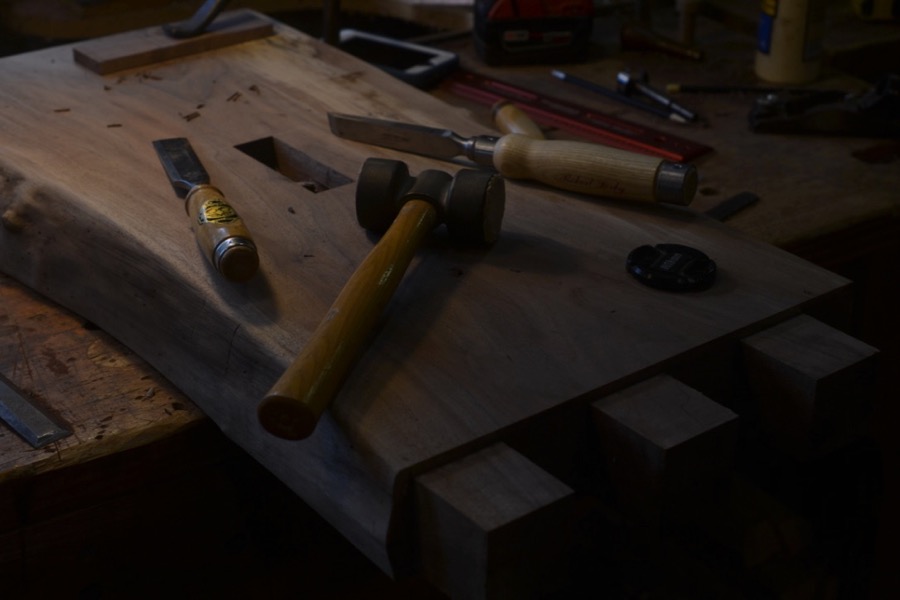
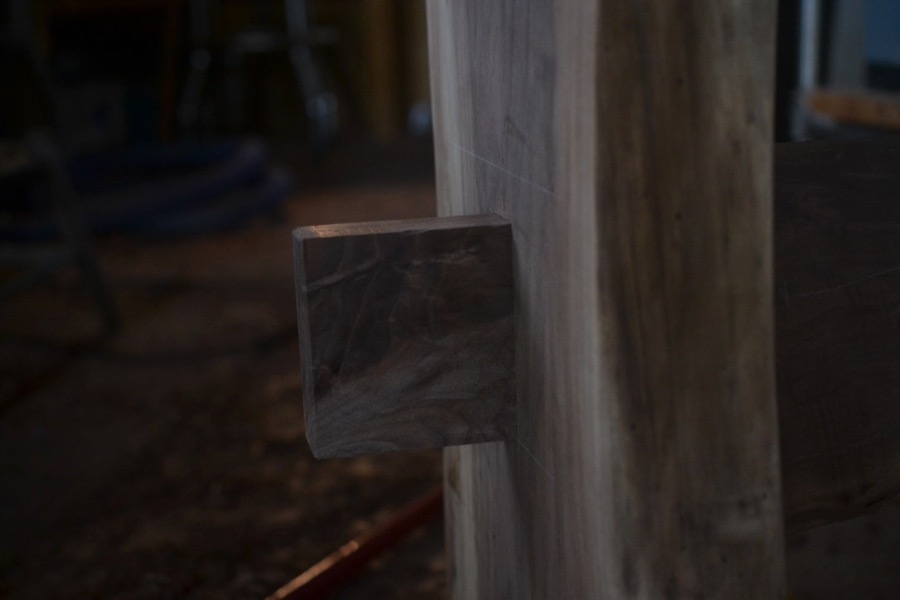
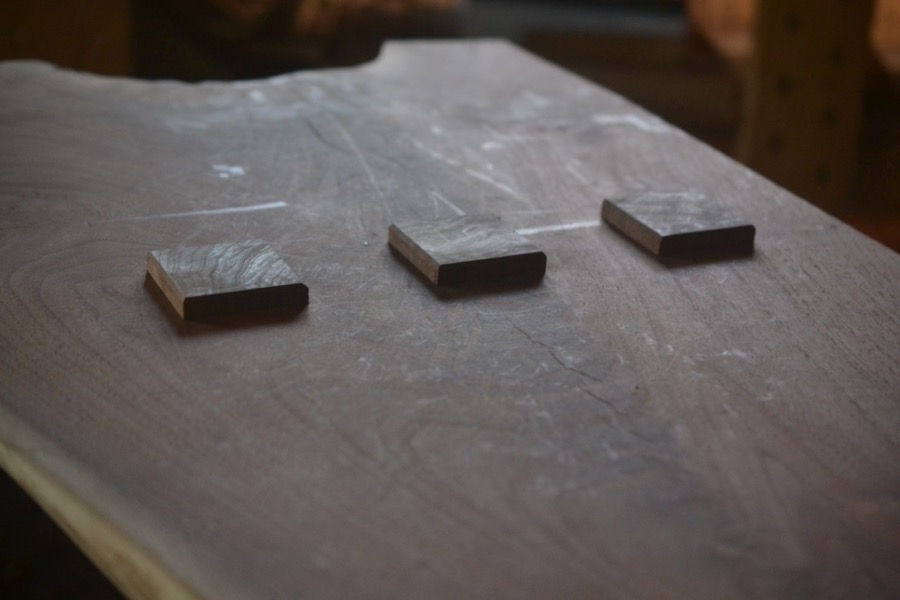
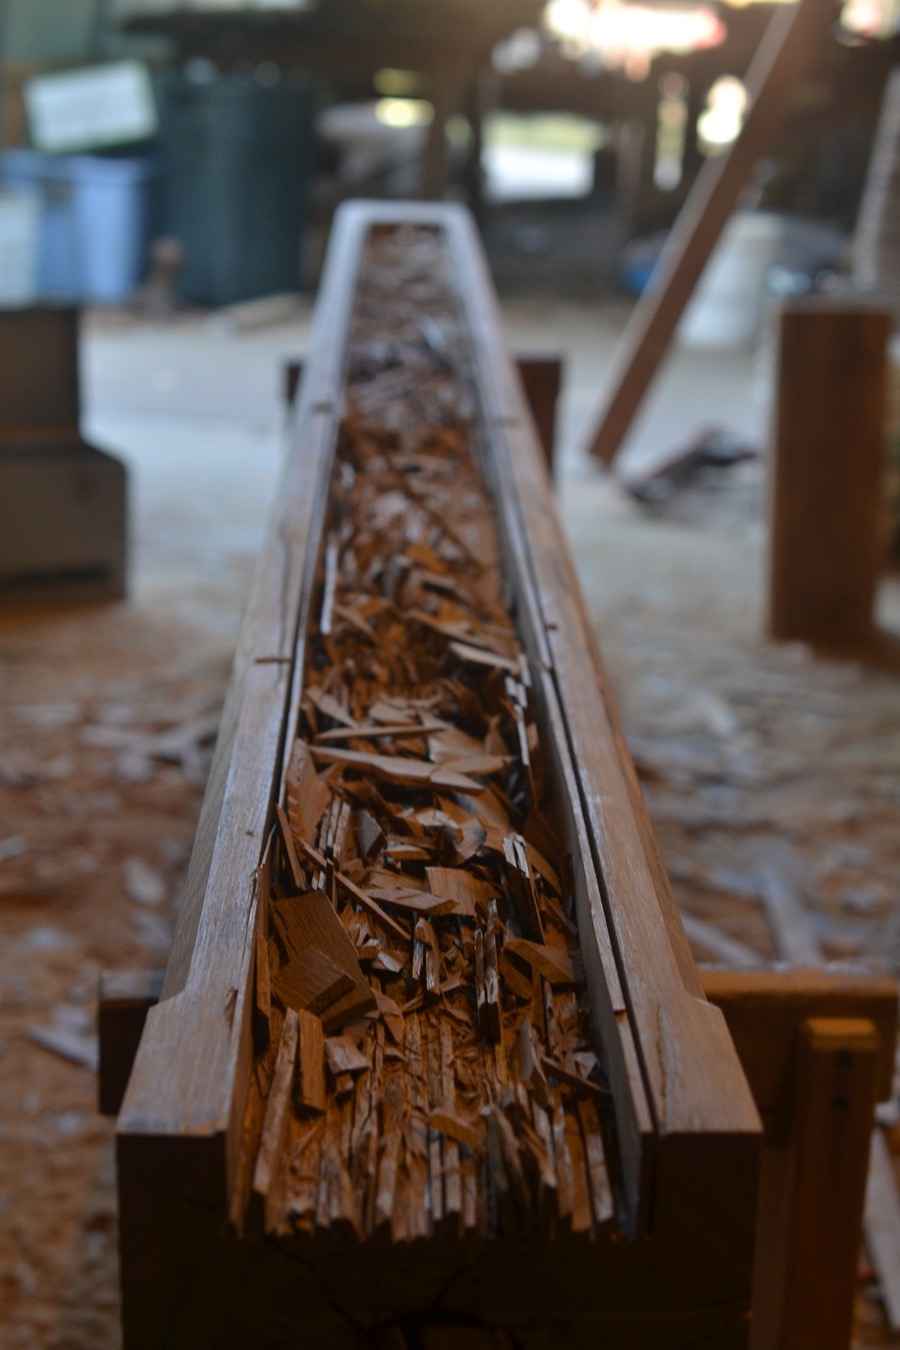
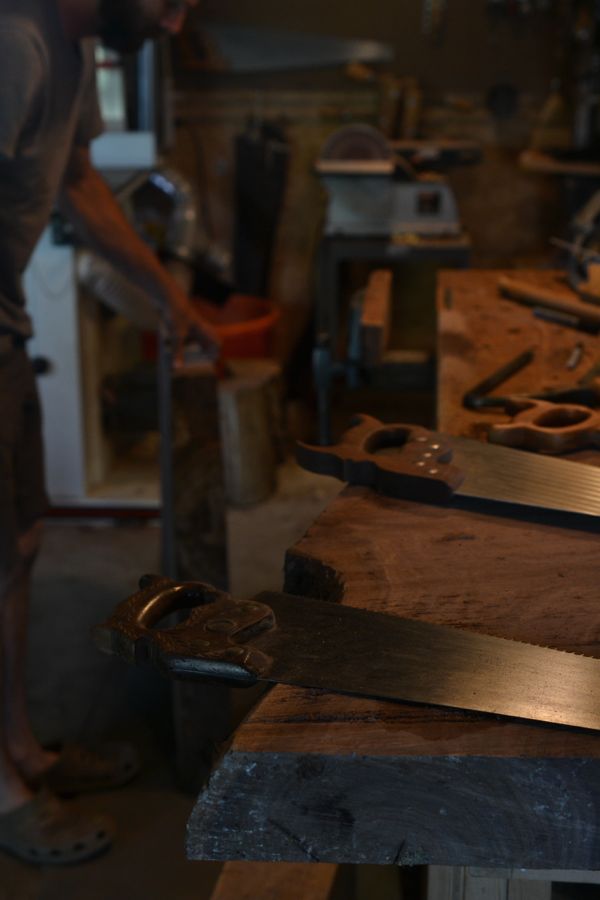
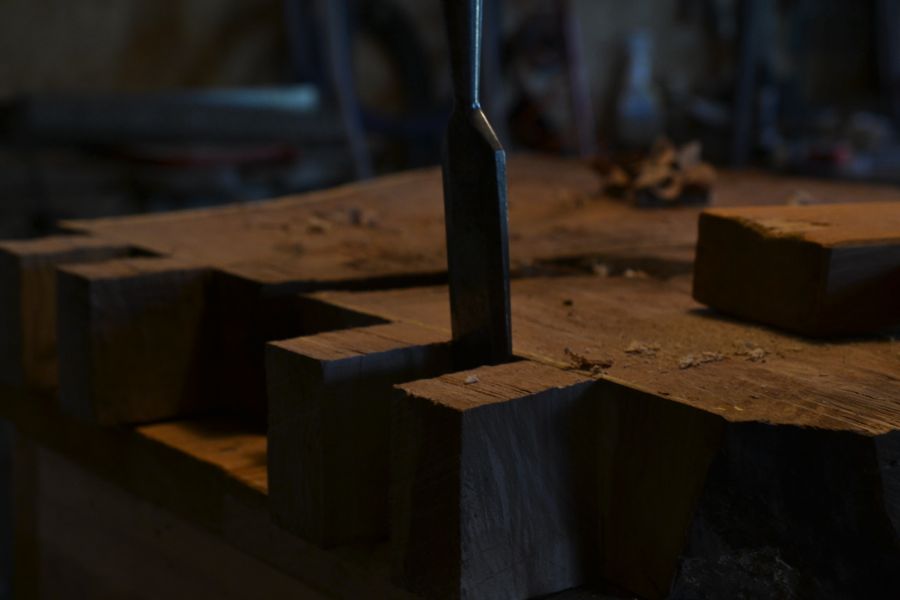
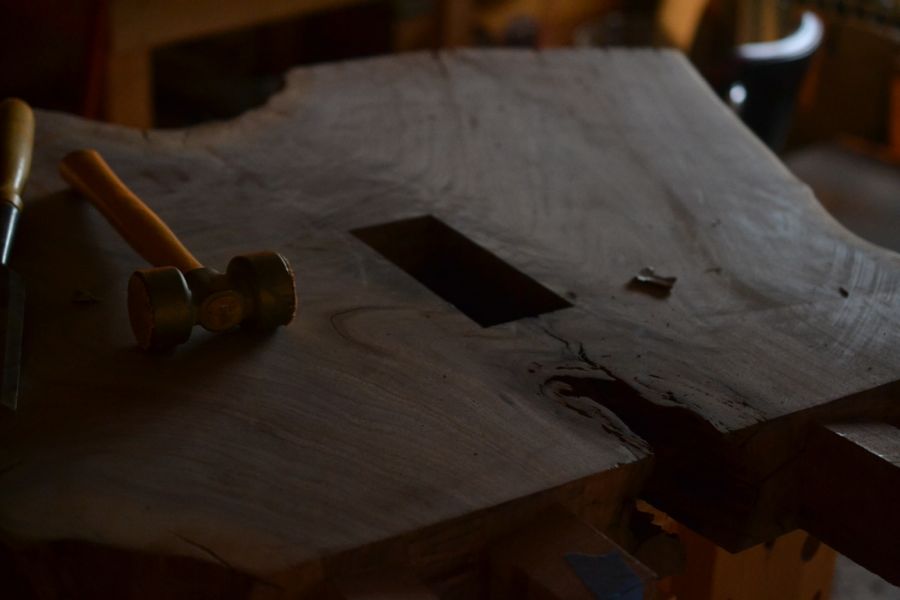
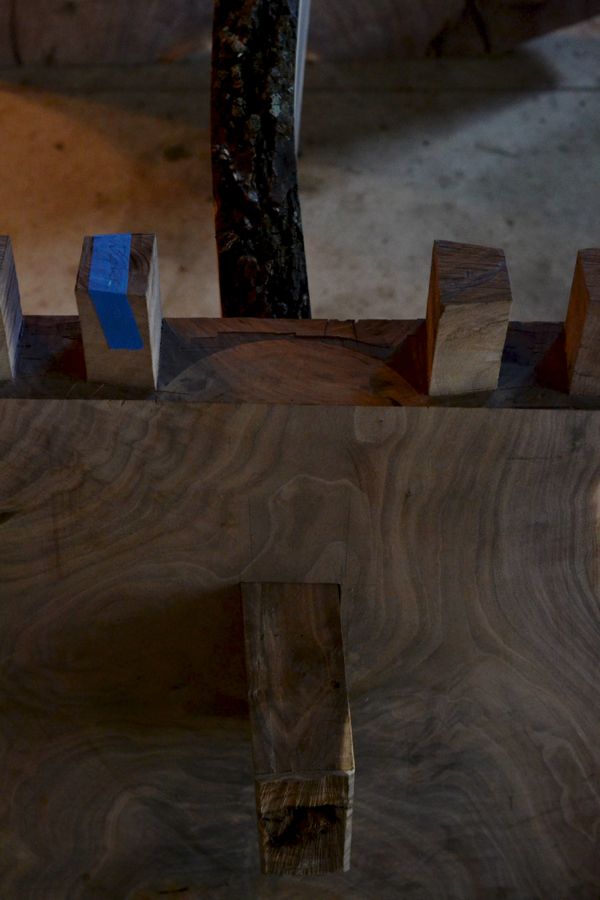
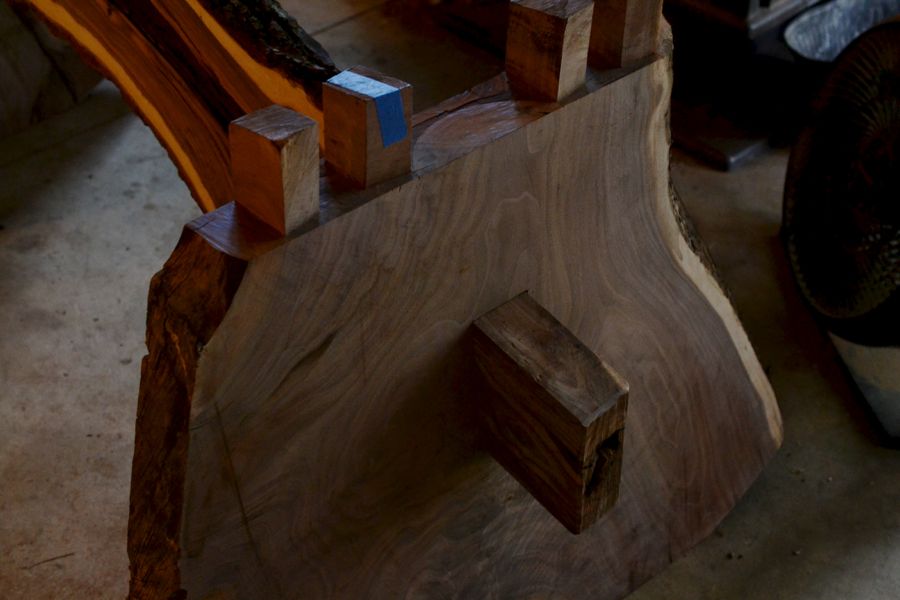
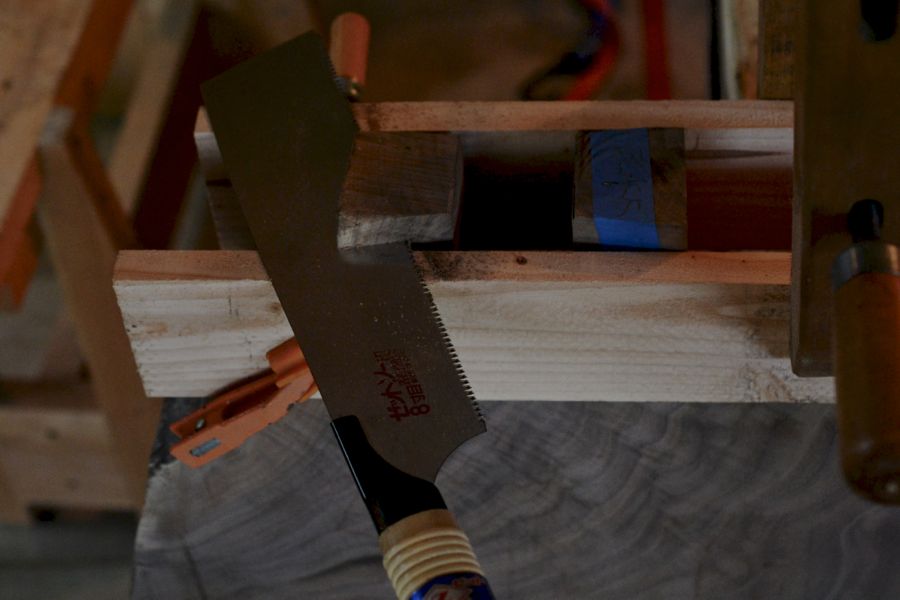
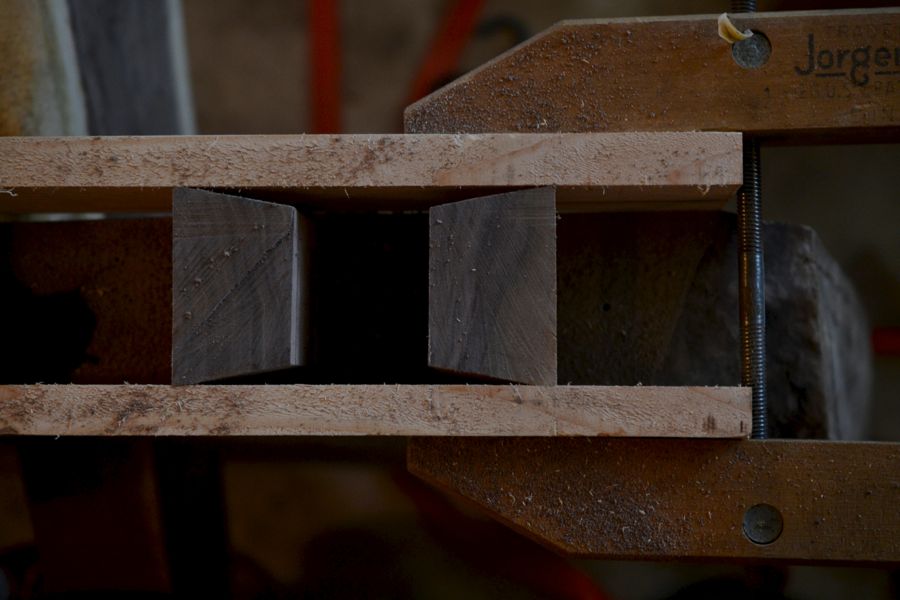
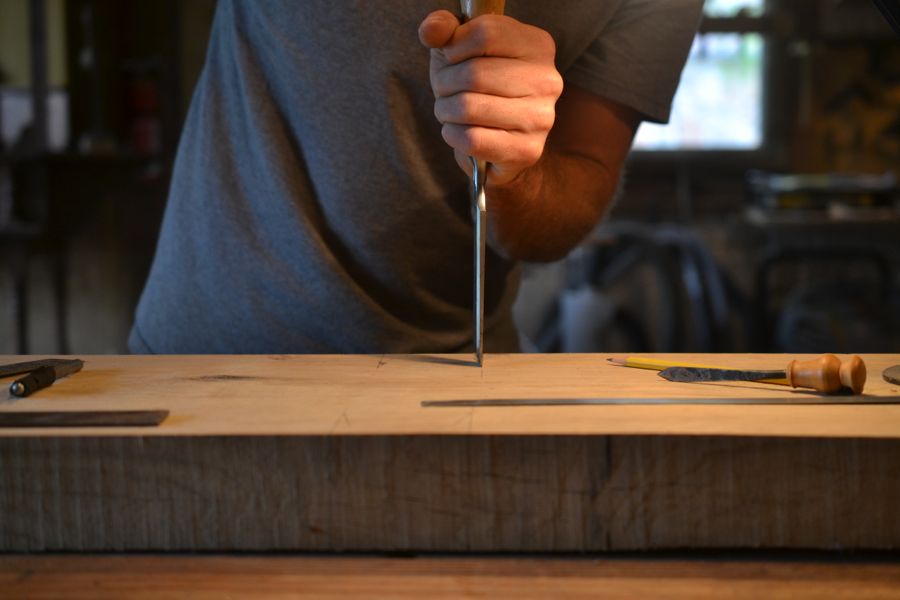
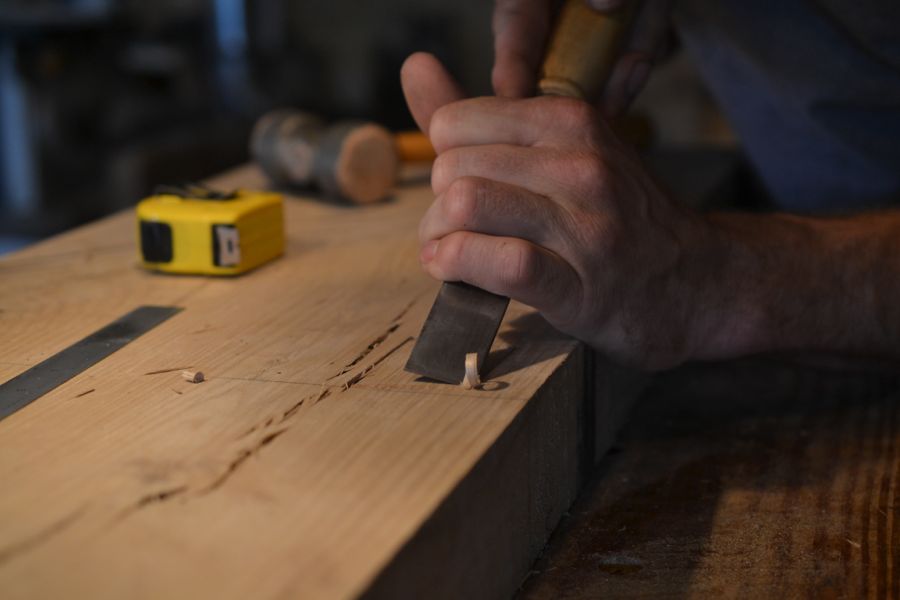
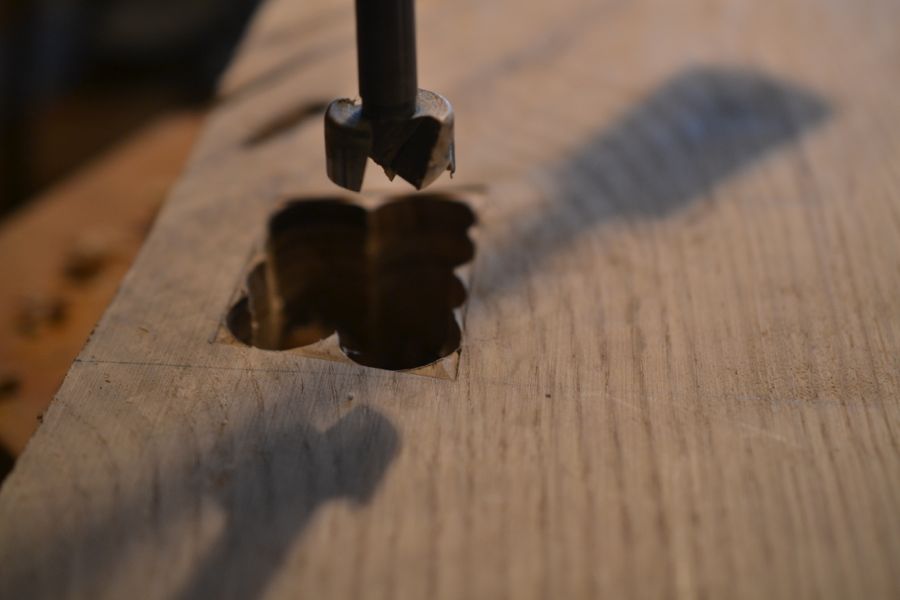
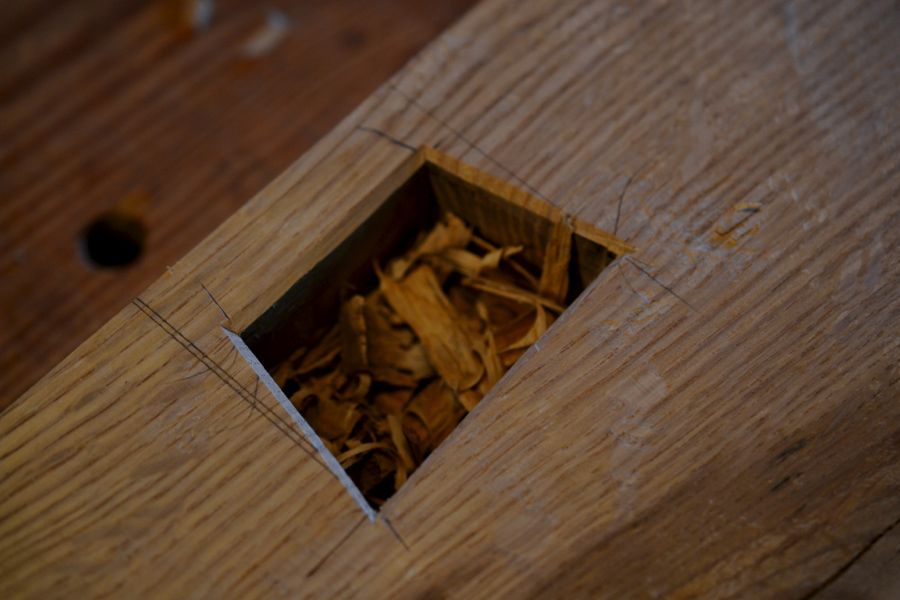
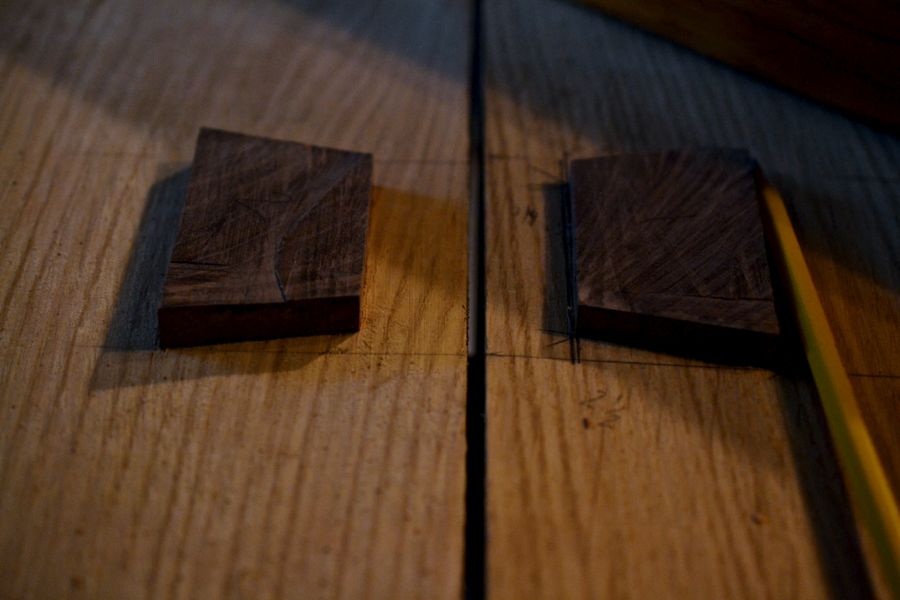
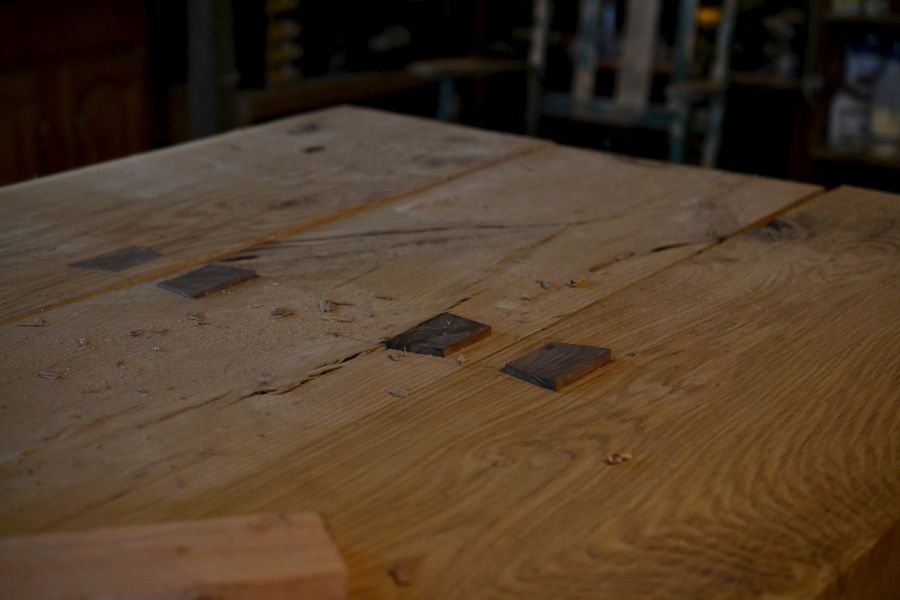
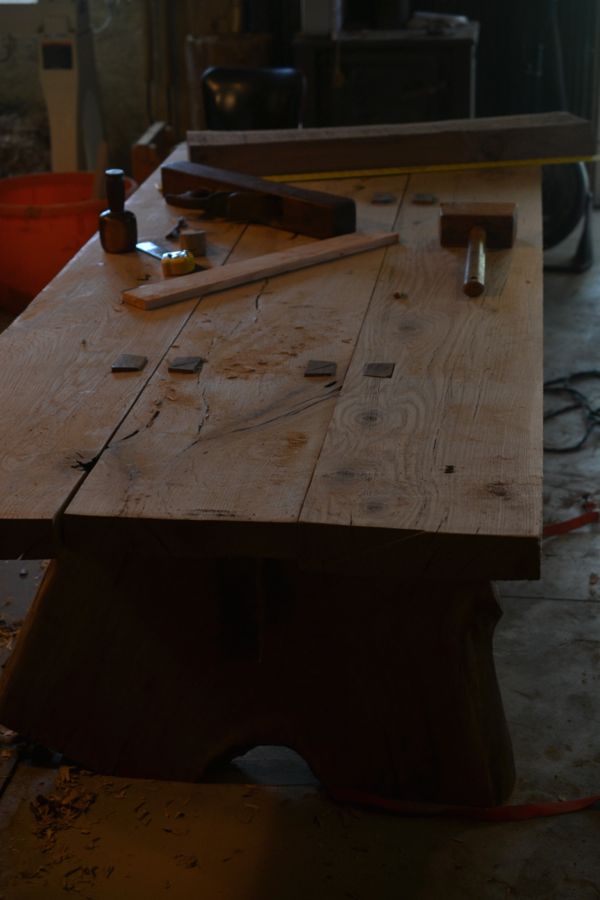
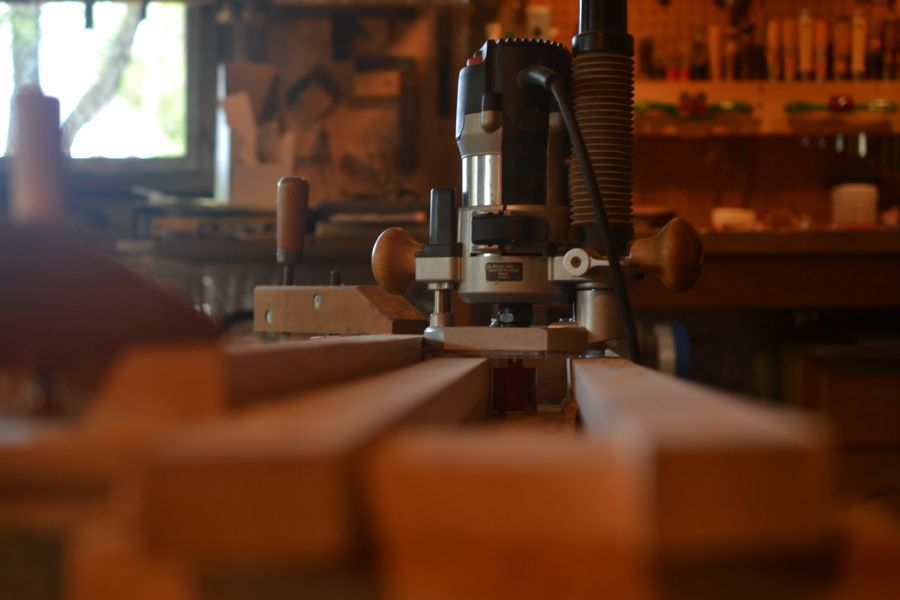
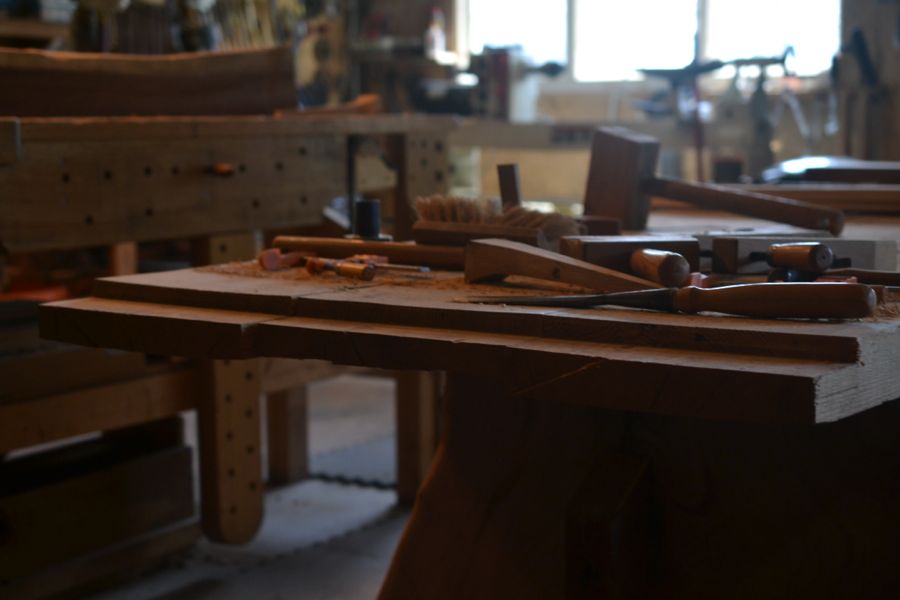
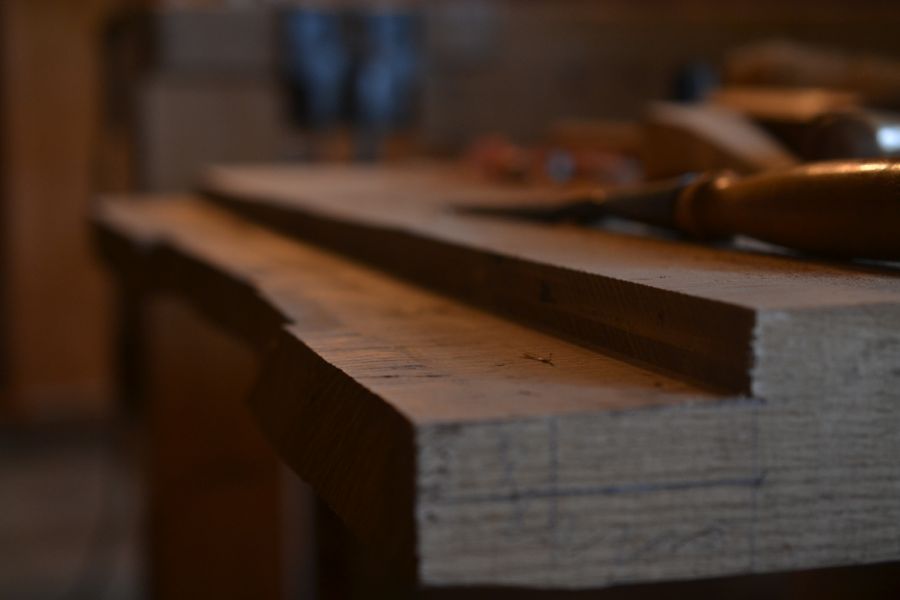
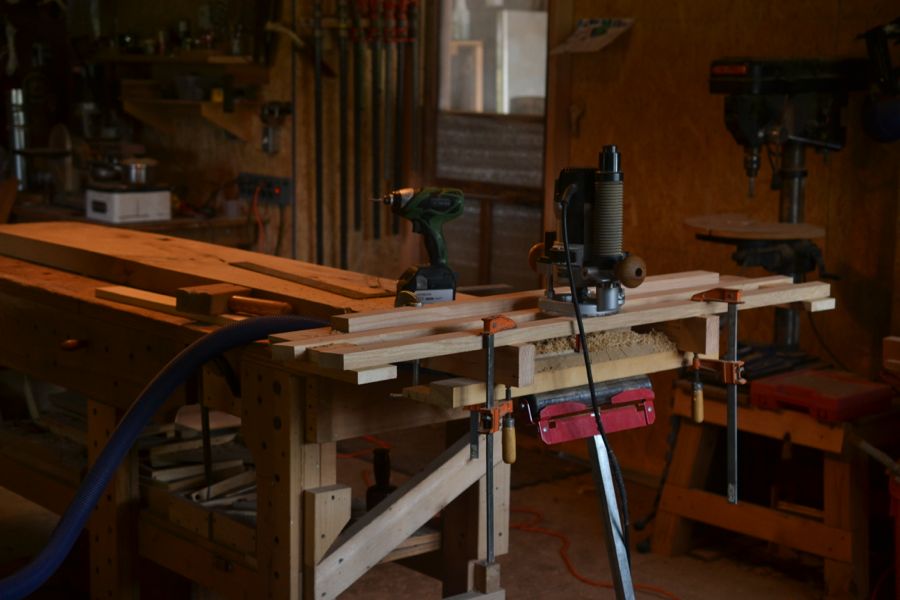
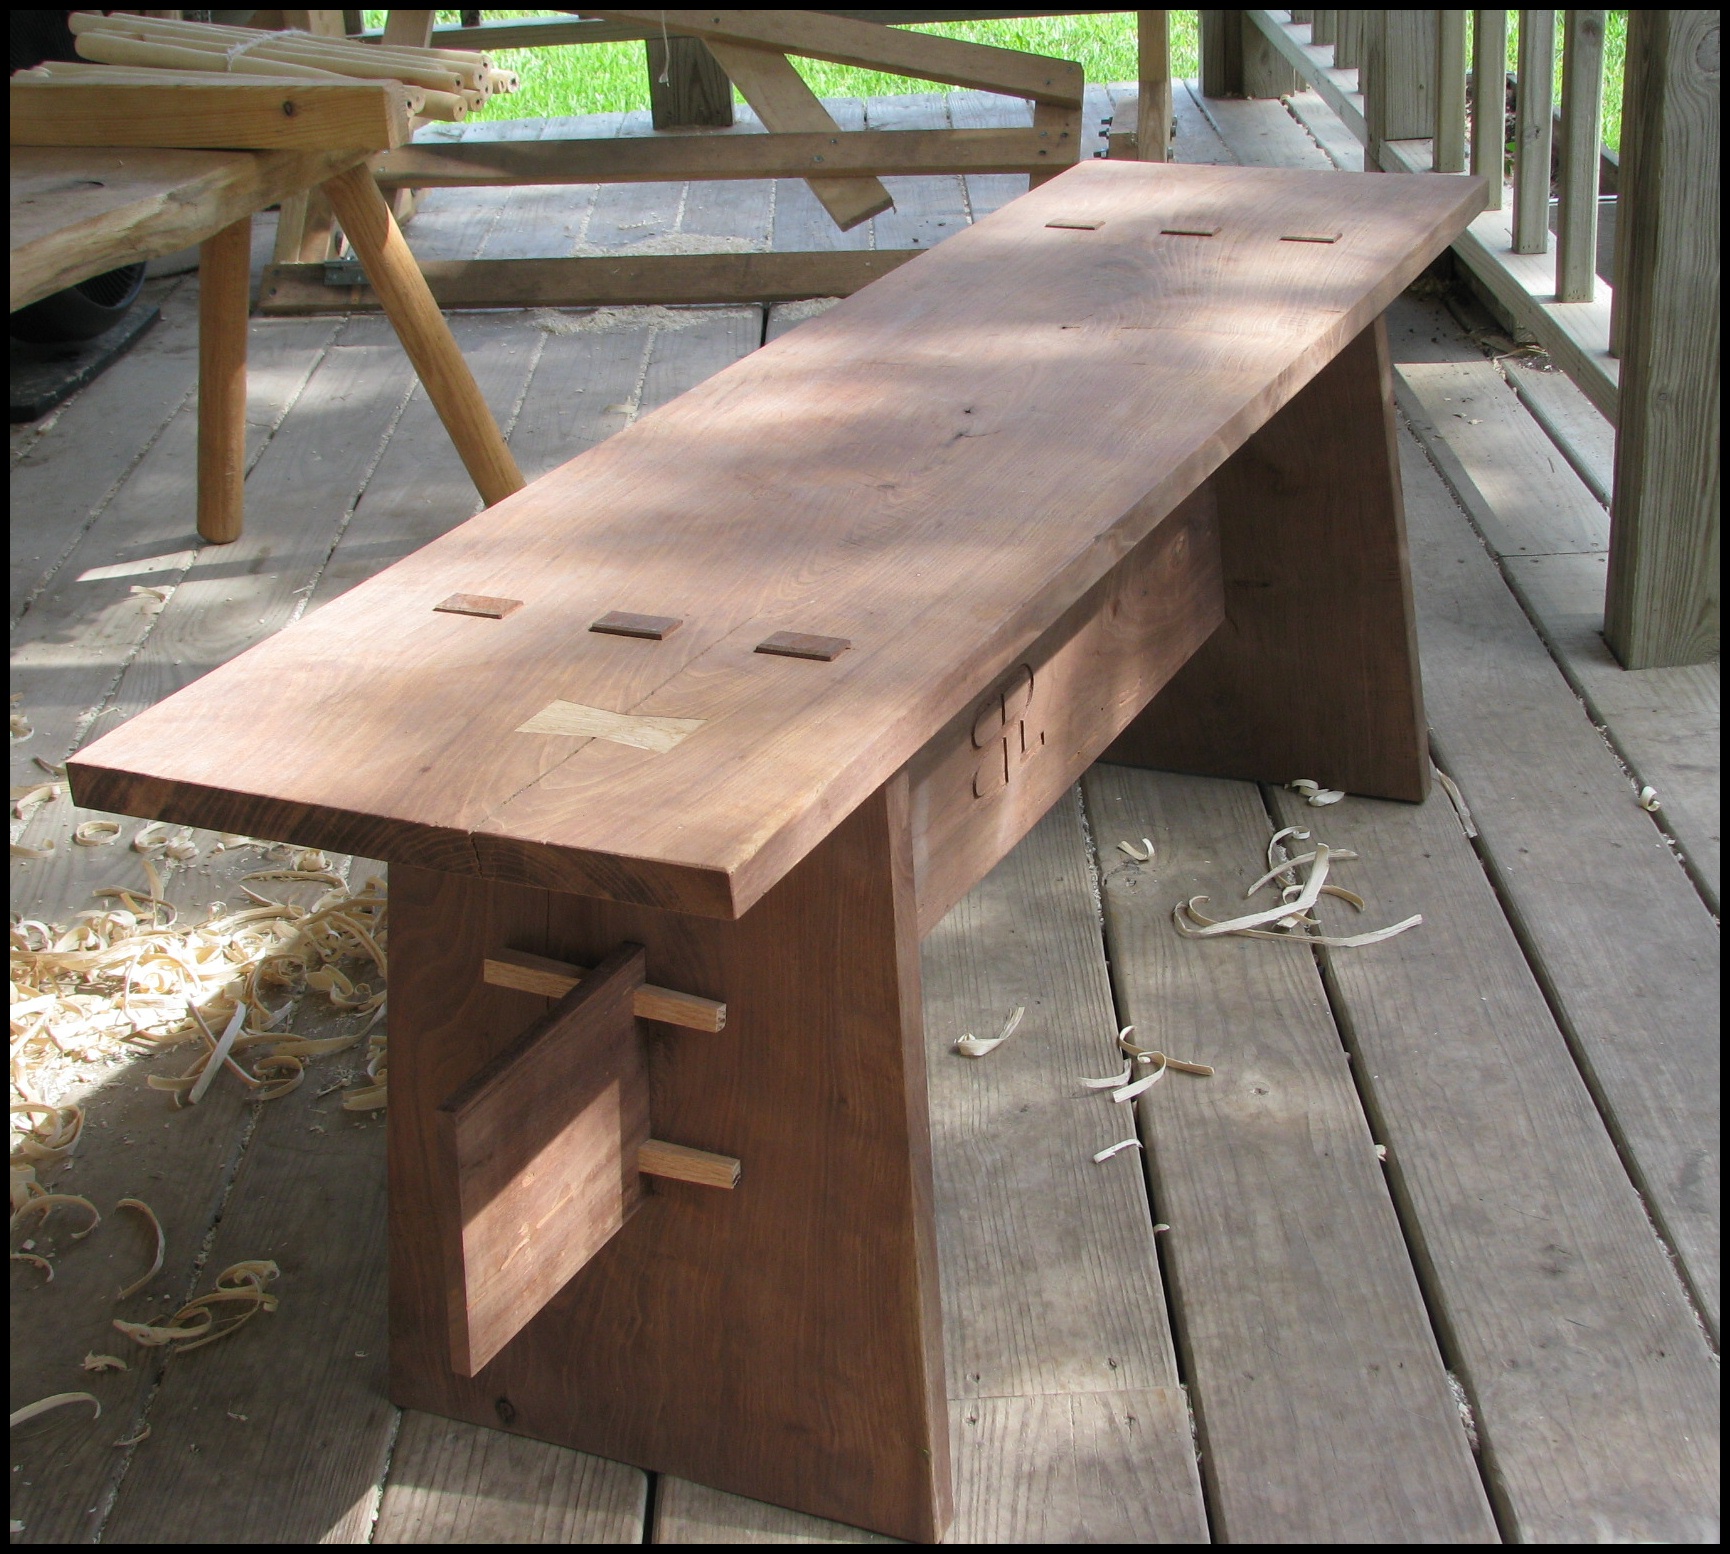
There are over 500 ebony and walnut butterfly joints throughout the pieces. Many of these serve a structural function, in knitting together knots and fractures throughout the slabs. We made the decision to use them aesthetically and rhythmically as well, in an attempt to interact with the movement and tension present in the slabs and their juxtapositions. Every butterfly was individually made and cut in by hand. This isn’t necessarily a testament to skill, but to the frail beauty of hand made lines versus machined perfection. The long labor isn’t to impress, but hopes to be a contemplative act of prayer in process, and to invite and serve that same response in the viewer.

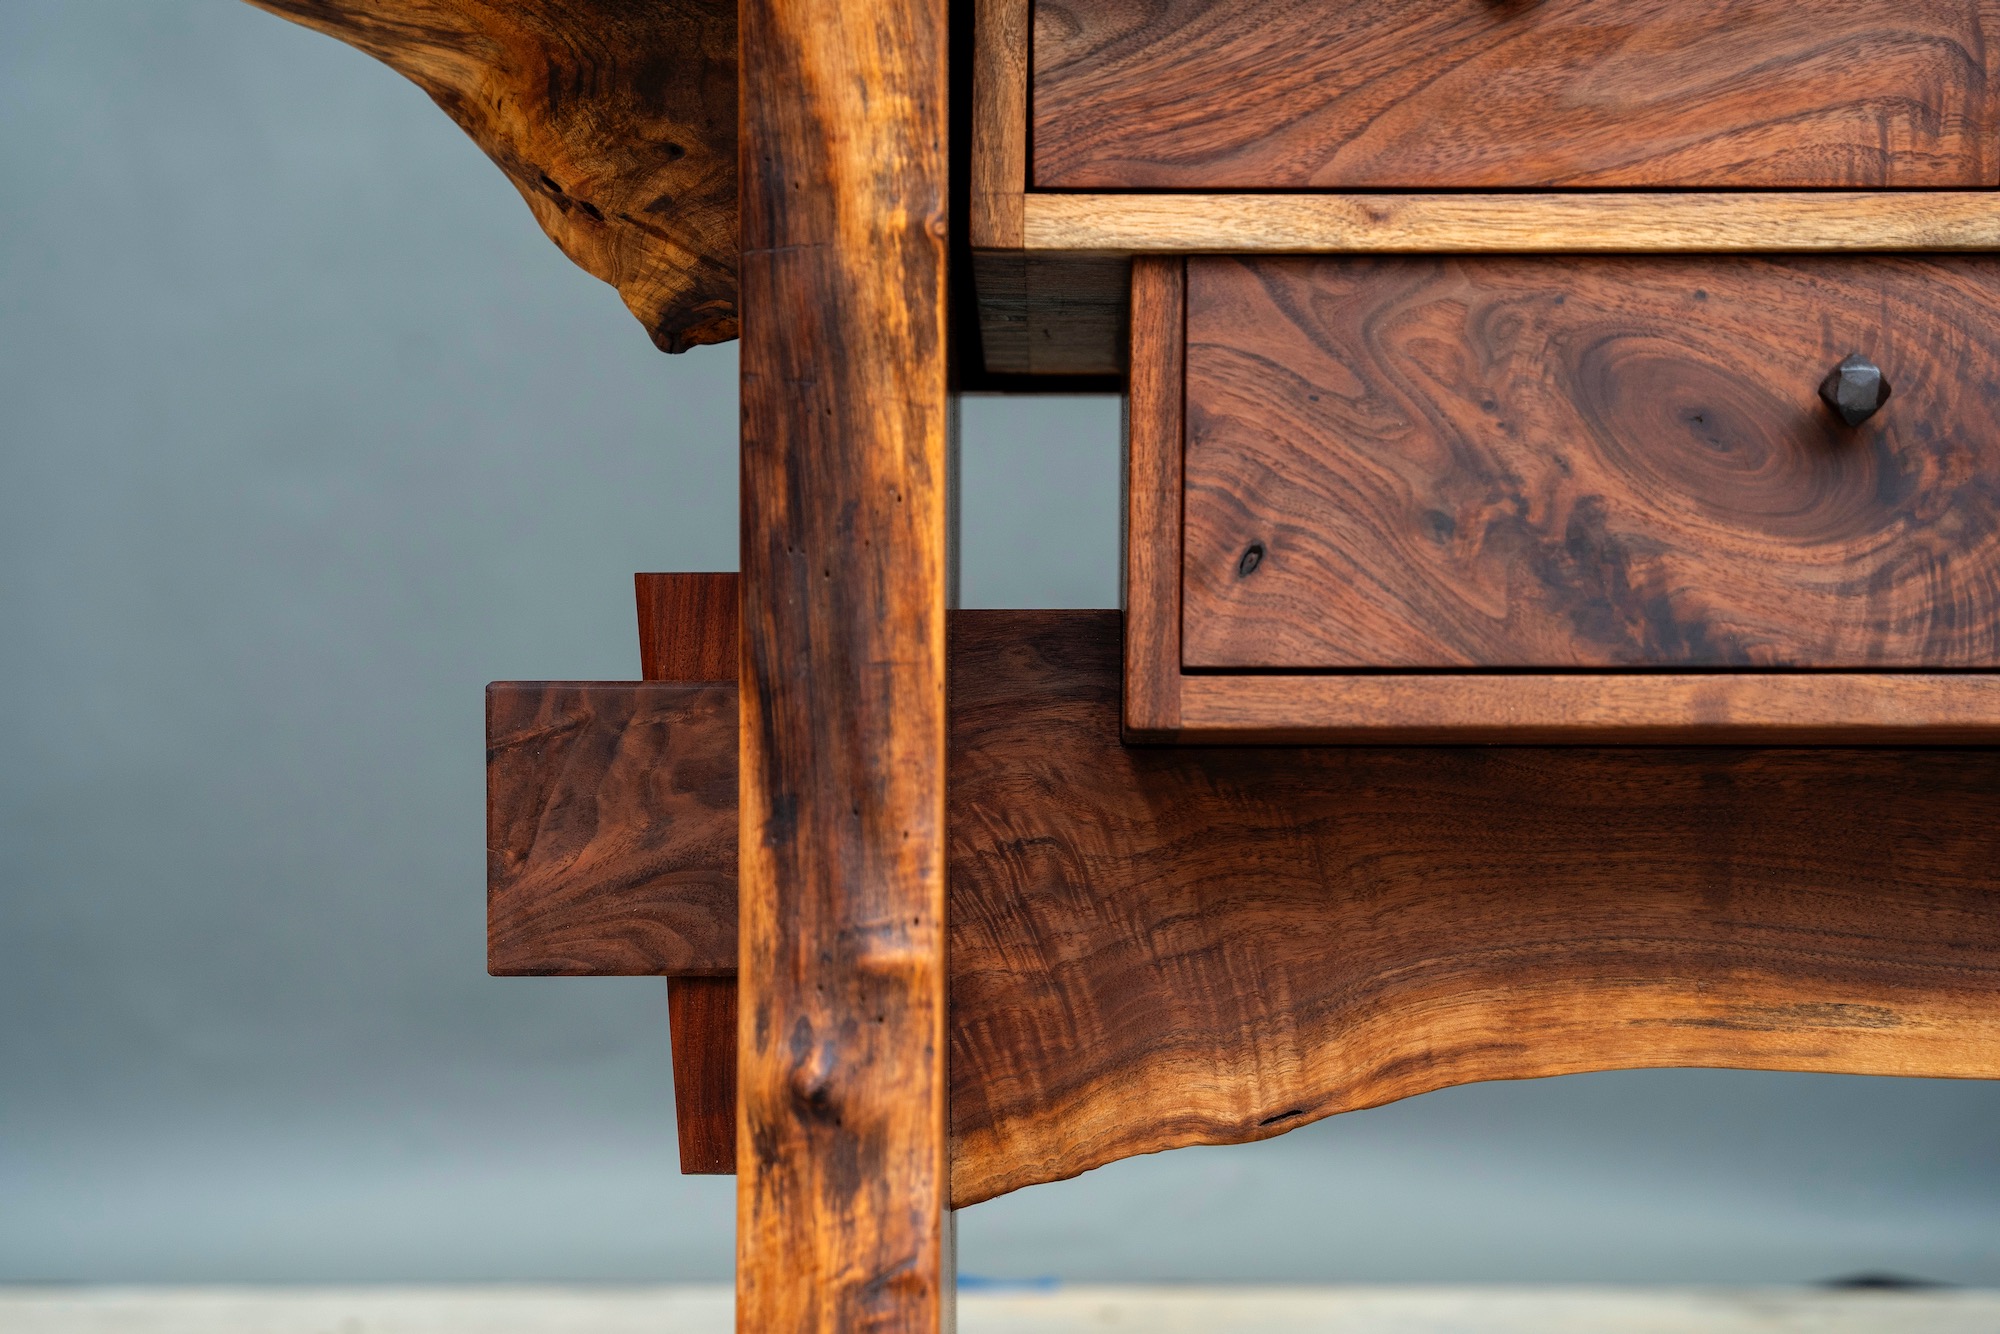
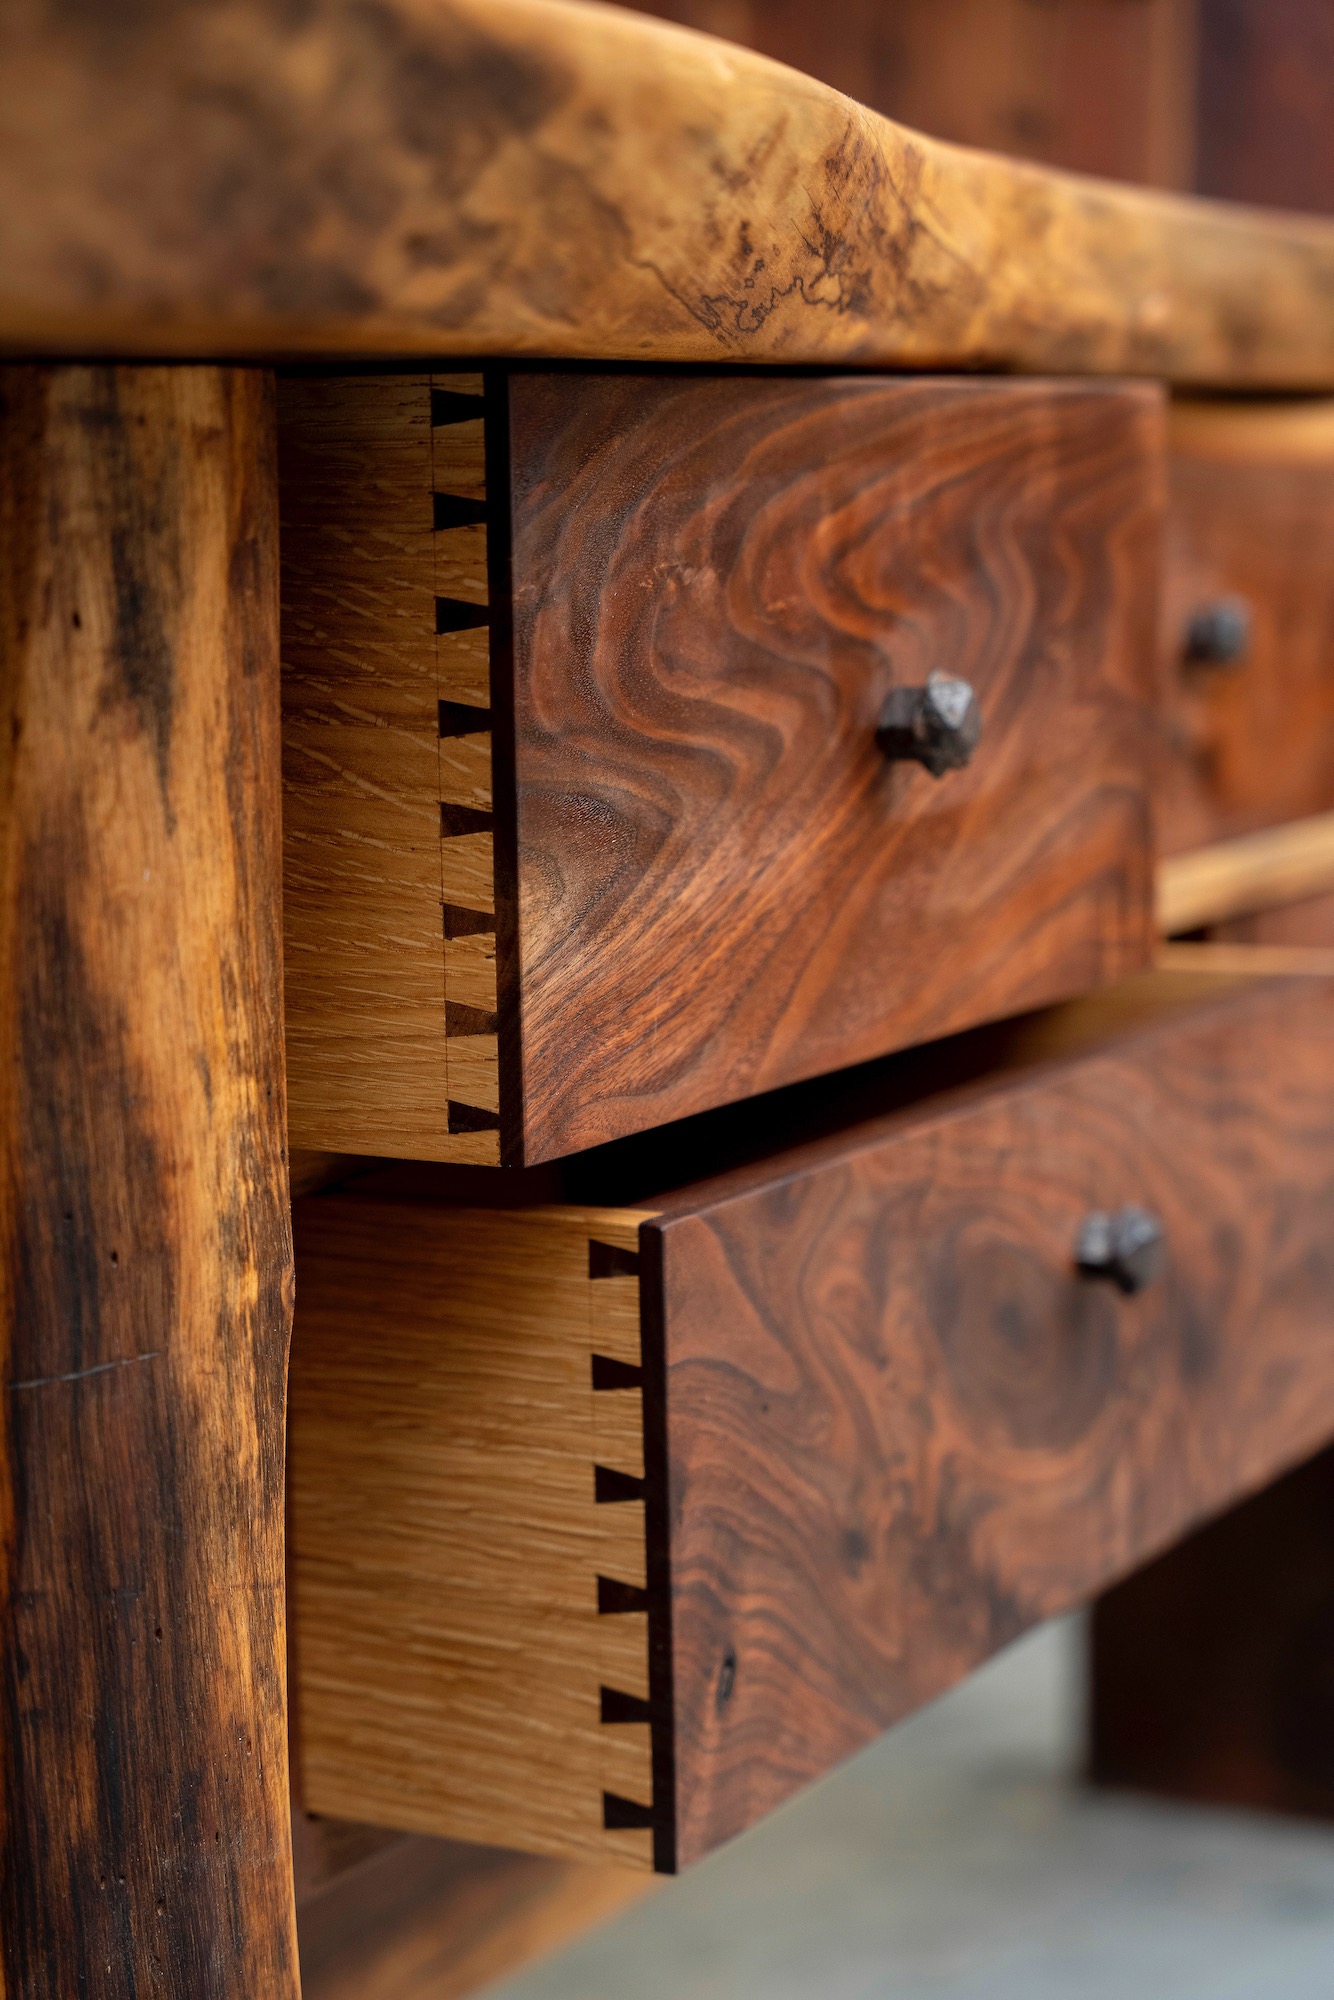
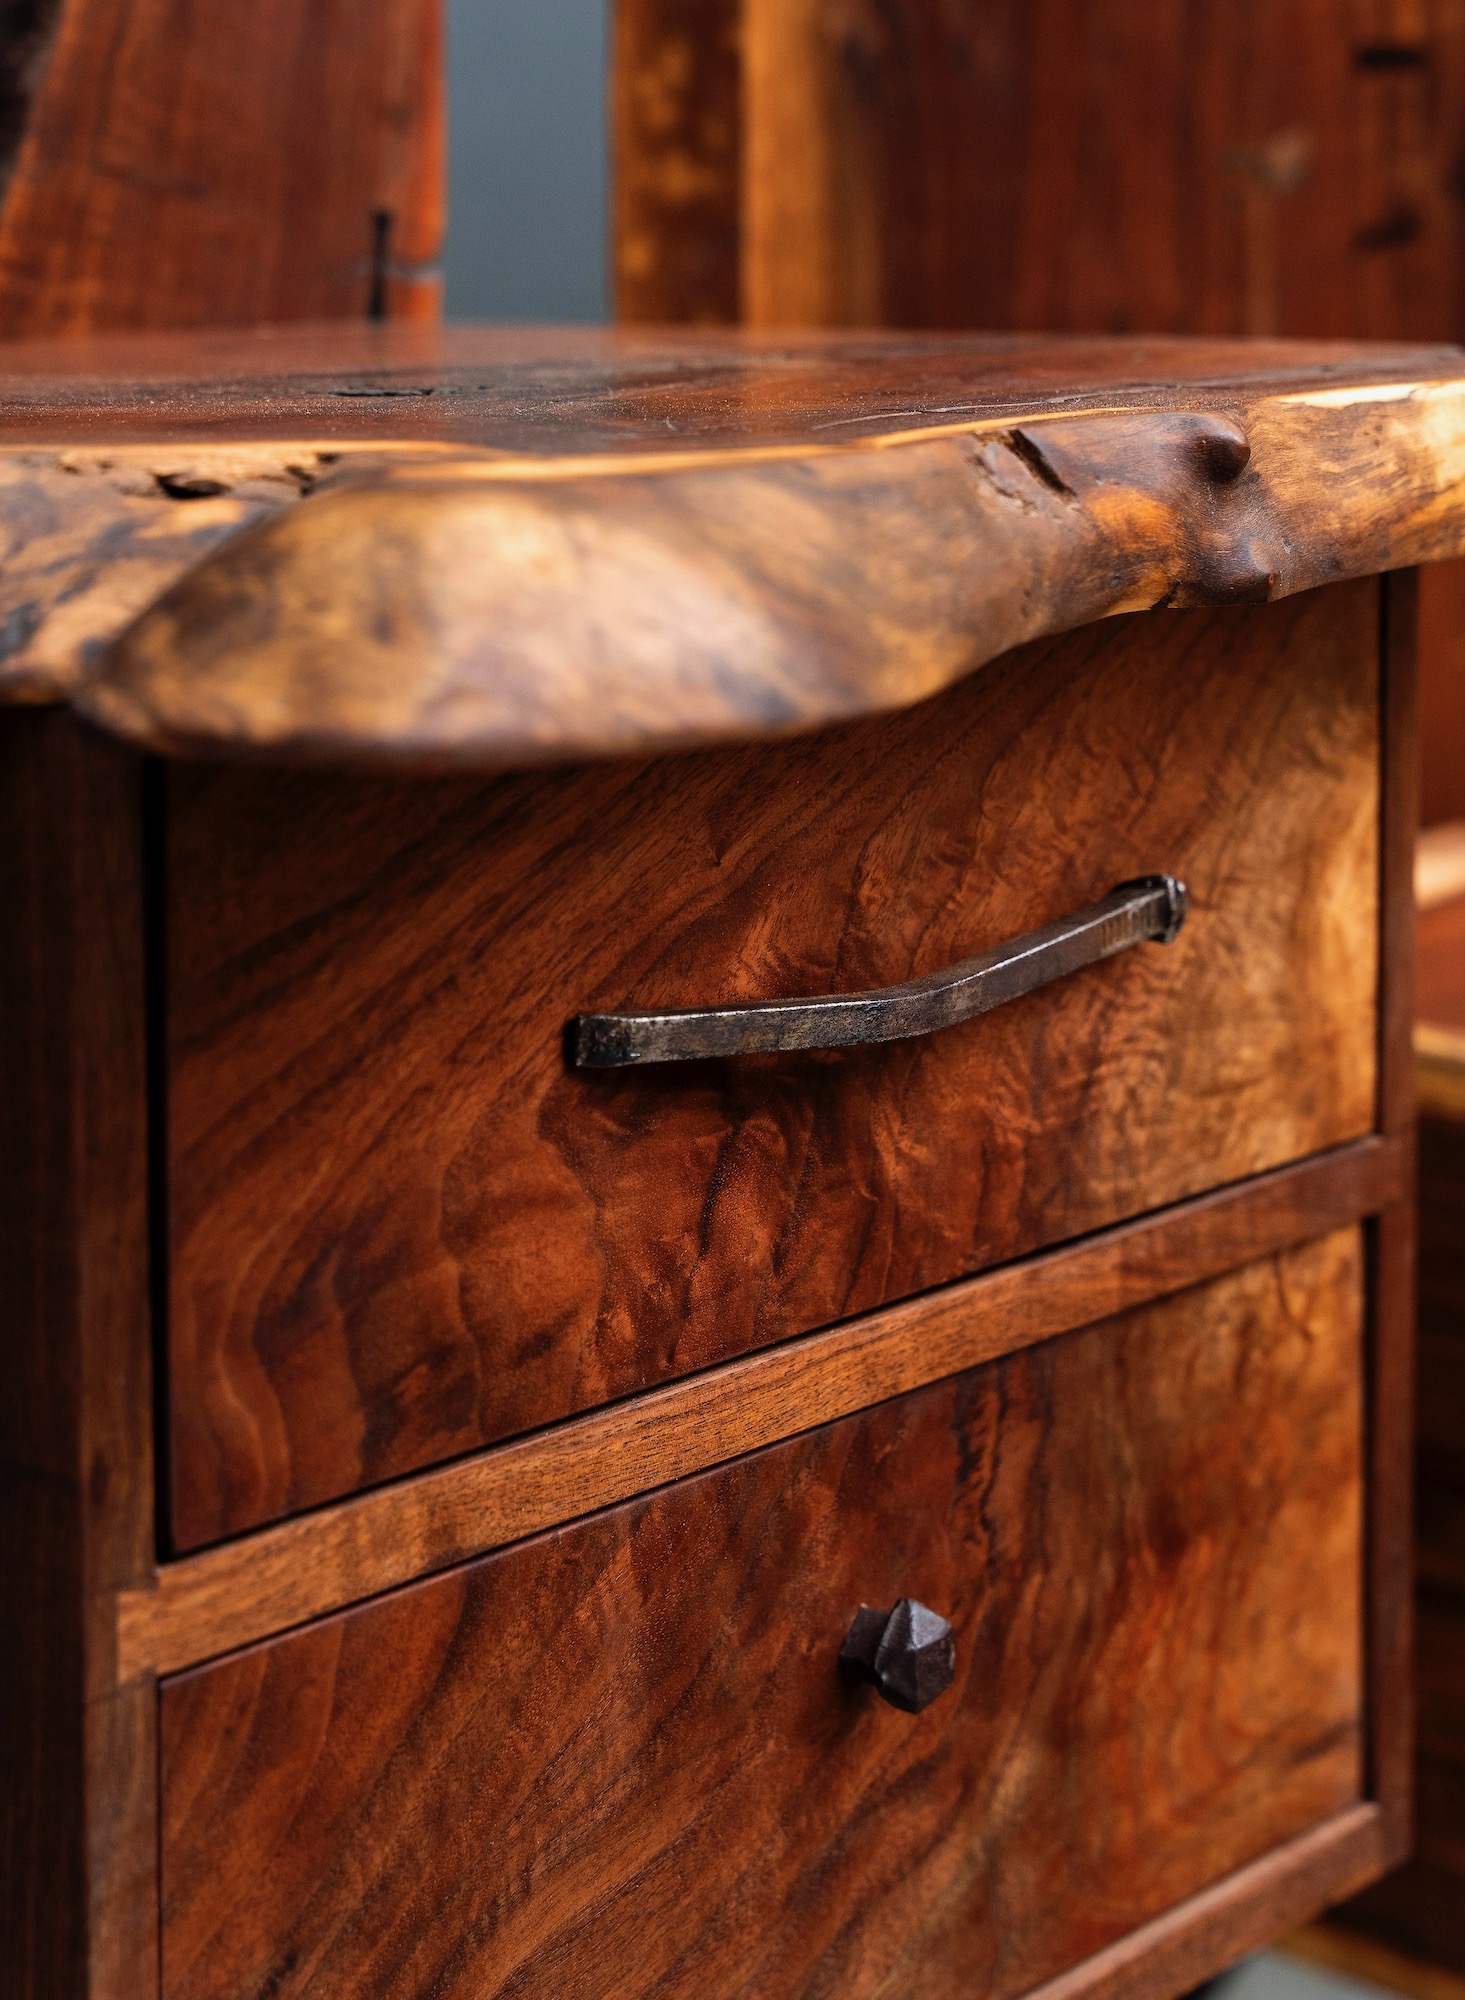
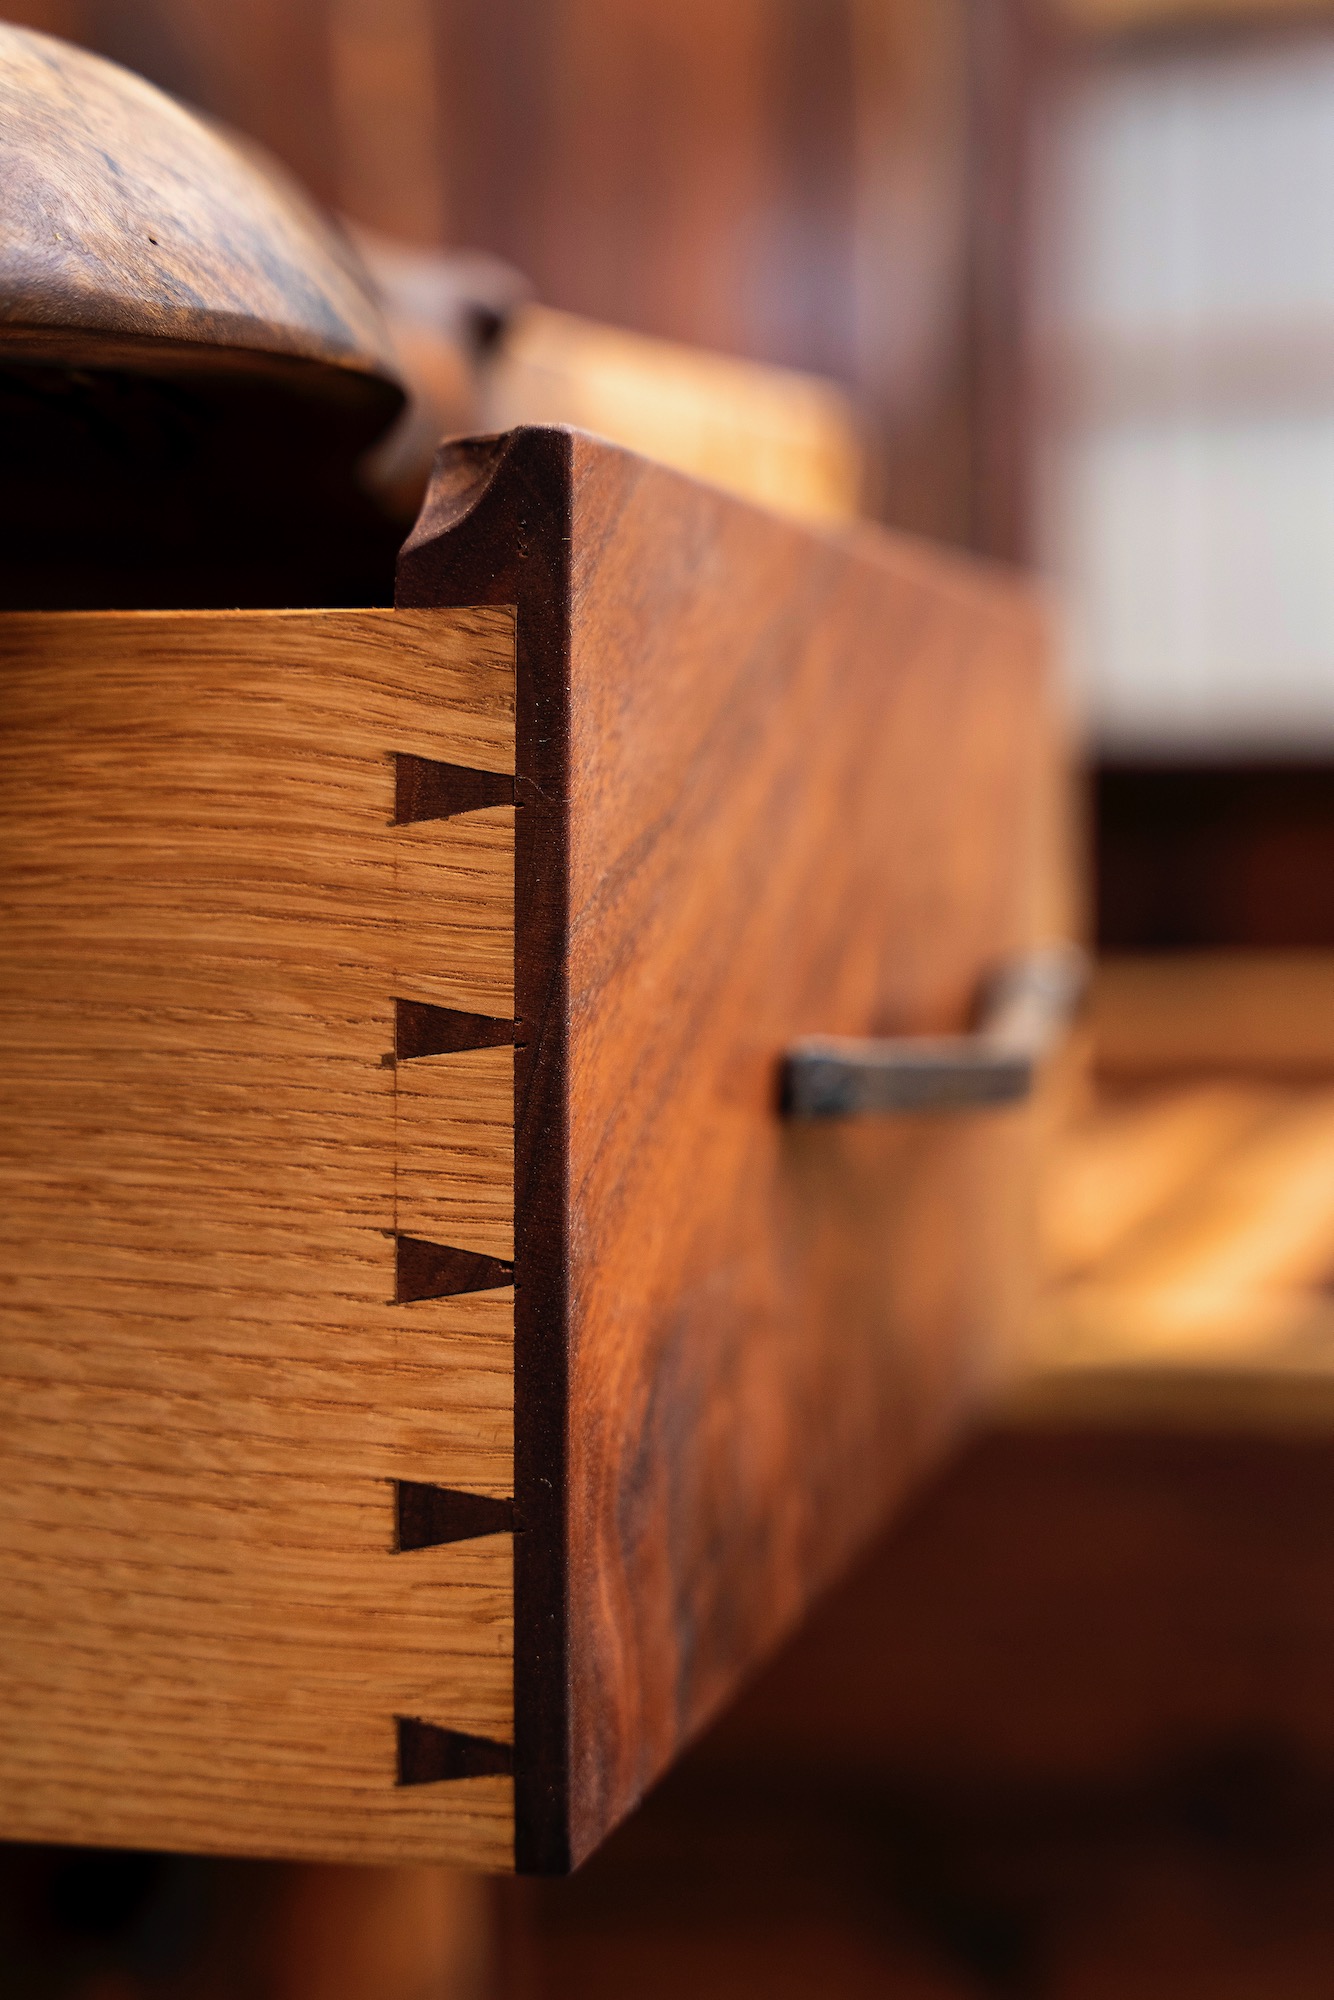
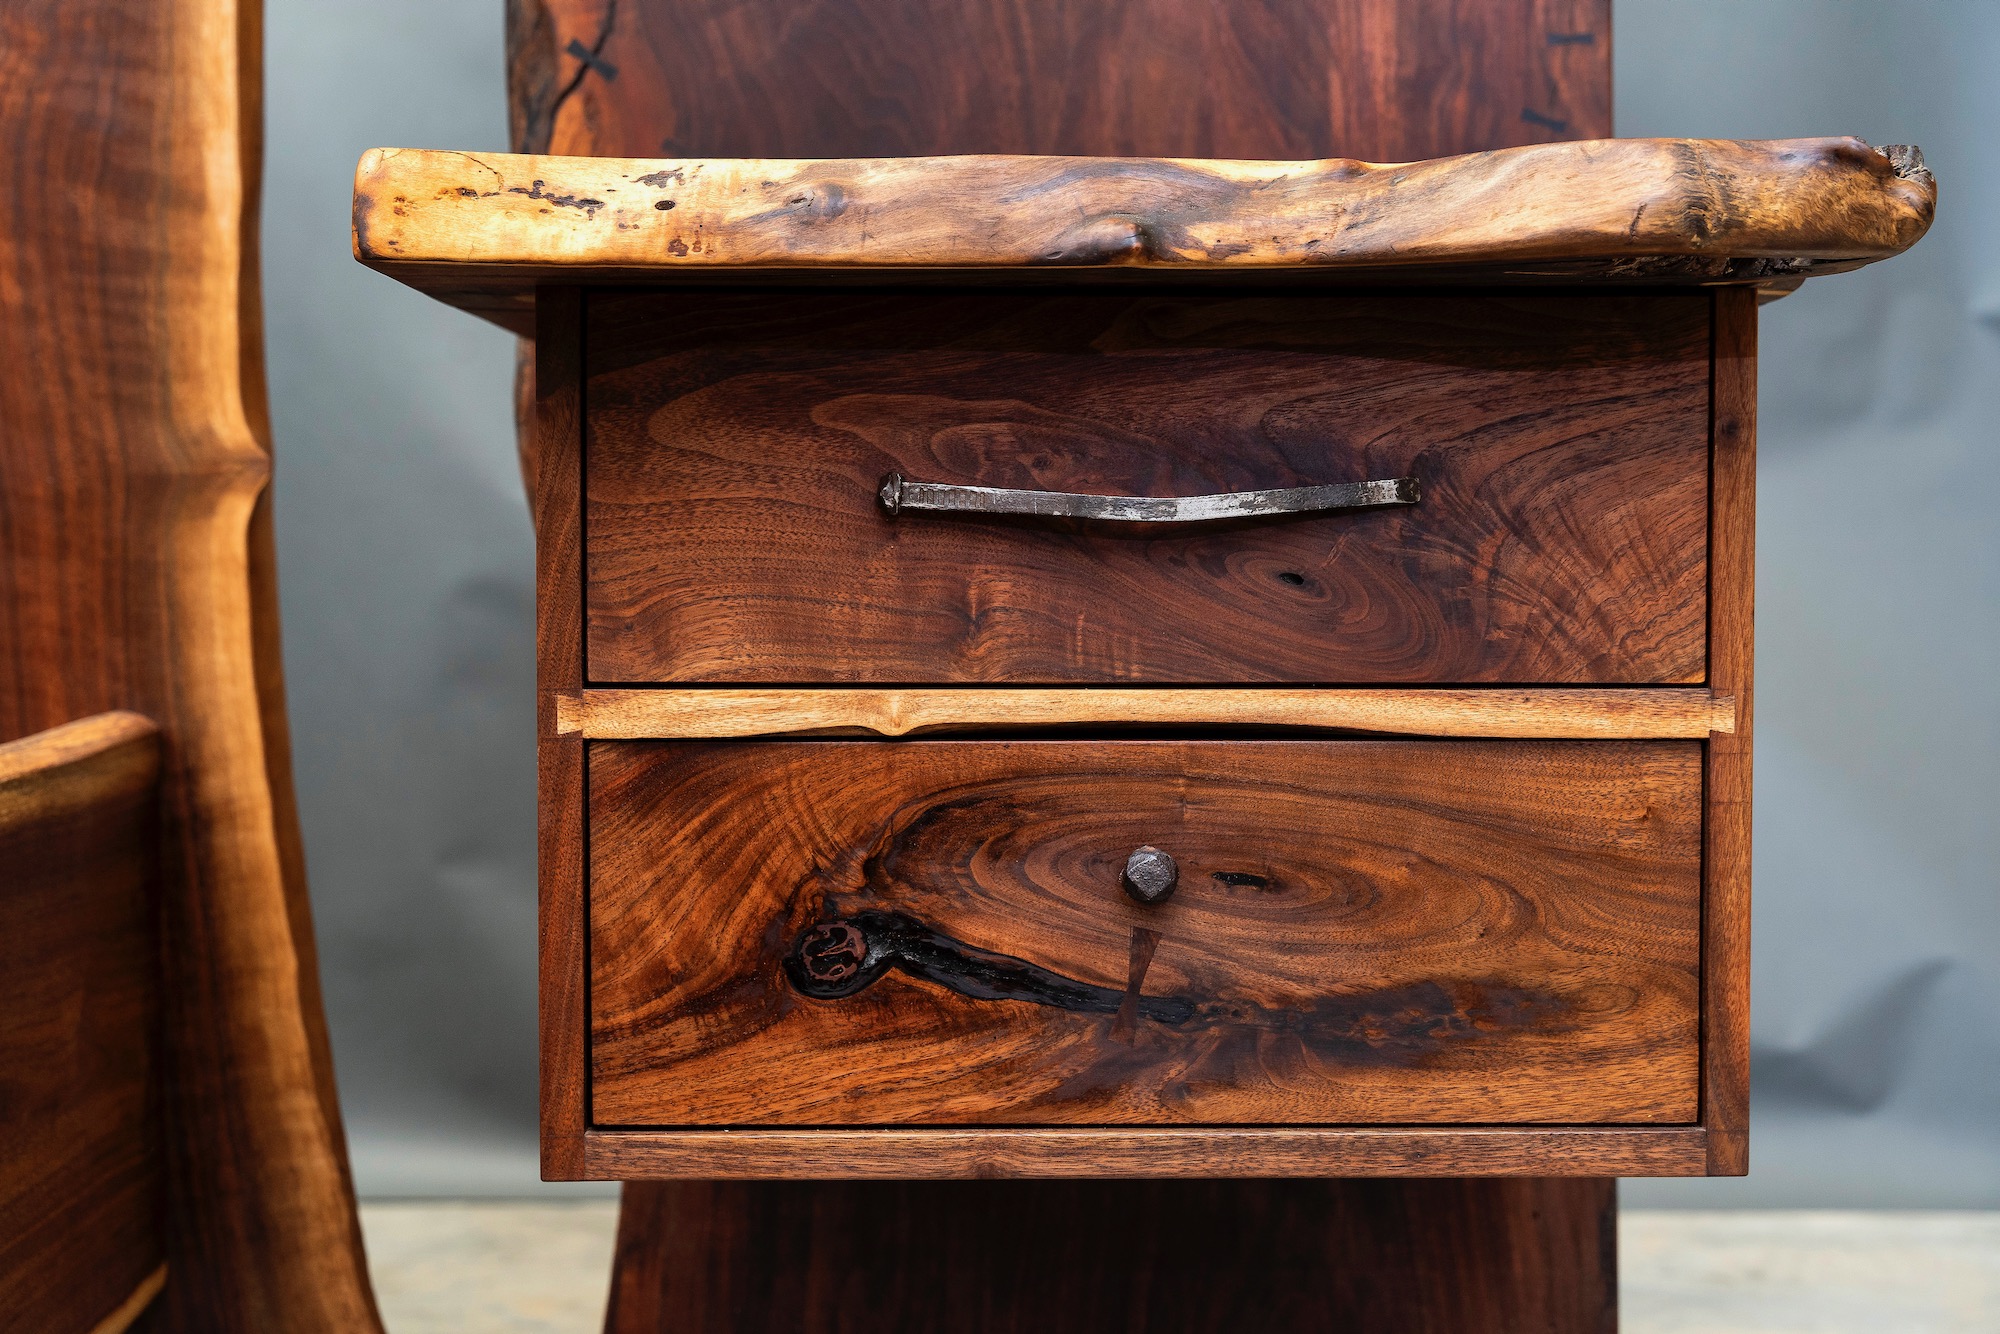
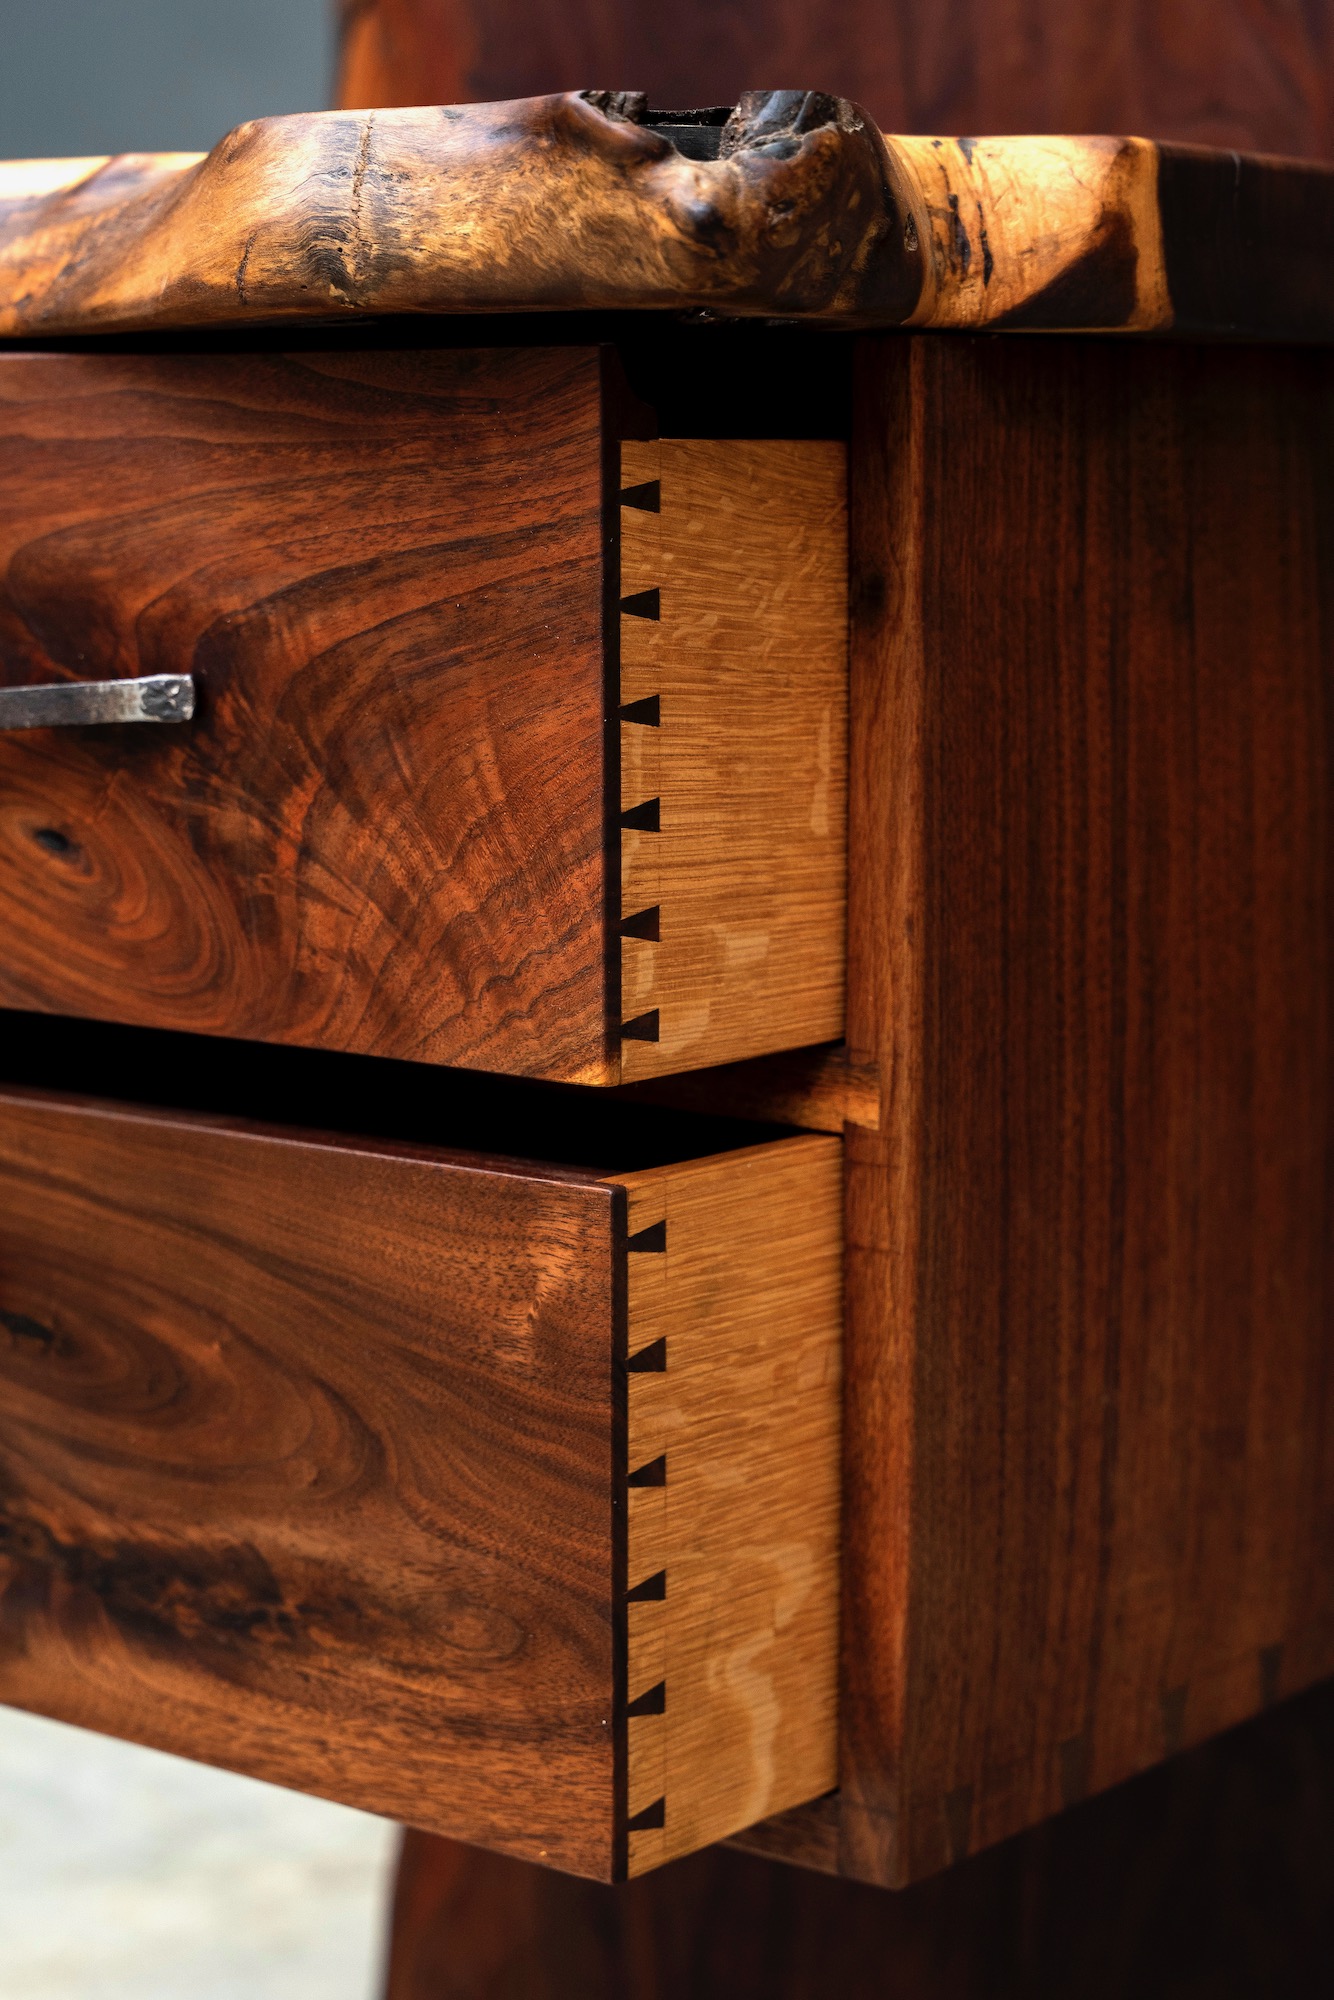
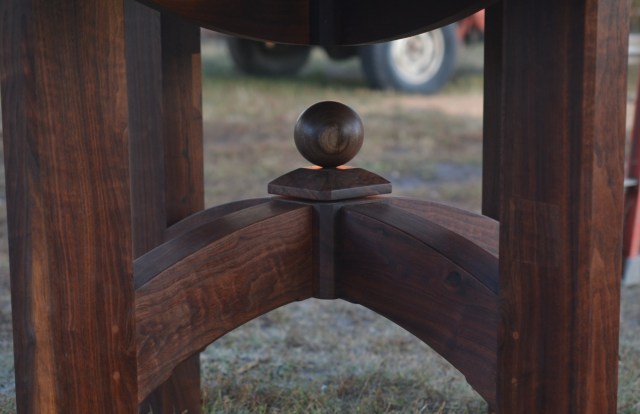
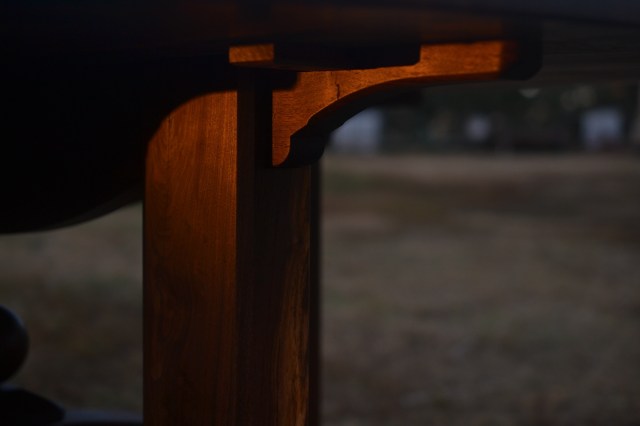
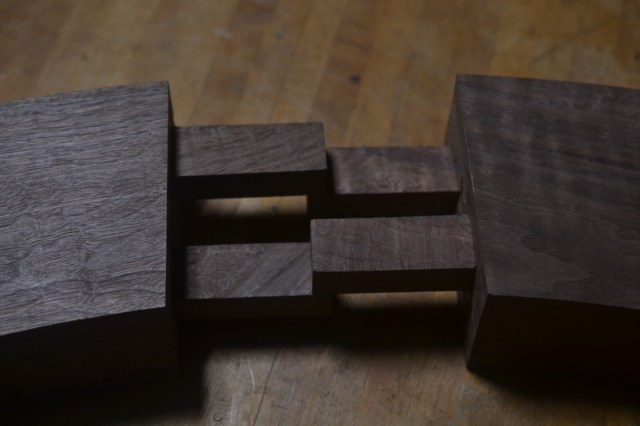
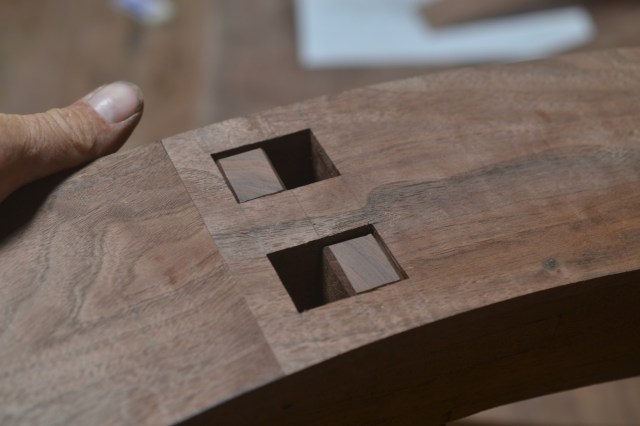
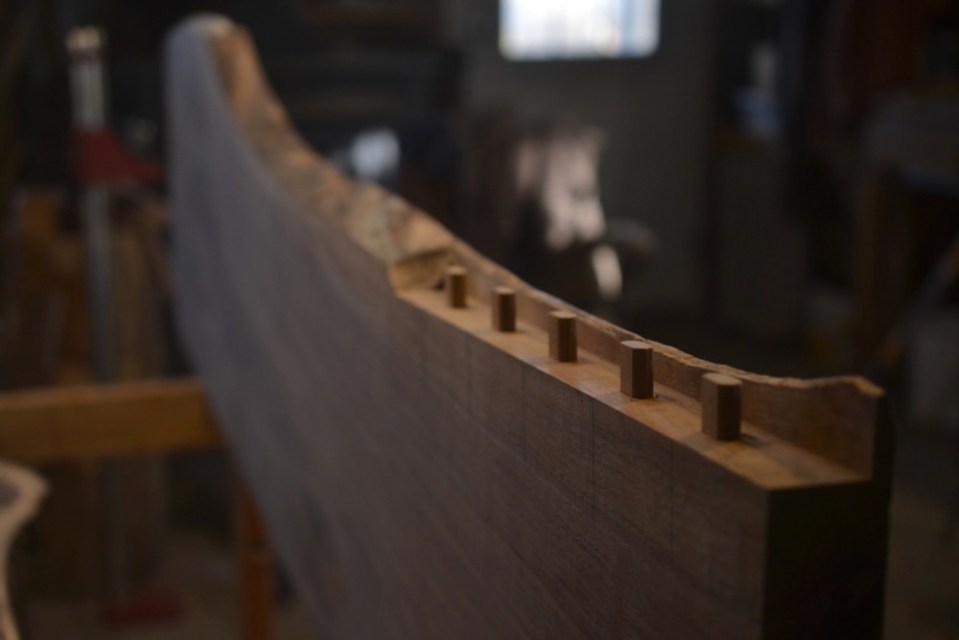
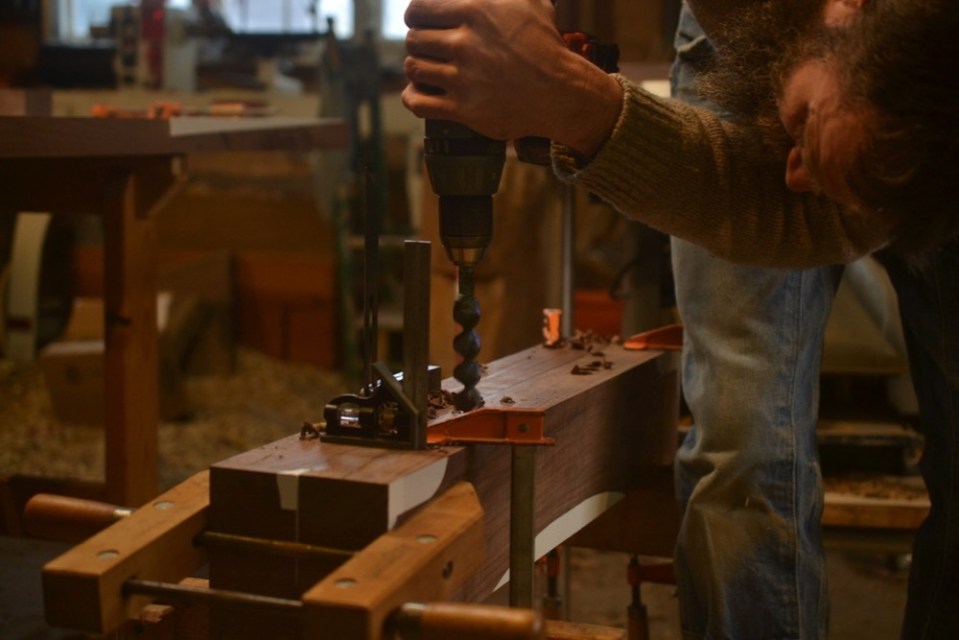
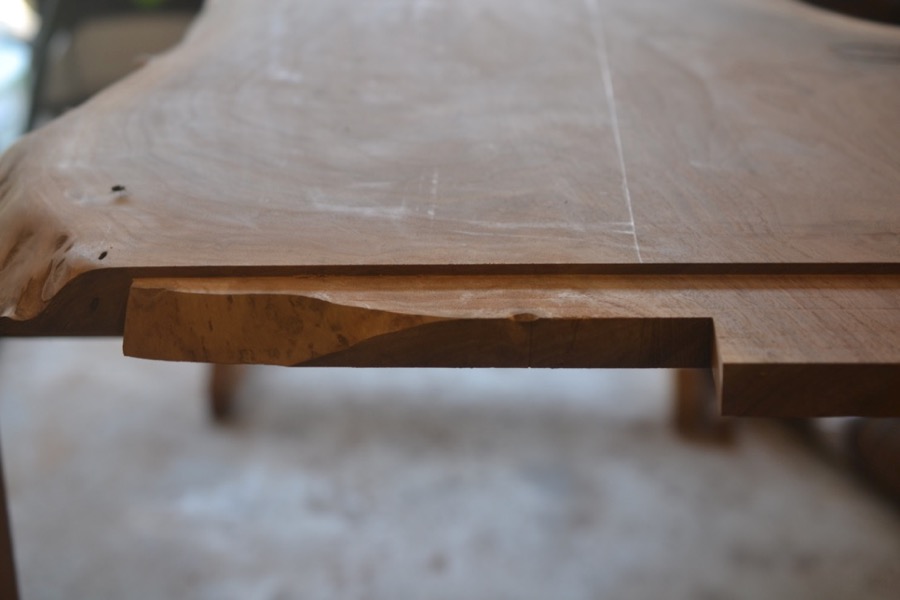
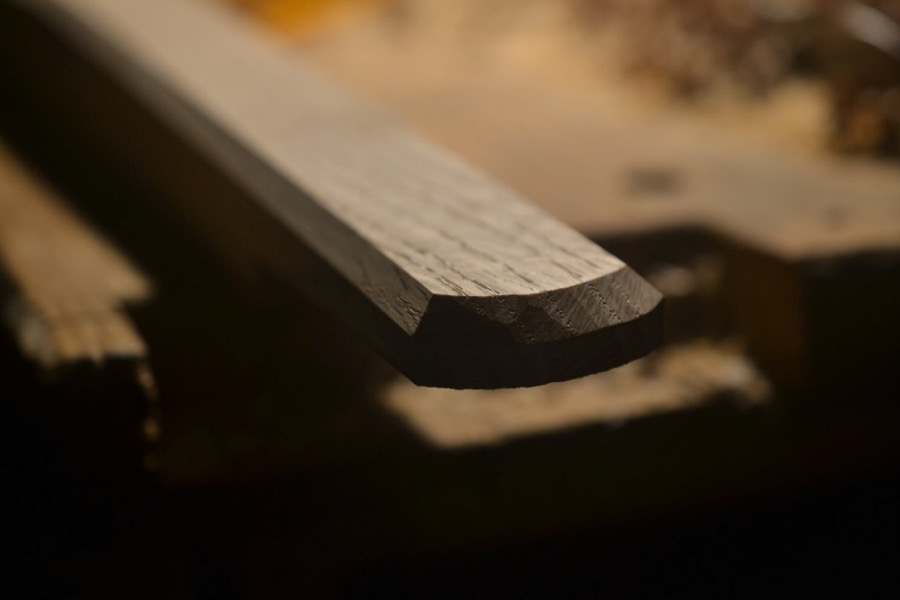
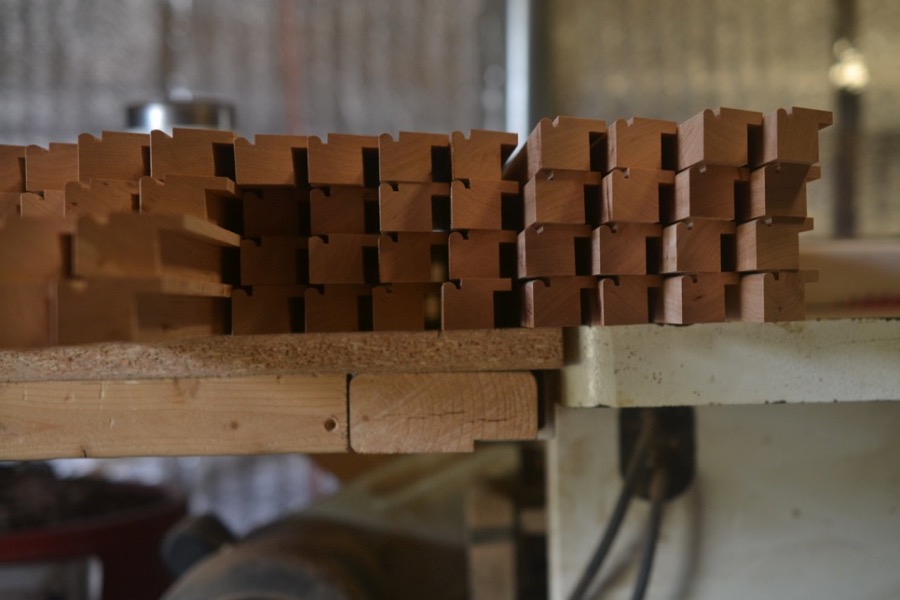
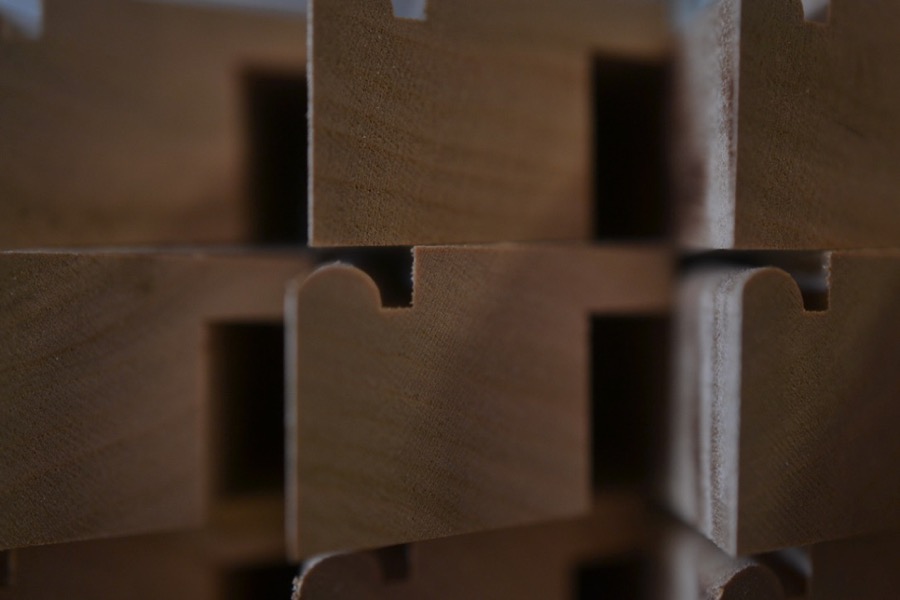
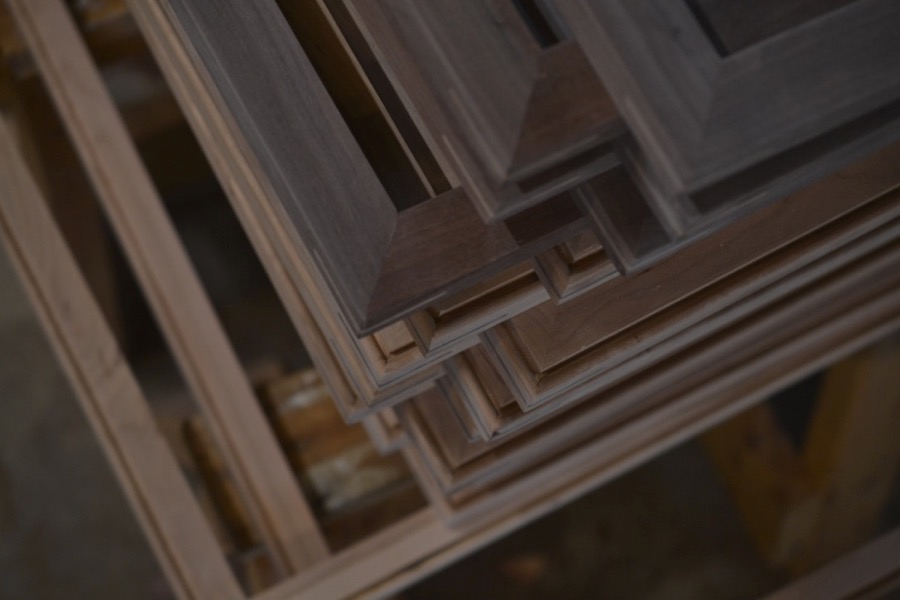
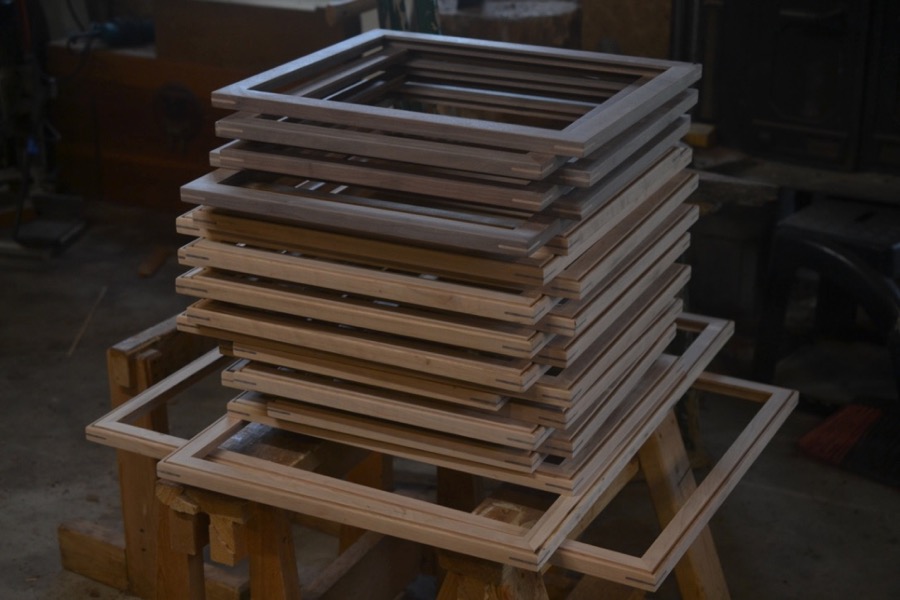
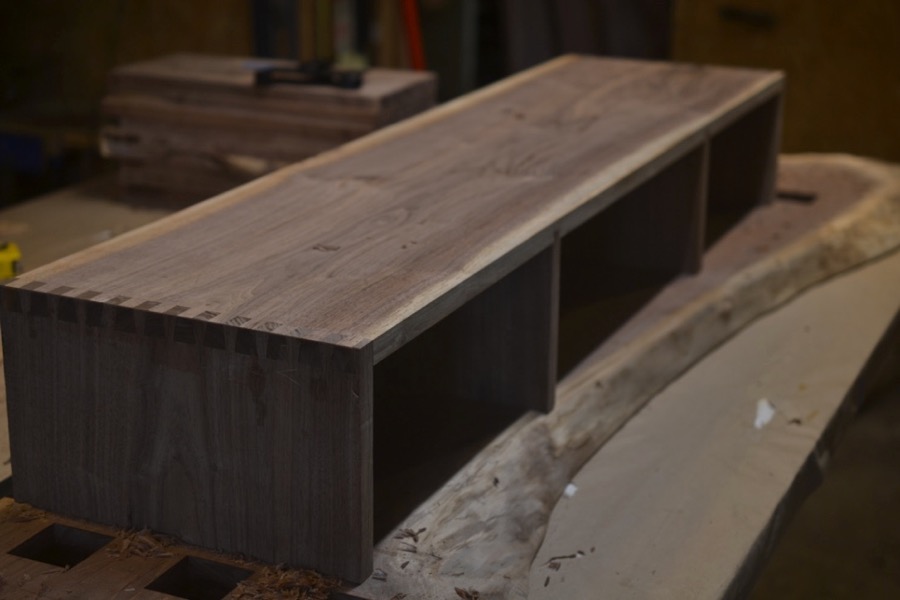
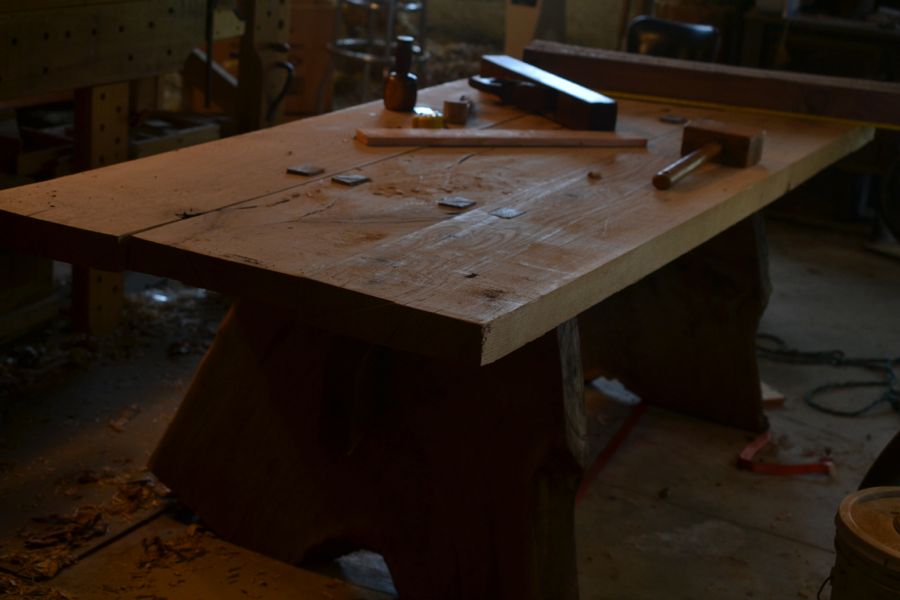
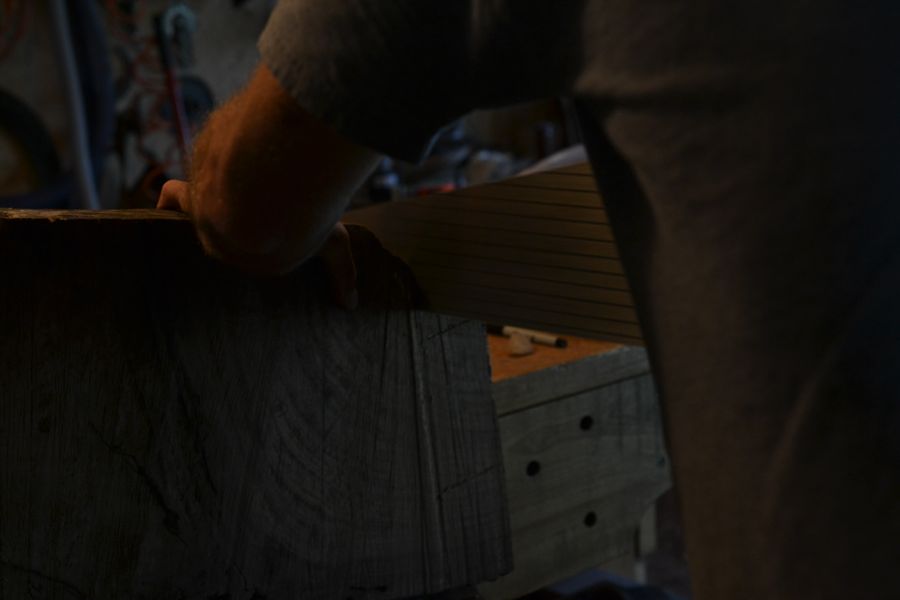
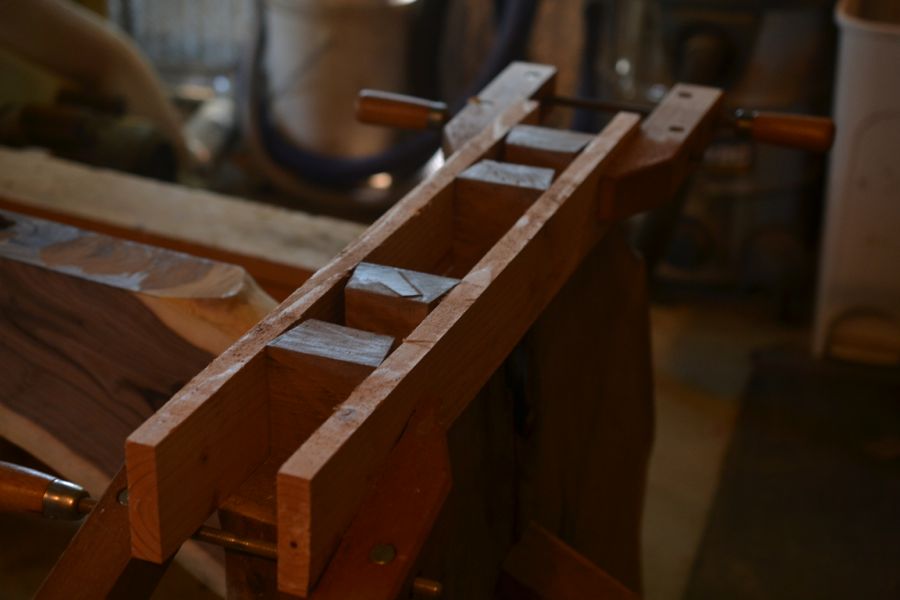
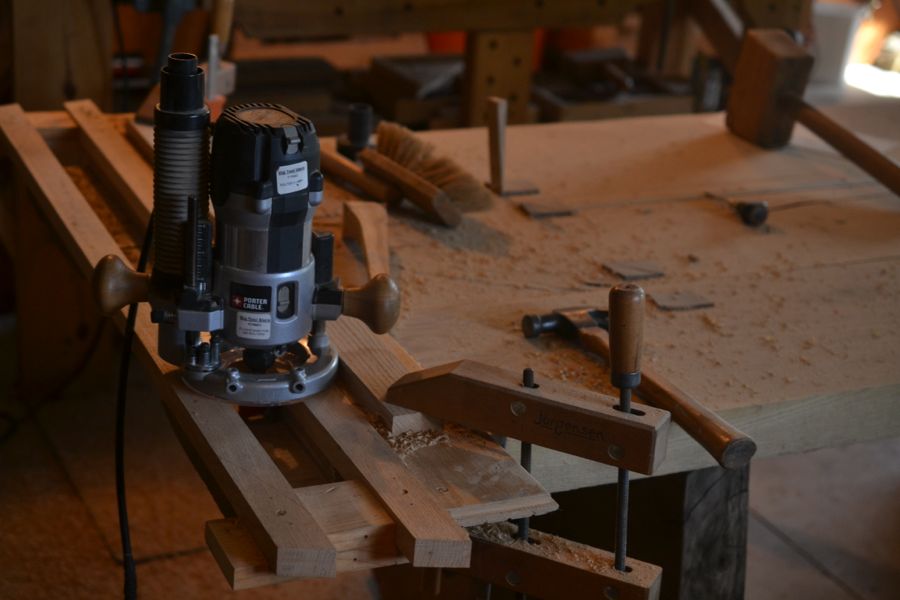
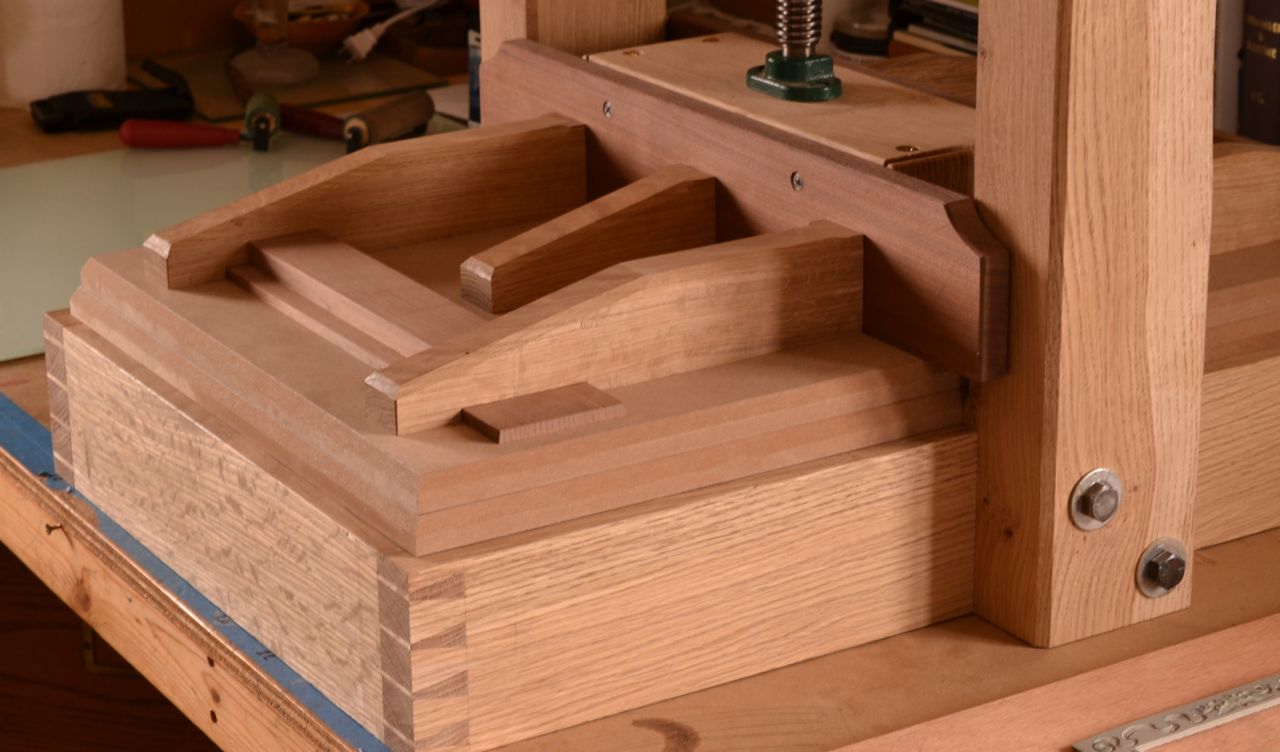
In the same contemplative spirit, all of the structural joints are “through” mortise and tenons, with hand cut dovetails on all of the casework and drawers. The hardware are re-purposed spikes from a derelict centenarian railroad bridge located on Cody’s land.

Thank you for taking the time to look at these images of my friend Cody’s and my celebration and wonder at the crystalized voice of our God in the ligneous song of our brother-trees. Thank you especially to Steve Hebert for having the gifts and knowledge to be able to photograph these pieces for us. 

Circle Table in Black Walnut

I built this round walnut table for a young family over the summer and into the fall. The base is mortise and tenon. I hoped for it to carry some of the feeling of the vaulted interior of a timber framed barn. The wood for the base came from gun stock maker in Wichita who gave me some timber from his stock before he passed away. The wood for the top was harvested from my friend’s land near Fall River, Kansas.

Trestle Table in Black Walnut

Discovering Design

The discovery of the life within the wood and the relationships they form is exciting to uncover. The early decisions are heavy. Every other act in the process is a response to these chalk marks as they try to hear and echo this walnut tree’s voice.

Underpinning Art with Discipline

The romance of the craft is backed up by countless hours of “mundane” work- the discipline that builds skill, and makes up the real life of labor. Days are spent creeping up on this scribed relationship and the foundational joinery. It’s a blessing to work, and to rest in the presence, at the same while striving towards the goal. Don’t mistake me, I’ve only had enough meager success at it to know it’s possible. 

Technology – Joinery

One side of the natural edge was curving away on bottom edge so I had to cut a shallow rebate in order to have a solid joint as well as cleanly scribed edge. This edge was reinforced with dominoes. The opposing edge curved towards the bottom edge and could be cut square. For it I made a floating contoured spline from Baltic birch. Assembled dry all is tight and solid.

Visualize and Establish Form

Finding a way to visualize the elements in a design is an engaging challenge. Krenov spoke of “composing”, and I’ve adopted his method and language -clamping up and mocking up relationships as the process moves forward. I don’t recall if he used tape, but I recently switched from using blue tape to white tape to mask off shapes- the difference is remarkable. 

Labor – Engaging Harvest

The last bit of joinery for the individual trestles is the horizontal rail completing the “H” form, which will eventually carry the longer rail that will join the two trestles together.

I’m grateful for this job, this material, this process. I heard a song that had a line which proclaimed “I am the record of His grace”.

The Sacred Process

Is labor a sacrament?  The invitation of the Eighth Day?  A sacred collaboration with the living God?  I can’t help but to note that the call to labor in the garden came before the curse of toil.  I am certain that labor is about more than just earning my bread.  There is something deeper there, not just for the artist, but for the ditch digger and the roofer, the farmer and the nurse.  “Whatever you think, it’s more than that…”  ISB.

summer woodwork - 6


summer woodwork - 1

summer woodwork - 2

summer woodwork - 8

summer woodwork - 3

summer woodwork - 4

summer woodwork - 15

summer woodwork - 14

summer woodwork - 12

summer woodwork - 11

summer woodwork - 13

summer woodwork - 5

summer woodwork - 7

summer woodwork - 10

summer woodwork - 9

summer woodwork - 19

summer woodwork - 20

summer woodwork - 21

summer woodwork - 22

summer woodwork - 24

summer woodwork - 23

summer woodwork - 26

summer woodwork - 25

summer woodwork - 27

summer woodwork - 29

summer woodwork - 28

summer woodwork - 17

summer woodwork - 16

summer woodwork - 35

summer woodwork - 18

summer woodwork - 30

summer woodwork - 32

summer woodwork - 31

summer woodwork - 33

summer woodwork - 34

The Champion Table Build, Part 3: Leg Joinery

champion table 301

flattening walnut stock with a wooden joiner for the top rails of the leg assembly

champion table 302

using winding-sticks to make sure there is no twist in the board

champion table 303

finishing up with a #7 jack plane

champion table 304

squaring up the remaining edges and dimensioning the walnut on the bandsaw

champion table 307

layout lines

champion table 308

initial shaping of the curves on the top rail of the legs

champion table 309

testing it against the table-top

champion table 310

sawing lengths of white-oak for the vertical posts of the leg assembly

champion table 311

the white oak after squaring-up

champion table 312

testing the concept and a few angles before committing

champion table 316

laying out the leg joints

champion table 317

establishing the sliding dovetail angle with a knife

champion table 318

cutting the front of the sliding dovetail

champion table 319

all the bandsaw work done, now the hand-tools will finish

champion table 320

paring the back cheek of the tenon

champion table 321

the joint is most of the way there- the waste between the mortise and the dovetail is yet to be removed

champion table 322

the four white oak legs all cut

champion table 323

the arsenal of tools to accurately transfer the dimensions of the tenon/ dovetails onto the walnut rails

champion table 306

marking

champion table 324

starting the cut for the sliding dovetail socket with a carcass saw

champion table 325

another view cutting sliding dovetail sockets

champion table 326

chopping out the waste in the socket

champion table 327

paring the sidewalls unreached by the saw

champion table 328

using a router plane to achieve an accurate floor of the joint- the leg on the cutter allows it to reach the angled corners

champion table 329

another view of the router-plane

champion table 330

starting the mortise with a 3/4 mortise chisel

champion table 331

the first row is delicate- just establishing the shape and protecting the corners

champion table 332

going the full depth of the mortise with an auger – you can see the round-topped sliding dovetail socket parallel to the mortise

champion table 333

squaring the mortise the rest of the way with the mortise chisel

champion table 336

cleaning the sidewalls with my extra-big paring chisel

champion table 334

thank God, they fit!

champion table 335

step one is successful- to get to this point took endless drawings and two complete practice joints and a lot of patience

champion table 313

marking the leg rails for some shaping/ sculpting cuts on the band saw

champion table 337

the top rails post rough-shaping, and the taper of one of the white-oak legs marked with blue tape

champion table 338

dry re-assembly just to make sure

champion table 339

the glue-up

champion table 340

next week will concern the joining of the bottom rail and the final shaping of the leg assemblies

Alder Wood Console

img_3514

img_3523

Above are the front and back  view of the alder wood console which after the final assembly.  Below are some detail shots of the carved elements.  There are some minor details to complete, such as to turned globes for the tops of the back posts, hardware, and finishing.  The construction is mortise and tenon, frame and panel and a few dovetails at the top of the carcass.    I use a combination of traditional work methods using hand tools and traditional-leaning work using power tools.

img_3508

img_3511

Details of the rosettes and fans (or sunburst).